This guide focuses on practical, field-ready repair tactics that construction professionals and serious DIYers can apply to keep cracks from turning into callbacks. The emphasis is on durable repairs, not quick cover‑ups.
Start With the Cause, Not the Caulk
Before you reach for any repair material, treat the crack as a symptom of a larger condition. If you don’t understand why it formed, you’re gambling with whatever you put on top.
First, note the crack’s location and orientation. Vertical cracks near window or door openings may point to settlement or framing movement. Horizontal cracks in foundations can signal lateral soil pressure. Map cracks with a pencil and date them; recheck in a few weeks to see if they’re still moving. Measure widths with feeler gauges or a caliper so you have a baseline.
Next, look for patterns: multiple parallel cracks in slabs may suggest shrinkage or poor joint layout; step-cracks in block walls can indicate footing movement. Check for related issues—sticking doors, out-of-square frames, ponding water near foundations, or downspouts dumping next to walls. If movement is severe, ongoing, or associated with structural deflection, bring in a structural engineer before attempting any repair. A proper diagnosis guides material choice, joint detailing, and whether you need to relieve movement (joints) instead of just hiding it (patch).
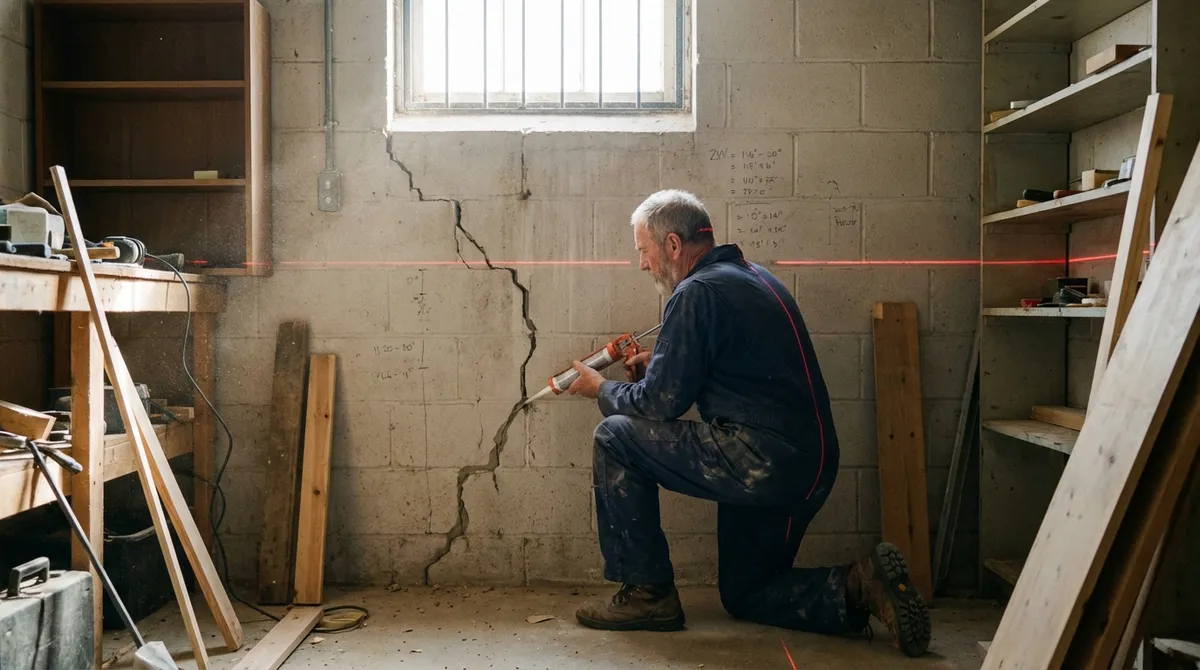
Prep Like It Matters (Because It Does)
Most failed crack repairs come back to one problem: poor preparation. Adhesion and durability depend on how well you clean, open, and condition the substrate before applying repair materials.
For concrete and masonry, use a grinder, chisel, or crack chaser blade to turn a razor-thin crack into a controlled repair groove. Aim for a profile that’s slightly wider at the base than at the surface (an inverted “V”) when you’re using rigid patch materials, or a consistent width/ depth for flexible sealants. Avoid feather edges with cement-based products—they almost always debond.
Thoroughly remove dust, loose material, and any previous failed patch. Use a vacuum (not just compressed air, which can drive dust deeper) and a stiff brush. For cracks exposed to oil, grease, or efflorescence, use appropriate cleaners—degreasers for oil; mechanical removal and water rinsing for salt deposits—then let the surface dry to the level recommended by the repair product’s technical data sheet.
On painted or coated surfaces, cut back to sound, bare substrate. New patch materials rarely bond reliably to old coatings. Finally, respect temperature and moisture limits: cold, saturated, or blazing-hot surfaces will sabotage even premium products. Check the manufacturer’s recommended substrate temperature range before starting.
Match the Material to the Movement
A rigid patch in a moving joint is an invitation to another crack. Choose repair materials based on how much movement you expect and how visible or trafficked the area is.
For non-moving or very low-movement structural cracks in concrete (often verified and specified by an engineer), epoxy injection can restore continuity. It’s best for dry, stable cracks where you need structural action across the crack, such as beams, slabs, and some foundation elements. For wet or actively leaking cracks, polyurethane injection systems may be more appropriate because they can expand and tolerate some water.
For moderate movement joints—control joints in slabs, panel joints, and perimeter gaps—use an elastomeric sealant (polyurethane, silyl-terminated polyether, or high-quality silicone) instead of rigid mortars. Proper joint design is critical: aim for an ideal width-to-depth ratio (often around 2:1), use a compatible backer rod to control depth, and avoid three-sided adhesion which causes premature failure.
For non-structural, shallow surface cracks in walls and walkways, a polymer-modified repair mortar or micro-topping can be effective once the crack is stabilized. On masonry, consider repointing with a mortar grade compatible in strength and vapor permeability with the existing brick or stone—too-hard mortar beside softer masonry can cause more cracking. When in doubt, refer to manufacturer technical resources and, for structural situations, engineering guidance.
Build in Movement Joints Where They Were Missing
Many recurring cracks are the structure’s way of “creating” the joints it should have had from the beginning. Rather than endlessly patching, consider whether you can introduce or improve control and expansion joints.
On concrete slabs, cracks that line up regularly along a path often indicate missing or misplaced control joints. If feasible, sawcut new joints along these crack lines and treat the existing cracks as part of a deliberate joint system. Keep cuts to proper depth—typically one-quarter to one-third of the slab thickness, per common industry guidance—so they attract future movement.
On masonry, step-cracks near corners or long, uninterrupted runs of wall suggest expansion or differential movement. Adding vertical movement joints at logical breaks—changes in wall thickness, corners, or long straight runs—can relieve stress. Follow brick or block manufacturer guidelines and relevant building codes for spacing and detailing.
At interfaces where dissimilar materials meet (masonry to wood framing, concrete to steel, etc.), expect different movement rates. Rigidly tying these together with inflexible materials encourages cracks right at the joint. Instead, detail a flexible sealant joint or a properly backed gap that allows independent movement. Over the long term, strategic joints almost always outlast repeated surface patches.
Protect the Repair So It Actually Reaches Its Full Strength
Even a perfectly chosen and placed repair will underperform if it’s not protected while it cures and in service. That means thinking about curing, loading, moisture, and UV exposure from the start.
For cement-based repair mortars and toppings, curing is critical. Rapid moisture loss leads to shrinkage and internal stress, especially in thin sections. Use curing compounds where compatible, or keep the surface lightly damp and covered as the product manufacturer recommends. Avoid traffic and heavy loads until full cure is reached—often longer than the initial “walk-on” time.
For sealants, respect skin-over, tack-free, and full-cure times before exposing the joint to water, dirt, or movement. If a joint is subject to joint cleaning machines, tire traffic, or snow plows (in parking structures, for example), ensure you’ve selected a sealant designed for that environment and followed joint dimension guidelines.
Where sunlight and weather are intense, confirm UV stability. Some polyurethanes and epoxies chalk or degrade in direct UV without a protective coating. In wet or freeze–thaw climates, ensure repaired areas are detailed to shed water, not trap it—slight slopes, drip edges, and properly lapped flashing matter. Document what products you used and when; for larger or commercial projects, this record is invaluable if performance questions arise later.
Conclusion
Crack repairs that last aren’t about the fanciest product on the shelf—they’re about understanding movement, preparing properly, and matching materials to real-world conditions. When you diagnose the cause, create a clean and controlled repair zone, allow for necessary movement, and protect the work through full cure, cracks stop being chronic problems and become controlled, manageable joints.
Whether you’re running a crew or tackling serious repairs on your own property, a disciplined approach pays off in fewer callbacks, longer service life, and structures that keep working the way they were meant to.
Sources
- [American Concrete Institute (ACI) – Concrete Repair Fundamentals](https://www.concrete.org/tools/frequentlyaskedquestions.aspx?faqid=640) - Overview of common concrete cracking and basic repair considerations
- [Portland Cement Association – Concrete Crack Repair](https://www.cement.org/learn/concrete-technology/concrete-construction/concrete-crack-repair) - Practical guidance on causes of cracks and appropriate repair strategies
- [U.S. General Services Administration – Repair and Rehabilitation of Concrete Structures](https://www.gsa.gov/real-estate/design-construction/design-excellence/engineering/repair-and-rehabilitation-of-concrete-structures) - Federal technical perspective on concrete repair methods and durability
- [Concrete Construction Magazine – Understanding Concrete Control Joints](https://www.concreteconstruction.net/how-to/repair/understanding-concrete-control-joints_o) - Discussion of joint layout and how joints influence cracking behavior
- [WBDG (Whole Building Design Guide) – Building Envelope Design Guide: Masonry Wall Systems](https://www.wbdg.org/guides-specifications/building-envelope-design-guide/masonry-wall-systems) - Explains movement, cracking, and joint detailing in masonry walls