Below are five expert-level, practical tips that work for both construction professionals and serious DIY builders. Each one includes specific, on-the-tool guidance you can put to work on your next project.
Tip 1: Treat Layout as a Build Phase, Not a Quick Sketch
Rushed layout is one of the most common reasons masonry jobs fight you all day. If the job doesn’t “feel right” from the first course, layout is usually why.
Practical steps:
- Snap and protect clear reference lines.
Snap chalk lines for wall centerlines and face lines on slabs or footings, then seal them with clear lacquer or hairspray so traffic and hose water don’t erase them mid-job.
- Dry-stack critical corners.
- Bond (joint spacing and pattern)
- Overall length vs. actual block/brick dimensions
- Where cuts will fall
- Plan head joints at openings.
- Paper-thin slivers at window or door jambs
- Tiny cuts near inside corners
Before mixing a single batch of mortar, dry-stack at least 3–4 courses at corners and key openings. Check:
Adjust layout so you avoid:
Shift the layout by half a unit or adjust bed joint thickness slightly over several units instead of forcing one ugly cut.
- Mark all critical heights.
- Top of footing or slab
- First course top
- Sill heights
- Lintel/beam bearings
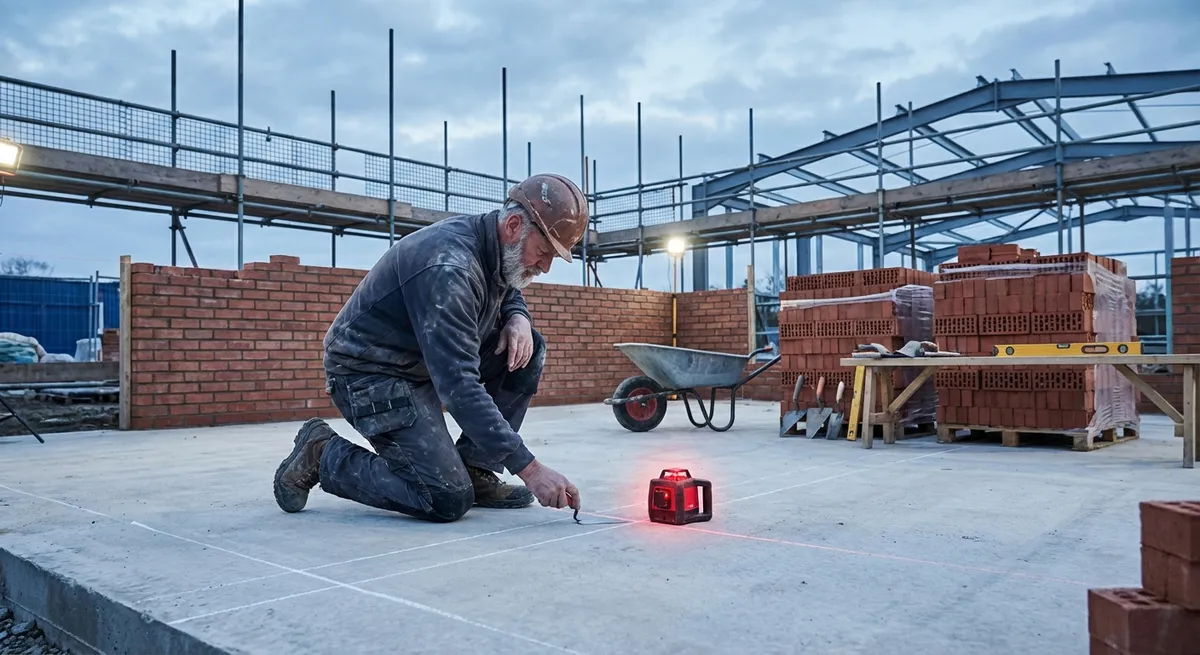
Transfer elevations from a benchmark using a laser level or water level. Mark:
This keeps you from “chasing level” with your eye and your trowel, which always creates cumulative error.
- Pre-locate movement and control joints.
- For CMU: ~20–25 ft (6–7.5 m) spacing, or per engineer/spec
- At inside corners, large openings, and transitions
Mark where movement/control joints will land before you start. Typical practice:
Knowing this early affects where you start and stop bonds, and where reinforcement should be staged.
Tip 2: Build a Mixing Routine That Produces Consistent Mortar
Strong, workable mortar isn’t about guessing “a shovel of this and some water.” Consistency is what lets you work fast without joints weakening or changing color over the day.
Practical steps:
- Know your mortar type and why.
- Type N: general above-grade walls and veneers
- Type S: higher-strength, moderate below-grade, and wind/seismic loads
- Type M: heavy loads, foundations (when specified)
Match the bag or batch recipe to your job and stick with it.
- Use the same water measure every batch.
- 75–80% of the usual water
- Add the last 20–25% slowly as you mix
Keep a dedicated water pail or bucket marked in liters/quarts. Start with:
Aim for a peanut-butter-like consistency that clings to the trowel but smears easily when pressed.
- Time your mixing, don’t eyeball it.
- 1 minute dry (sand + cement/lime)
- 2–3 minutes wet after adding water
In a mixer, run:
Under-mixed mortar can be grainy and weak; over-mixed can entrain too much air and lose strength.
- Control retempering.
- Do not add water to mortar older than 2–2.5 hours (or per manufacturer).
- When retempering still-fresh mortar, add water in small amounts and remix thoroughly, not just splash and stir with a trowel.
This keeps workability consistent and helps your joints cure uniformly.
- Stage batches to match your crew pace.
Smaller, more frequent batches are better than one huge tub that skins over. As you learn your production rate (units/hour), schedule mixing to keep mortar fresh without constant retempering.
Tip 3: Use String Lines and Profiles Like a Second Set of Hands
A string line tells you instantly if your wall is wandering or sagging. Used correctly, it speeds you up and reduces rework. Misused, it becomes a suggestion you ignore.
Practical steps:
- Anchor line blocks or pins correctly.
- On block walls, use line blocks at corners and keep them tight to the unit.
- On brickwork, use adjustable line pins or spring line holders in the bed joints.
Ensure corner units are dead plumb and braced before trusting the line.
- Set line height with joints in mind.
- The top of the course you’re laying
- Or the top of the bed joint if that’s how you work
Place the line to represent:
Check that line height matches your intended joint thickness at both ends before you start bedding units.
- Keep the line taut and clear of contact.
- Pull the line tight enough to “sing” when plucked.
- Avoid units touching or deflecting the line; this will build errors into every course.
If the line sags or vibrates excessively, shorten the span or add an intermediate reference (like a temporary profile or gauge stick).
- Work to the line, not past it.
- Position units so their outer arris just kisses the line—never push the line out of the way.
- Use your trowel handle as a quick gauge to keep units back from the line consistently.
- Gauge heights with story poles or marked profiles.
- Course heights vs. marks
- Joint thickness consistency
Mark your course heights, bond lines, sill/lintel heights directly on corner profiles or a story pole. Every few courses, check:
This prevents “joint creep” where bed joints gradually thicken or thin over long runs.
Tip 4: Control Water—from the Material Pile to the Finished Wall
Water is friend and enemy in masonry. Too little or too much at the wrong moment leads to weak bonds, efflorescence, and cracking. Professionals manage moisture proactively, not reactively.
Practical steps:
- Assess and prep units before laying.
- Highly absorptive units (some bricks, dry CMU) may need pre-wetting so they don’t suck water out of the mortar.
- Lightly dampen surfaces, then allow them to surface-dry (no visible water sheen) before laying.
Over-wet units can cause mortar to slide and joints to smear.
- Keep the wall face clean as you go.
- Strike excess mortar from joints immediately with your trowel.
- Brush the face with a soft brush when mortar is thumbprint-hard, not fully cured.
Mortar smears trap water and salts. To minimize:
This reduces later washing, which often involves more water than the wall needs.
- Tool joints at the correct moisture stage.
- Joint too early: mortar tears and drags, weakening weather resistance.
- Joint too late: surface is too hard to compact, leaving porous joints.
Aim for “thumbprint hard”—your thumb leaves a slight mark but doesn’t sink.
- Protect fresh work from rapid drying and direct soaking.
- In hot, dry, or windy weather, use light misting and windbreaks to reduce rapid evaporation.
- In rain, cover fresh walls with breathable tarps, leaving air flow at the bottom.
Avoid wrapping walls tightly in non-breathable plastic; it can trap water against the face.
- Plan drainage paths, not just surface sealing.
- Weep holes are placed and remain clear.
- Flashings are properly lapped and not punctured by anchors.
- Cavities stay clean (no dropped mortar bridges) so water can drain to the exterior.
For veneers and cavity walls, make sure:
Managing water inside the assembly is as important as keeping it off the exterior surface.
Tip 5: Reinforce and Tie Masonry So It Acts as One System
Masonry is strongest when it’s properly tied, reinforced, and allowed to move where it needs to. This is where structural durability and crack control meet.
Practical steps:
- Follow specified reinforcement patterns exactly.
- Vertical bar spacing and bar sizes
- Horizontal joint reinforcement spacing
- Lap lengths and hook details
Check the drawings or local code for:
Pre-bundle bars and joint reinforcement for each segment of wall so you’re not improvising mid-course.
- Place reinforcement clean and centered.
- Keep vertical bars away from block webs so grout can fully surround them.
- Clean mortar fins and debris from cells and cavities before grouting.
Contaminated or obstructed cells lead to voids and weak connections.
- Use compatible anchor and tie systems.
- Use corrosion-resistant anchors appropriate to the environment (galvanized or stainless in exposed/exterior locations).
- Follow embedment depths and spacing recommended by the manufacturer or specified by the engineer.
For tying masonry to concrete or steel:
This ensures load transfer without creating corrosion problems later.
- Don’t ignore movement joints.
- Install expansion or control joints where planned, at full depth through the veneer or wall.
- Use proper backer rod and sealant designed for masonry joints.
These joints relieve stress from thermal and moisture movement, preventing random cracking.
- Grout in controlled lifts and consolidate properly.
- Grout in lifts that match code or spec (often 4–5 ft / 1.2–1.5 m).
- Use rodding, mechanical vibration, or reconsolidation to remove air pockets.
When grouting reinforced masonry:
Proper consolidation ensures bars are fully bonded, so the wall can act as a single structural element instead of isolated segments.
Conclusion
High-performing masonry doesn’t come from one “advanced hack.” It’s the result of steady, predictable routines: careful layout, consistent mixing, disciplined use of string lines, active moisture control, and thoughtful reinforcement. When these habits become standard on your jobs—whether you’re a contractor running a crew or a homeowner tackling a once-in-a-decade project—your walls go up straighter, your joints look sharper, and your work stays out of the “repair file” for years.
Use these five tips as a pre-job checklist. If you build them into your normal process instead of treating them as extras, the payoff will show up in fewer callbacks, faster production, and masonry that looks and performs like it should.
Sources
- [Portland Cement Association – Mortar Types and Uses](https://www.cement.org/cement-concrete/paving/buildings-structures/mortar-types-and-uses) – Overview of mortar types (N, S, M, etc.) and where each is typically specified
- [The Masonry Society – Movement Control in Masonry Walls](https://masonrysociety.org/resources/movement-control-in-masonry-walls/) – Guidance on control joints, expansion joints, and crack management in masonry construction
- [NCMA (National Concrete Masonry Association) – TEK 3-2A: Concrete Masonry Construction](https://ncma.org/resource/concrete-masonry-construction/) – Technical recommendations for layout, reinforcement, grouting, and general CMU construction practices
- [Brick Industry Association – Technical Note 7: Water Penetration Resistance of Brick Masonry](https://www.gobrick.com/technical-notes) – Best practices for moisture management, flashing, and weeps in brick masonry walls
- [U.S. General Services Administration – Whole Building Design Guide: Masonry Construction](https://www.wbdg.org/building-types/collections/masonry-construction) – Broad reference on masonry systems, detailing, and performance considerations