This guide breaks down five expert-level tips you can apply to almost any DIY project so your work is straighter, safer, and more durable.
Start With the Structure, Not the Finish
Many DIY frustrations come from “designing by the finish” first—picking tile, paint, or hardware—without checking what’s behind or beneath the surface. Professionals reverse that: they evaluate structure and utilities before committing to finishes or layouts.
Begin every project with a quick “structural and systems check”:
- Walls and framing: If you’re mounting cabinets, shelving, or a TV, locate studs and measure their spacing. Confirm they’re where you expect and in acceptable condition (no severe cracking, rot, or soft spots). Reinforce questionable areas with additional blocking before you think about finishes or fixtures.
- Floors and subfloors: For flooring, tile, or heavy furniture, inspect for deflection (bouncy spots) and damage. Use a straightedge or long level to check for dips and humps. Stiffen or level the base layer before you install the visible surface.
- Moisture and ventilation: In basements, bathrooms, and exterior work, assess moisture risks first. Look for water staining, efflorescence, musty odors, or peeling finishes. Address leaks, drainage, or ventilation issues before any aesthetic upgrades.
- Utilities: For any project involving walls, ceilings, or floors, mark the path of electrical, plumbing, and HVAC. Use a stud finder with live wire detection where possible and compare to known fixture locations (outlets, switches, vents) to avoid accidental damage.
This upfront assessment shapes the scope of your project and prevents expensive “do-overs” after you’ve already installed finishes.
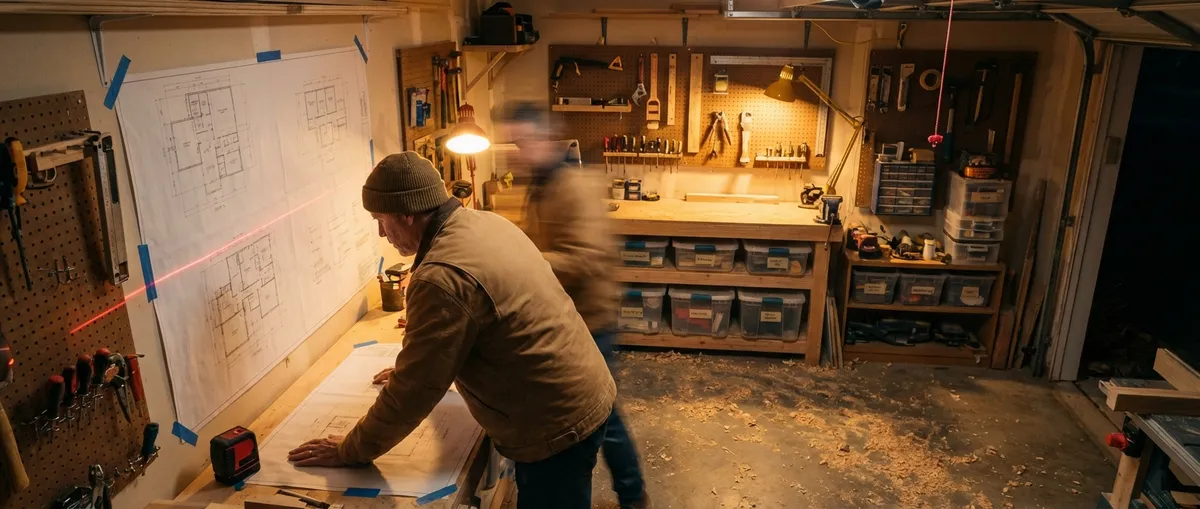
Build Repeatable Accuracy Into Your Layouts
Professionals don’t trust a single measurement or mark—they create systems to repeat accuracy across an entire job. You can adopt scaled-down versions of these layout habits to dramatically improve results.
Key practices to apply:
- Establish a control line: For decks, fences, tile, or room layouts, snap a control line using a chalk line or a tightly stretched string. Base all other measurements off this reference rather than off random walls which may be out of square.
- Use the 3-4-5 rule for square: When you need a right angle (like laying out a shed pad or partition wall), measure 3 units on one side, 4 on the other, and adjust the angle until the diagonal measures 5 units. You can scale this up (6-8-10, 9-12-15) for larger layouts.
- Create story poles or templates: For repetitive work—shelf spacing, baluster layout, tile patterns—cut a scrap board and mark all repeated positions on it. Use that board to transfer consistent spacing instead of re-measuring every time.
- Check diagonals, not just sides: When laying out rectangles (framing a wall, building a platform, setting posts), measure both diagonals. Equal diagonals mean your shape is square, even if all four sides are the same length.
- Dry-fit and mock up: Before driving fasteners or applying adhesive, assemble components loosely. Use clamps, temporary screws, or shims to confirm fit and alignment. This is particularly valuable for built-ins, mitered corners, and large panels.
By treating layout as its own deliberate phase, you greatly reduce fitting problems and cumulative errors later in the build.
Choose Fasteners and Adhesives for the Conditions, Not Just the Material
DIY builders often focus on lumber, panels, or masonry and treat fasteners as an afterthought. Professionals regularly see failures that come not from the material, but from the wrong screws, nails, or adhesives for the environment and loads.
Improve your fastener choices with these principles:
- Match fasteners to environment:
- Interior dry: Standard zinc-coated screws or nails are often acceptable.
- Exterior or damp: Use hot-dipped galvanized or exterior-rated coated fasteners to resist corrosion.
- Coastal or highly corrosive environments: Consider stainless steel fasteners for deck hardware, railings, and exterior trim.
- Know what you’re fastening into:
- Wood framing: Wood screws or nails sized for at least 1–1¼" embedment.
- Concrete or masonry: Use masonry screws, anchors, or sleeve anchors rated for the load. Pre-drill with the correct masonry bit.
- Hollow walls: Use appropriate drywall anchors or toggle bolts for non-stud locations, and defer to stud mounting for heavier loads.
- Use structural-rated hardware where needed: For decks, stairs, and overhead loads, look for connectors and fasteners labeled as structural or code-compliant. Avoid substituting generic screws where plans or manufacturer instructions call for specific hardware.
- Select adhesives by substrate and movement:
- Construction adhesive for subfloors, framing, and general bonding.
- Flexible sealant (like polyurethane or high-quality silicone) where movement and water-resistance are expected (e.g., exterior gaps, certain joint lines).
- Rigid adhesives (like some epoxies and thinsets) for stable, non-moving assemblies like properly supported tile, stone, or structural repairs.
Read manufacturer data sheets when possible—professionals do this routinely to avoid compatibility issues and premature failures.
Sequence Your Work to Protect What You’ve Already Done
On a jobsite, time and energy go into protecting finished work from the next phase of construction. In DIY projects, the same mindset prevents damage, rework, and frustration.
Plan your sequence and protection like this:
- “Dirty-to-clean” workflow: Do cutting, sanding, drilling, and demolition before painting, installing trim, or setting fixtures. If you must cross phases, cover finished surfaces with drop cloths, cardboard, or protective film.
- Top-down approach for interiors: Start with ceilings, then walls, then trim, then floors. This minimizes the risk that dust, paint drips, or dropped tools damage completed surfaces below.
- Protect traffic paths: If you’re moving tools and materials through a finished area, create defined paths with builder’s paper, cardboard, or removable floor protection. Professionals protect flooring before bringing in heavy or messy tools.
- Stage materials smartly: Store lumber, sheet goods, and boxes off the floor on simple skids or blocks. This prevents moisture wicking, surface damage, and trip hazards.
- Schedule drying and curing time as part of the project: Don’t rush into sanding, re-coating, loading shelves, or walking on newly installed surfaces. Respect recommended cure times for adhesives, paints, finishes, concrete, and joint compounds.
Thinking about how each step affects previous work improves both the quality and efficiency of your projects.
Build and Use a Simple Quality Checklist for Every Project
Professionals don’t rely purely on memory—they use checklists and standardized inspections. You can adapt this by keeping a simple, written quality checklist that you apply to each project before you call it “done.”
Here’s how to build and use one effectively:
- Define critical checkpoints before you start: For each project, write down 5–10 items that must be correct before you move on. Examples: “Stud locations marked and verified,” “All cuts test-fitted,” “Anchors appropriate for base material,” “Electrical power confirmed off.”
- Visually inspect key details under good light: Use a work light or daylight to check seams, edges, gaps, and fastener heads. Look from multiple angles—what looks fine straight-on may show problems from the side.
- Confirm level, plumb, and square: Keep a small level and a reliable tape measure on hand. For doors, cabinets, and shelving, check that verticals are plumb, horizontals are level, and mating corners are square.
- Test function, not just appearance: Open and close doors and drawers repeatedly, walk the full surface of a new deck or floor, run water through new plumbing work, and test load-bearing items with safe, progressive weights.
- Document what you did and used: Take photos of hidden work (framing, wiring routes, blocking locations) and note product types and dates (paint, adhesives, sealants). This makes future repairs or upgrades significantly easier.
Over time, your checklist will evolve as you learn from each project, just as professional crews refine their processes from job to job.
Conclusion
Reliable, professional-quality DIY work isn’t about having a truck full of tools—it’s about thinking and working in a structured, deliberate way. Start by understanding the structure and systems, lay out your work with accuracy, pick fasteners and adhesives suited to real-world conditions, protect finished surfaces as you go, and close every project with a simple but disciplined quality check.
Apply these habits consistently and you’ll notice a visible jump in the straightness, durability, and overall “feel” of your projects—whether you’re building a simple closet organizer or tackling a more ambitious renovation.
Sources
- [U.S. Department of Housing and Urban Development – Residential Rehabilitation Inspection Guide](https://www.hud.gov/program_offices/public_indian_housing/programs/ph/phrehab/rehabguide) - Covers systematic evaluation of residential structures, moisture issues, and building components
- [U.S. Consumer Product Safety Commission – Home Maintenance & Safety](https://www.cpsc.gov/Safety-Education/Safety-Guides/Home) - Provides safety guidance relevant to DIY projects, including structural and electrical considerations
- [Simpson Strong-Tie – Fastener and Connector Resources](https://www.strongtie.com/resources) - Technical information about structural connectors, corrosion resistance, and proper fastener selection
- [Family Handyman – Layout Tips for Building Projects](https://www.familyhandyman.com/project/layout-tips-for-better-building/) - Practical guidance on layout techniques like control lines, squaring, and dry-fitting work
- [Fine Homebuilding – Jobsite Protection Strategies](https://www.finehomebuilding.com/project-guides/job-site-safety/job-site-protection) - Discusses professional methods for protecting finished surfaces and sequencing work on construction sites