Start With the Wall’s Job, Not Just Its Dimensions
Before you snap a single line, define what the wall actually needs to do. That drives everything from unit choice to joint layout.
Ask and document:
- Is this wall load-bearing, retaining, or purely architectural?
- What’s its exposure: freeze–thaw cycles, de-icing salts, coastal air, or interior conditioned space?
- Are there code requirements for fire rating, wind resistance, or seismic performance?
- What’s the finish expectation: tight architectural joints, rustic look, or “standard commercial”?
- How will services run: conduits, plumbing, or mechanical sleeves set in the wall?
Once the performance requirements are clear, set the basic parameters:
- Choose unit type and size (solid brick, hollow CMU, architectural block, stone).
- Confirm specified mortar type and joint profile (affects visual banding and water shedding).
- Identify control joints, expansion joints, and movement breaks early—before you start laying.
- Determine exact finished heights to coordinate with floors, window heads, sills, and lintels.
Document these decisions in a simple layout summary (one page is enough) and keep it on-site. This becomes the reference when questions arise mid-build, preventing improvisations that cause rework and misalignment.
Use Modular Planning to Avoid Awkward Cuts
Masonry units are designed around modular dimensions—but only if you use them. Planning your wall to align with the unit module will save time, material, and headache.
Key modular planning steps:
- Know the true modular size.
Manufacturers list a “nominal” (with mortar) and “actual” (without mortar) size. For example, standard CMU is 7 5/8" x 7 5/8" x 15 5/8", nominally 8" x 8" x 16" with 3/8" joints. Use the modular (nominal) size for layout math.
- Lay out in full and half units first.
Start with full units and half units at corners and openings. Treat anything smaller as an exception you try to eliminate.
- Check your spans against the module.
For a clear wall length, divide the length by the unit module (including joint). If you don’t land cleanly on a full or half unit, adjust:
- Slightly shift an opening.
- Widen a pier or pilaster.
- Add a small return or pilaster that naturally hides a cut.
- Centralize unavoidable cuts.
- Center of a long span behind landscaping.
- Under a coping where thickness hides irregularities.
- In uniform bands rather than random, scattered cuts.
- Mock up a key section dry.
- Include a corner or opening.
- Check courses, bond pattern, and where cuts fall.
- Adjust before ordering special units or cutting on-site.
When cuts are unavoidable, place them in low-visibility zones:
On complex walls, dry-lay a short section on a flat surface:
This modular thinking is one of the easiest “pro” upgrades for DIYers and an essential time-saver for pros trying to keep production and aesthetics in balance.
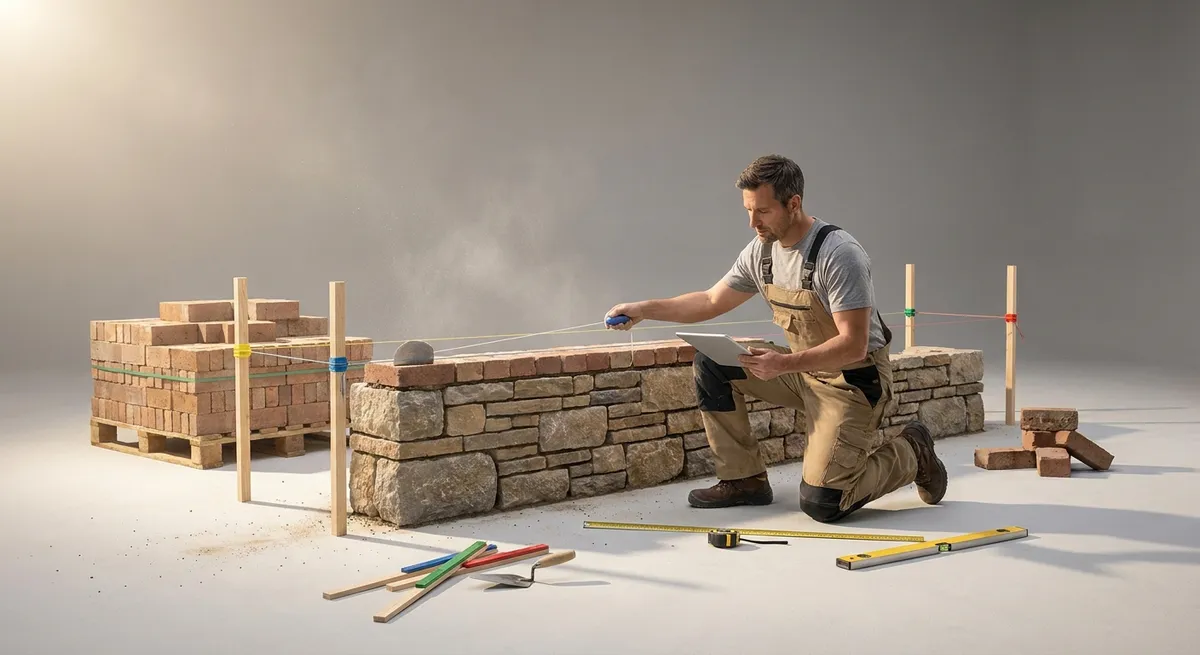
Treat String Lines and Story Poles as Non‑Negotiable Tools
Walls that drift out of level, plumb, or plane don’t happen suddenly—they creep. Consistent reference tools are how you prevent that creep.
String lines done right
Use a high-tension mason’s line, not generic twine:
- Establish absolute reference:
- Snap chalk lines for wall centerline and face line on the footing or slab.
- Use these as your baseline for all measurements.
- Run lines on the “face” that matters most:
- For walls seen from one side, keep that side perfectly straight.
- For free-standing walls, maintain both faces with frequent checking.
- Keep the line lifted, not resting on units:
Use line blocks or line pins so the line floats just off the unit arrises. Bricks or blocks should “kiss” the line but not push it out of true.
Story poles for consistent course heights
A story pole is a simple but powerful layout tool:
- Mark course heights (including joint thickness) on a straight board or metal pole.
- Note critical elements directly on the pole: sills, lintels, anchor bolt locations, box-outs for utilities.
- For multi-person crews, use identical story poles at each corner to:
- Keep courses level across long runs.
- Hit exact heights at openings without repeated measuring.
- Coordinate with other trades (window installers, framers, electricians).
When DIYing, a single well-marked story pole can prevent the classic issue of “almost” aligning to the window head or door lintel—where you end up cutting a sliver course or living with a visually off alignment.
Design Corners and Openings Before You Touch the Field
Corners and openings are where masonry projects either look intentionally precise or obviously improvised. Planning them in detail pays off more than any other layout step.
Corners: control the bond pattern
Decide how your bond pattern will wrap corners:
- For running bond:
- Plan which wall “dominates” visually at the corner (whose stretchers continue through).
- Use proper corner units or intentional half units—not random cuts.
- For stack bond or more complex patterns:
- Draw a corner grid on paper or in simple CAD.
- Mark each unit type and orientation to avoid pattern “breaks.”
On-site, pre-stack several corner courses dry to confirm:
- The bond pattern wraps cleanly.
- There are no units with obvious face size mismatches.
- Any required cuts are repeated and consistent from course to course.
Openings: build around, not into, the problem
To keep windows and doors cleanly integrated:
- Align heads and sills to course lines where possible.
If a head hits mid-course, you’ll often end up with a small strip course above or below. Adjust the opening height slightly, if allowed, to land on a course line.
- Use jack or soldier courses deliberately.
- So they hit uniform heights across the façade.
- So their thickness and joints work with the primary coursing.
- Coordinate with structural support.
- Confirm bearing length and course alignment.
- Detail how they interact with different wall thicknesses (e.g., veneer vs. backup).
If the design calls for accent courses, plan them:
For lintels and bond beams:
Mark opening extents on the wall and on your story pole so everyone on-site understands where masonry stops and the rough opening begins. This reduces field “adjustments” that create out-of-square openings and complicated trim work later.
Expert Tips That Make Layout Faster and More Reliable
These five practices are small in effort but large in impact for both professionals and serious DIYers.
1. Standardize Your Joint Thickness and Police It Constantly
Pick your joint thickness (commonly 3/8") and stick to it relentlessly:
- Cut a simple joint gauge from scrap wood or metal to quickly check bed and head joints.
- Correct creeping joint sizes early—small variations multiply course by course.
- For architectural work, confirm joint profile (concave, flush, raked) with a short mockup before committing.
Consistent joints make layout math work and produce clean visual lines that read “professional” even from a distance.
2. Pre-Calculate Critical Heights and Mark Them in Multiple Places
Before day one on the wall:
- List every critical elevation:
- Finished floor levels
- Window sills and heads
- Door headers
- Top of wall / coping height
- Convert those to course counts and partial courses (if any).
- Mark these heights:
- On your story pole.
- On temporary stakes near the wall line.
- On the actual wall at corners once you start building.
Triple-marking keeps you from “almost” hitting key heights and then having to improvise visually obvious fixes.
3. Work From Verified Corners Toward the Middle
Never start laying randomly in the middle of a span:
- Build and plumb both corners first, up several courses.
- Stretch your line between the corners and work toward the center from both ends.
- Where the two runs meet, adjust cuts and minor misalignments in a controlled, low-visibility zone.
This method distributes any minor cumulative errors evenly instead of concentrating them where everyone will see them.
4. Audit Your Layout After the First Three Courses
Treat the first few courses as your “layout inspection” phase:
- Check:
- Course heights vs. your story pole at multiple points.
- Alignment of units to snapped lines.
- Consistency of joint thickness.
- Plumb of corners and any pilasters.
- If you find an issue, correct it immediately—even if it means relaying a section.
Masonry is forgiving at three courses and punishing at 15 courses. A short pause for verification early is vastly cheaper than grinding out misaligned sections later.
5. Plan Service Penetrations and Attachments on Paper
Penetrations and attachments are layout killers if left to improvisation:
- Get drawings (or at least measurements) from electricians, plumbers, and HVAC contractors.
- Plot:
- Conduit chases
- Hose bibbs and vents
- Electrical boxes and fixtures
- Mounting points for railings, canopies, or signage
- Adjust masonry layout so these elements:
- Fall within full or half units when possible.
- Avoid landing exactly on a joint whenever a centered placement is possible.
- Have adequate bearing material around them for anchorage.
This planning prevents the all-too-common scenario where someone shows up to core-drill through your carefully laid block because their box won’t land in the intended joint.
Conclusion
Well-planned masonry layout isn’t just about straight lines and neat corners—it’s about making the wall work with its structure, services, and finishes so the build proceeds smoothly instead of fighting you at every opening and elevation. By starting with the wall’s function, planning to the module, using solid reference tools, designing corners and openings on purpose, and incorporating a handful of expert habits, you can create walls that almost “build themselves.” Whether you’re leading a crew or tackling a substantial DIY project, investing thought in layout up front will pay you back every single course.
Sources
- [Masonry Standards Joint Committee (MSJC) / TMS 402/602](https://masonrysociety.org/product/tms-402-602-building-code-requirements-and-specification-for-masonry-structures-2022/) - Industry-standard building code and specifications for masonry structures, including layout considerations and best practices
- [NCMA TEK Manual – National Concrete Masonry Association](https://ncma.org/tek-manual/) - Technical notes on concrete masonry design and construction, with detailed guidance on modular layout, coursing, and detailing
- [Brick Industry Association Technical Notes](https://www.gobrick.com/technical-notes) - Authoritative guidance on brick masonry design and construction, including bond patterns, jointing, and wall layout strategies
- [U.S. General Services Administration – Masonry (PBS-P100)](https://www.gsa.gov/technical-procedures/masonry) - Federal-level technical procedures and recommendations for masonry work on public buildings
- [Portland Cement Association – Concrete Masonry Construction](https://www.cement.org/learn/buildings-structures/concrete-masonry) - Overview of concrete masonry systems, design principles, and construction practices relevant to layout planning