Below are five expert‑level tips that blend pro trade habits with homeowner priorities, so your work looks clean, lasts longer, and passes the “would I stake my reputation on this?” test.
Plan Like a Pro: Scope, Sequence, and Safety First
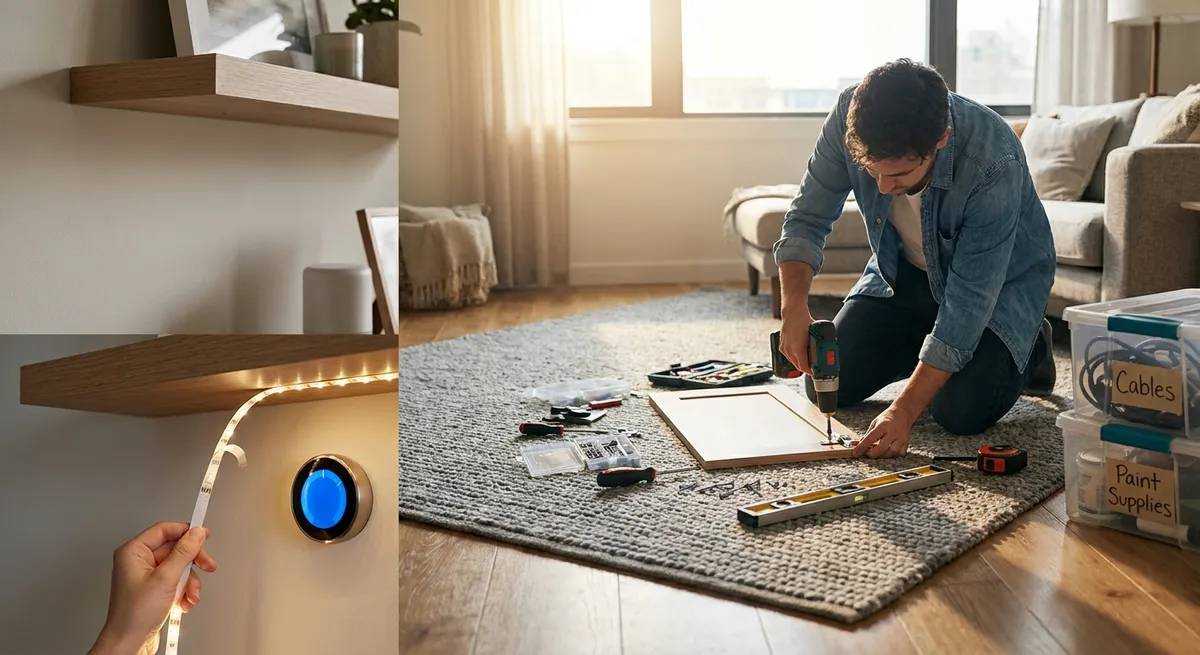
Before you touch a tool, treat your project the way a superintendent treats a jobsite: clarify the scope, sequence the work, and define safety standards.
Start by writing a one‑page project brief: what you’re changing, why, and what “done” looks like (including finish level and performance expectations). List all tasks, then reorder them in the right sequence—demo, rough work (framing, wiring, plumbing), inspection (if required), insulation, drywall, finish, and punch list. This reduces rework, such as opening walls you just closed because you forgot a cable or backing.
Next, identify what is legally off‑limits. Structural modifications, new circuits, gas work, and major plumbing changes may require permits and licensed trades. Check your local building department’s website for permit thresholds and inspection requirements, and err on the side of compliance—especially for anything hidden behind finishes.
Safety needs to be part of the plan, not an afterthought. Set up dust control (zip walls, box fans with filters), ensure proper ventilation for adhesives and finishes, and confirm you have the right PPE: safety glasses, hearing protection, NIOSH‑approved respirators, cut‑resistant gloves when needed, and non‑slip footwear. For overhead work and ladders, follow the “three points of contact” rule and never work alone when there’s a fall risk.
Professional‑grade planning might feel slow at first, but it pays off in fewer surprises, cleaner work, and projects that finish closer to the budget and timeline you had in mind.
Build a Reliable Reference: Layout, Level, and Fastening Fundamentals
Straight, solid work is built on accurate layout and fastening, not just good intentions. Investing time in this step is what separates “weekend project” from “trade quality.”
Start with reference lines. For wall work, snap chalk lines or use a laser level to establish horizontal and vertical control lines around the space. For flooring or large panel installations, snap center lines and work outwards, adjusting layout to avoid tiny slivers at edges. Transfer key heights (countertops, handrails, receptacles) using a story pole or laser to keep everything consistent.
Know your structure before you fasten anything. Use a stud finder plus a sanity check (small test holes) to confirm stud spacing and direction. In older homes, assume nothing is square or level. Shim, plane, or sister materials as needed instead of forcing finishes to follow crooked framing.
Choose fasteners based on substrate and load, not guesswork. For example:
- Hollow walls: Use rated hollow‑wall anchors or toggle bolts for heavier loads.
- Masonry: Use masonry screws or sleeve anchors with proper pilot holes and depth.
- Exterior: Use corrosion‑resistant or stainless fasteners, especially near coastal areas.
Pre‑drill where splitting is likely (near board ends, hardwoods, or thin stock) and respect minimum edge distances for screws and anchors. When fastening into concrete or brick, clean the dust from drilled holes before setting anchors; dust reduces holding strength.
Finally, document as you go. Take photos of open walls with measurements before closing them. Future you—and any pro who works on the house later—will know exactly where framing, cables, and pipes are, drastically reducing risk and repair time.
Upgrade Where It Matters: Electrical and Lighting Projects You Should (and Shouldn’t) DIY
Lighting and power significantly affect how livable a space feels, but electrical work is also where DIYers can quickly get in over their heads. The key is to distinguish between safe upgrades and projects that should go to a licensed electrician.
Appropriate DIY electrical‑adjacent projects include:
- Replacing light fixtures on existing boxes where the circuit is already present.
- Swapping standard switches for properly rated dimmers or occupancy sensors.
- Changing receptacle covers, faceplates, and labeling panel circuits.
For these, shut off power at the breaker, verify with a non‑contact voltage tester, and work methodically: disconnect one conductor at a time, label wires if needed, and confirm ground and neutral connections match the original configuration. Use wire connectors (wire nuts or lever connectors) that are listed for the wire gauge and number of conductors, and ensure all connections are inside approved junction boxes.
Projects best left to licensed pros include:
- Adding new circuits or subpanels.
- Working on the main service panel or meter.
- Rewiring knob‑and‑tube or aluminum branch circuits.
- Any work where you’re unsure of code compliance (arc‑fault, GFCI, load calculations).
When upgrading lighting, think in terms of layered illumination: ambient (general), task (over counters, benches, desks), and accent (walls, art, architectural features). Use warm‑white (2700–3000K) in living areas, neutral (3500–4000K) in workspaces and kitchens, and consider high CRI (color‑rendering index) fixtures where accurate color matters.
For retrofit recessed lighting, choose IC‑rated, airtight housings or low‑profile LED retrofit modules and follow the manufacturer’s clearance requirements to avoid overheating insulation. In garages, basements, and utility rooms, prioritize brightness and coverage over aesthetics—continuous‑run LED strips or linked shop lights often deliver more usable light than decorative fixtures.
When in doubt about any electrical detail—box fill, conductor size, breaker rating—stop and either research authoritative guidance or hire a pro. A clean patch in the drywall is far cheaper than recovering from an electrical fault.
Make Surfaces Work Harder: Durable Walls, Floors, and Work Zones
Your home’s most abused surfaces are often the most overlooked: entryways, mudrooms, garages, and work areas. Smart DIY upgrades here pay dividends in cleanliness, durability, and ease of maintenance.
For high‑traffic walls (mudrooms, kids’ zones, garages), consider upgrading from basic flat paint to more durable systems:
- Use a high‑quality, washable acrylic or alkyd‑reinforced paint in eggshell or satin for easier cleaning.
- Add mechanical protection where impacts are common—wainscoting, plywood panels, PVC panels, or fiber‑cement boards in garages and utility spaces.
Before painting, prioritize surface prep: degrease, sand glossy finishes, repair cracks and nail pops, and prime as required for the substrate and topcoat. Poor prep is the main reason DIY finishes fail prematurely.
On floors, balance traction, cleanability, and impact resistance. In garages and workshops:
- Concrete sealers can reduce dusting and staining while preserving a utilitarian look.
- Two‑part epoxy or polyaspartic coatings offer chemical resistance and brightness but require rigorous prep: crack repair, grinding/etching, and moisture testing.
- For lighter‑duty use, interlocking tiles or rubber flooring can be installed without specialty tools and are easily replaced if damaged.
In work zones (laundry, craft rooms, bench areas), create hard‑working backsplashes and bench surfaces using affordable, durable materials: cement board plus tile, stainless panels, or high‑pressure laminate. Include blocking or track systems on walls for flexible tool and supply storage so you can reconfigure as needs change.
Think through maintenance from the start. Choose finishes that can be cleaned with common, non‑aggressive cleaners, and keep a labeled kit of touch‑up paint, caulk, and extra tiles or planks. Pro jobs don’t just look good on day one—they’re built with repair and upkeep in mind.
Finish with Precision: Caulking, Sealing, and the Small Details That Sell the Work
The difference between “DIY” and “professional” often comes down to the last 5%: how joints are sealed, how lines are cut in, and how hardware is aligned. These details protect the work and shape how others judge it.
For caulking, match the product to the application:
- Paintable acrylic/latex or acrylic‑silicone blends for interior trim and gaps to be painted.
- 100% silicone or specialty kitchen/bath sealants for wet areas (tubs, showers, sinks).
- Polyurethane or high‑performance exterior sealants for outdoor joints that move and weather.
Cut the nozzle to the smallest opening that will fill the joint, maintain consistent gun pressure, and keep the tip moving steadily. Tool the bead within the product’s recommended open time using a dampened finger or profiling tool. Wipe edges clean rather than smearing excess across surrounding surfaces.
For painting, invest in a quality angled sash brush and a balanced roller frame. Instead of taping everything, practice cutting in along ceilings, trim, and corners for sharper, faster results. Work from wet edges, maintain a consistent nap direction, and avoid over‑rolling partially cured paint, which can leave texture and pull marks.
Hardware and fixtures deserve the same precision:
- Use a small level for door hardware, towel bars, and handles.
- Pre‑drill for screws in hard materials and use depth stops where over‑driving is a risk.
- Align switch and outlet plates so screw slots are consistent (a small detail pros rarely ignore).
Finally, execute a punch list like a contractor: inspect every surface in good light, mark defects with low‑tack tape, and address them methodically. Touch up, re‑caulk, adjust hinges, and clean work areas thoroughly. A spotless, well‑finished job communicates competence—even to someone who never saw the messy middle stages.
Conclusion
Well‑planned, carefully executed DIY projects can achieve a professional standard and genuinely improve how your home works day to day. By approaching each job with clear scope, reliable layout, disciplined safety, and attention to finish details, you’ll deliver results that hold up under real use—and that you can confidently share, recommend, and build on.
Whether you’re a construction professional applying trade skills at home or an experienced DIYer raising your game, these principles help ensure each project adds lasting value instead of future headaches.
Sources
- [U.S. Consumer Product Safety Commission – DIY Safety Tips](https://www.cpsc.gov/safety-education/safety-guides/general-safety/do-it-yourselfer-safety-tips) - Guidance on safe practices, tools, and common DIY hazards to avoid
- [U.S. Department of Energy – Residential Lighting](https://www.energy.gov/energysaver/lighting-choices-save-you-money) - Covers efficient lighting options, color temperature, and performance considerations for home upgrades
- [National Fire Protection Association (NFPA) – Electrical Safety in the Home](https://www.nfpa.org/education-and-research/home-fire-safety/electrical) - Authoritative information on household electrical risks, safe behaviors, and when to call a professional
- [The Family Handyman – Concrete Floor Coatings Guide](https://www.familyhandyman.com/project/how-to-apply-epoxy-floor-coatings/) - Practical, step‑by‑step coverage of surface prep and application for durable garage and shop flooring
- [Benjamin Moore – Surface Preparation and Painting Guide](https://www.benjaminmoore.com/en-us/paint-and-stain-tips/how-to-paint) - Detailed best practices for surface prep, priming, and finishing interior walls and trim