This guide breaks down five field-tested tips that pros actually use to keep projects predictable and efficient. Apply these to your home projects—whether you’re pouring a small slab, framing a wall, tiling, or doing exterior repairs—and you’ll see immediate gains in speed, quality, and safety.
Tip 1: Build a “Scope Lock” Before You Buy Anything
Professionals rarely walk onto a job without a clearly defined scope. For DIY projects, that same discipline prevents cost creep, unnecessary tool purchases, and half-finished work.
How to create a simple scope lock
Before you spend a dollar or pick up a tool, write down:
- Project objective
Plain language, one sentence.
Example: “Build a 10' x 12' pressure-treated deck attached to the existing house, sized for a grill and seating.”
- Performance requirements
- Load capacity (e.g., handle gatherings safely)
- Weather resistance (UV, freeze-thaw, moisture)
- Service life (how long it should last before major replacement)
- Constraints
- Budget range (with a 10–15% contingency)
- Time window (weekends only vs. consecutive days)
- Site limitations (access, noise restrictions, neighbors)
- Must-have details
- Code or permit requirements
- Clearances (doors, windows, vents, electrical)
- Interface with existing structure (flashing, fasteners, anchors)
What must this project do?
Keep this on a single page and print it or save it to your phone. Every time you’re tempted to change materials or expand the project (“While I’m here, I might as well…”), compare the idea to your scope lock. If it doesn’t support the original objective—or blows the constraints—park it for a future phase.
Why this feels “pro-level”:
Contractors keep projects profitable by avoiding uncontrolled scope changes. As a DIYer, this same discipline keeps your money, energy, and weekends focused on finishing what you started—well.
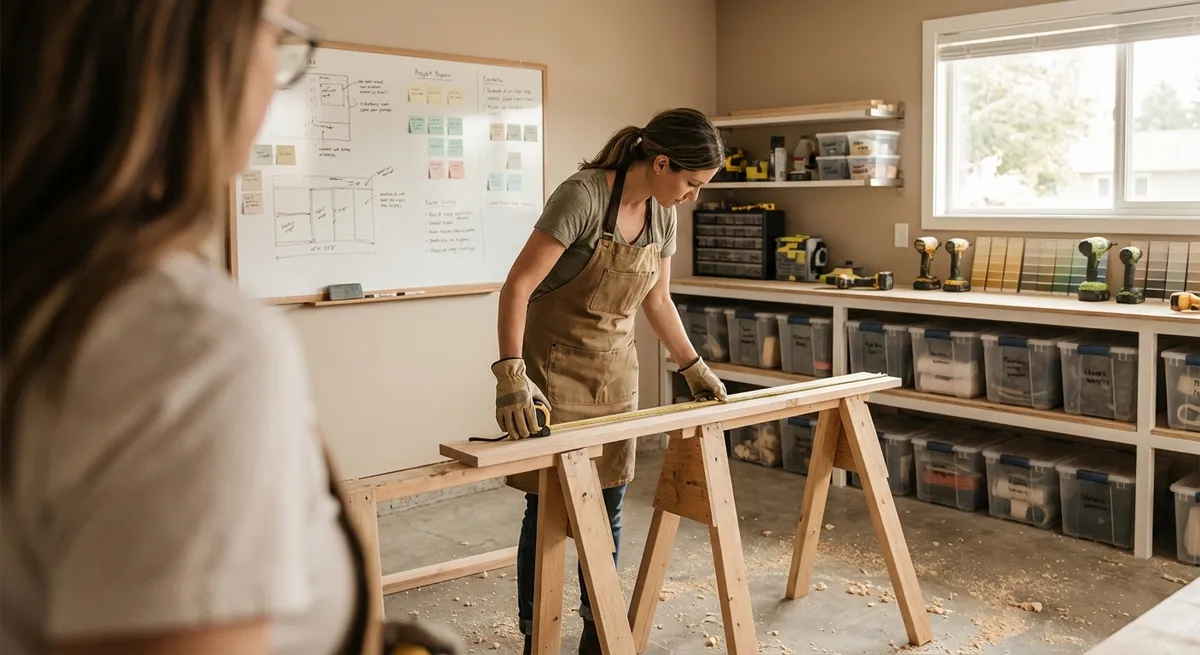
Tip 2: Stage Materials and Tools in “Zones” to Cut Mistakes
Job sites that look organized usually run on fewer mistakes and less fatigue. Pros use staging zones so work flows in one direction: from storage, to prep, to install, to cleanup.
Set up three basic zones
Clean Storage Zone (Uncut Materials & Sensitive Items)
- Location: dry, out of direct traffic and dust - Use for: unopened bags, primed lumber, adhesives, fasteners, electronics, finishes - Keep off bare concrete with pallets, 2x scraps, or shelving to avoid moisture wicking
Prep/Processing Zone (Cutting, Mixing, Measuring)
- Location: well-ventilated, good lighting, close to power - Use for: saws, mixing buckets, clamps, layout tools - Protect surfaces with plywood or sacrificial boards - Keep measuring tools and reference drawings here so adjustments are consistent
Install Zone (At the Actual Work Area)
- Only bring what you will use in the next 30–60 minutes - Use tool pouches, small bins, or a rolling cart - Remove offcuts and trash regularly instead of letting them accumulate
Pro details that DIYers often miss
- Orientation matters: Store long materials (lumber, pipe, trim) aligned with how you’ll move them into the work space. You reduce awkward handling and accidental damage.
- Mixing discipline: Maintain one dedicated mixing area for concrete, mortar, or joint compound with water, measuring container, and cleaning tools on hand. Inconsistent water ratios happen when you mix “wherever there’s space.”
- Lighting as a tool: Add temporary work lights in your prep and install zones. Good lighting reveals defects in cuts, joints, and finishes before they’re locked in.
Organized zoning doesn’t just look professional—it directly improves accuracy, reduces trip hazards, and helps you finish closer to plan.
Tip 3: Standardize Fasteners and Hardware Before You Start
On professional sites, random fasteners are a warning sign. Mixed screw types and incompatible metal coatings lead to failures, callbacks, and expensive repairs.
How to standardize like a pro
Match fasteners to environment and materials
- Exterior / damp areas: - Use hot-dip galvanized or stainless fasteners for treated lumber, masonry connectors, and exterior flashing. - Avoid mixing metals (e.g., zinc-plated screws with stainless hardware) to reduce galvanic corrosion. - Interior dry areas: - Coated or zinc fasteners are typically fine unless specified otherwise.
Unify drive types and head styles
- Pick a primary drive type (e.g., Torx or square) for most structural and repetitive work. - Keep the required bits clearly labeled and stored with the fasteners. - Reserve Phillips/flat-head for specific devices or fixtures that require them.
Pre-assign fastener lengths
- For each material combination, decide the correct, minimum, and maximum fastener length ahead of time. Examples: - 2x lumber to 2x lumber: 3" structural screw or #10 x 3" wood screw - 3/4" plywood to framing: 2–2½" screws or nails - Furring strips to masonry: specified masonry screw length or anchors
Create a simple fastener legend
- On your project sketch or notes, mark: - “F1” = 3" structural screw (deck ledger, headers, studs to plates) - “F2” = 2½" exterior wood screw (decking to joists, exterior trim) - “F3” = 1⅝" drywall screw (interior drywall to framing) - Keep that legend taped to your tool case or wall.
Result: Fewer split boards, stronger connections, less hunting for “whatever fits,” and repairs that you can understand years later because the fastener strategy was intentional.
Tip 4: Use Checkpoints, Not Guesswork, to Catch Problems Early
Professionals rarely wait until the end to see if something “turned out straight.” They build in checkpoints where they verify alignment, level, and structural basics before committing to the next step.
Add checkpoints at natural breakpoints
Use a pencil checklist on paper or your phone. Typical checkpoints:
- After layout, before drilling or cutting:
- Confirm measurements against at least two fixed references (e.g., existing wall and a control line).
- Dry-lay components when possible (tiles, pavers, trim) to verify pattern and coverage.
- After first row / first course / first bay:
- Check level, plumb, and square.
- For repetitive work (tiling, decking, siding), this first unit sets the pattern. Correct deviations immediately instead of “fudging” later.
- Before covering anything permanent:
- Before drywall: confirm wiring, plumbing, insulation, fire blocking, and fastener patterns.
- Before backfilling: photograph footing, drainage, waterproofing, and reinforcement for your records.
Tools that make checkpoints fast
- 4' level or longer
- Laser line or rotary laser (for multi-room or exterior alignment)
- Framing square and speed square
- Diagonal measurements to confirm square (both diagonals equal = square)
- Feeler gauges or simple shims to identify and correct gaps
Commit to stopping at each checkpoint, even if you feel behind. Fixing 3 mm out of level in the first row of tile is easy; hiding that same defect four rows later is almost impossible without visible correction.
Tip 5: Finish with a “Turnover Walk” and a Maintenance Plan
On commercial projects, a final walk-through and documentation handoff are standard. Treat your home projects the same way—future-you is the “client” who needs to understand what you built.
Do a turnover walk like a contractor
Move through the project as if you’re inspecting someone else’s work:
- Visual inspection
- Sight along edges and joints for waves, gaps, and inconsistent reveals.
- Look at surfaces from low angles with raking light to highlight ridges, hollows, or sanding marks.
- Compare visible hardware and fasteners—mismatched heads or finishes are both aesthetic and potential performance issues.
- Functional checks
- Open and close doors, gates, access panels, drawers, and vents multiple times.
- Load-test gently where appropriate (e.g., carefully stepping on new steps, leaning on rails) while watching for movement.
- Confirm drainage paths: hose down exterior surfaces and watch where water goes.
- Safety / durability
- Verify there are no protruding fasteners, sharp edges, or unstable items.
- Confirm all sealants, paints, or adhesives have had adequate cure time before full use.
Create a compact maintenance file
Capture the essentials in one place:
- Photos of each stage (framing, reinforcement, wiring, waterproofing, finish)
- Product labels or spec sheets for:
- Fasteners
- Coatings and sealants
- Adhesives, mortars, or grouts
- Lumber, connectors, or specialty hardware
- A short note on:
- Date completed
- Expected maintenance schedule (e.g., “Recoat in 3–5 years or when water no longer beads.”)
- Any known compromises (e.g., “Used alternative bracket here due to clearance limitation.”)
Store this physically in a labeled folder and digitally (cloud or local drive). When it’s time to repair, upgrade, or sell, you’ll have professional-grade documentation that explains how and why the project was built the way it was.
Conclusion
Professional-quality DIY work isn’t about owning every specialized tool—it’s about the way you plan, stage, execute, and close out your projects. By locking your scope, organizing your work area into zones, standardizing fasteners and hardware, enforcing checkpoints, and documenting your finished work, you bring proven construction practices into your home projects.
These habits reduce surprises, rework, and fatigue while improving the durability and appearance of what you build. Start with your next project—apply even two or three of these tips, and you’ll notice the difference in how smoothly the work runs and how confidently you can stand behind the finished result.
Sources
- [U.S. Consumer Product Safety Commission – DIY Safety Tips](https://www.cpsc.gov/safety-education/safety-guides/home-improvement-and-diy) – Guidance on safe practices and common hazards during home improvement projects.
- [Occupational Safety and Health Administration (OSHA) – Construction Industry Safety](https://www.osha.gov/construction) – Authoritative information on jobsite organization, tool use, and hazard reduction drawn from professional construction standards.
- [U.S. Department of Housing and Urban Development – Residential Rehabilitation Inspection Guide](https://www.hud.gov/program_offices/public_indian_housing/programs/ph/phecc/rehabguide) – Offers practical checklists and inspection concepts relevant to DIYers planning and reviewing residential projects.
- [International Code Council (ICC) – Building Codes & Standards](https://www.iccsafe.org/building-safety-journal/bcj-guides/building-codes-101/) – Background on how codes shape fastening, structural connections, and project requirements.
- [Kansas State University Extension – Home Maintenance and Repairs](https://www.ksre.k-state.edu/news/stories/2019/01/home-maintenance-repairs.html) – Extension guidance on planning, maintaining, and documenting residential repair and improvement work.