This guide walks through five expert-level habits for inspecting masonry in real time, so you can catch problems before they turn into cracks, leaks, and failed finishes.
Tip 1: Train Your Eye on Mortar Joints, Not Just the Face of the Wall
Most people judge masonry by how the visible surface looks. Pros start with the joints.
Begin by stepping back and scanning horizontal joints (bed joints) at eye level. Look for changes in thickness: joints that taper, bulge, or wander are early indicators of uneven bearing, poor layout, or rushed work. Even if the wall looks “straight enough,” inconsistent joints can concentrate stress and telegraph as cracks later.
Next, get closer and drag a finger lightly along the joint. You’re checking three things: density, cohesion, and finish. Mortar that powders easily or flakes out of the joint is often under-cured, over-sanded, or re-tempered with water. Mortar that feels greasy or overly smooth may be too rich in cement, leading to shrinkage cracks that show up after the wall is loaded or exposed to weather.
Pay attention to joint profile. Whether you’re using concave, V, flush, or raked joints, consistency matters as much as the chosen style. Inconsistently compacted joints are more prone to water ingress and freeze-thaw damage, especially on exterior work. If you see hairline separation at the brick–mortar interface, even in a small area, treat it as a warning that your tooling timing or mix moisture may be off and correct it before continuing.
Finally, inspect corners and openings. Joints here endure more movement; if they already show minor gaps or mismatched thickness, go back and reset or retool before your work is hidden by trim, windows, or cladding.
Tip 2: Use Simple Field Checks to Confirm Units Are Working Together
Well-built masonry acts like a single, unified mass—not a stack of individual blocks or bricks. There are quick, practical ways to test whether your work is behaving as one system.
First, lightly tap units in several areas with the wooden handle of a hammer or trowel. You’re listening for sound: a solid, dull note indicates good bedding, while a hollow, ringing tone often means poor contact or voids behind the face. Isolated hollow spots may be acceptable in some veneer work, but repeated hollows along a course suggest inconsistent buttering or bedding depth.
Check bond patterns not just for appearance, but for load transfer. Running bond, stack bond, Flemish, and English bonds all have different structural characteristics. Confirm that the chosen pattern matches the structural intent of the wall: load-bearing sections should not casually shift to stack bond unless properly reinforced. Misaligned vertical joints over multiple courses are a clear flag that the wall will rely too much on mortar strength rather than proper interlock between units.
At corners and intersections, look for true interlocking (units lapping into each other) rather than relying on a vertical mortar “tooth” to hold things together. Where detailing requires vertical joints (for example, between a masonry fence and a building), verify there is planned movement accommodation, not just a filled joint that will crack later.
If reinforcement is specified—such as ladder wire in joints or rebar and grout in CMU—spot-check that it’s properly placed and fully embedded. Exposed reinforcement, misaligned bars, or visible voids where grout should be are early signs of structural weakness that are cheap to fix now and expensive to correct once the wall is complete.
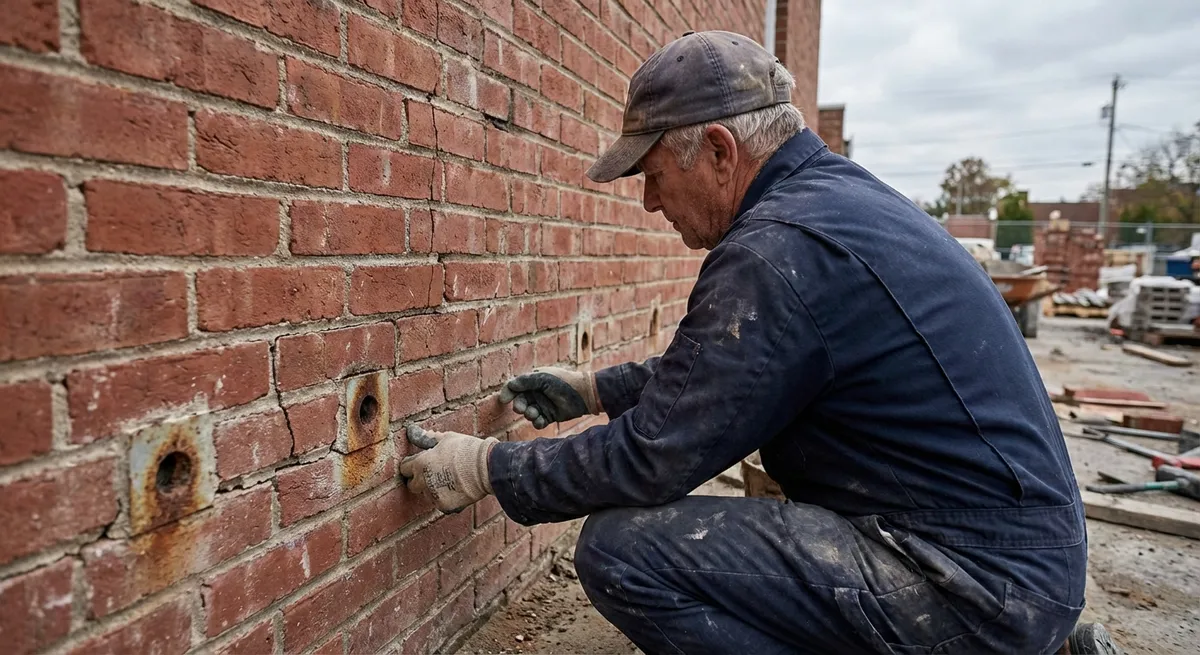
Tip 3: Read Moisture Patterns Before They Become Leaks
Moisture is the single most common long-term enemy of masonry. Learning to recognize how water moves through and around your work will prevent many of the failures people blame on “bad materials.”
Start by looking for directional staining or discoloration on existing or newly installed masonry. Vertical streaks below sills, coping, and parapets often indicate missing or ineffective flashing or drip edges. On fresh work, uneven darkening can reveal where mortar is soaking up more water than intended—an early indicator of mix inconsistency or differential absorption between units.
Check all horizontal breaks in the exterior envelope: window heads, ledger attachments, balcony penetrations, and changes in façade depth. Confirm that weep systems (weep holes, weep tubes, or open head joints) actually exist, are not clogged with mortar droppings, and are spaced per design or code. A clean-looking wall without functional weeps is an invitation to trapped water and internal damage.
During or after rain, walk the project if you can. Look for places where water lingers on ledges, steps, or retaining walls instead of shedding quickly. Puddling on flat masonry surfaces points to inadequate slope or accidental depressions introduced during installation. Those shallow “birdbaths” are where scaling, efflorescence, and freeze-thaw spalling will show up first.
Inside, pay attention to musty odors, efflorescence on interior faces, or paint that bubbles over masonry walls. These are practical clues that your exterior work is either taking in water or not allowing it to escape. Addressing flashing, sealant transitions, and vapor control at this stage is far easier than chasing invisible “leaks” after finishes go in.
Tip 4: Monitor Movement Joints and Interfaces, Not Just Cracks
Movement is inevitable: temperature changes, moisture swings, and structural loads all cause masonry to expand, contract, and shift slightly. The quality of your work is often defined not by whether it cracks, but by how and where that movement is managed.
Begin by finding every intentional movement joint on your plans or in your design—expansion joints, control joints, and soft joints at dissimilar materials. On site, verify they exist exactly where specified and that they remain clear of mortar bridges. Even a small amount of stray mortar bonding two sides of an expansion joint can transfer stress and push cracking into adjacent units instead of the joint where it belongs.
Look closely at transitions: masonry to concrete, masonry to steel columns, masonry to wood framing, and around window/door frames. These interfaces are natural movement hot spots. Check whether sealants are correctly sized (width-to-depth ratio), properly backed by backer rod or bond-breaker tape, and not smeared onto dusty or wet substrates. Poor adhesion or over-stretched sealant will usually fail well before the masonry does.
When you do see hairline surface cracks, read their location and pattern rather than rushing to patch. Diagonal cracks from corners of openings often indicate stress concentration, potentially from insufficient reinforcement or missing movement joints. Vertical cracks at regular intervals can be a sign that the wall is moving as expected—but without proper joint detailing to absorb that movement.
On long walls, sight down the length to see if expansion joints line up with visible changes in alignment or surface texture. If the joint locations seem arbitrary, consider whether temperature-driven expansion could be pushing units out of plane over time. Adjusting joint spacing or detailing on future work can prevent repeats of the same problem.
Tip 5: Use Short, Structured Checks at Key Milestones
Even the best masons miss things when rushing. The solution is not endless inspection, but brief, consistent checkpoints built into your workflow that catch small issues before they propagate.
Before you start a new section, physically verify base conditions. Check that foundations, slabs, or existing walls are reasonably level, clean, and free of loose materials or standing water. It’s easier to shim or adjust at the first course than to correct a leaning wall four feet up.
During the build, pause at logical break points—after every 3–5 courses, at the top of a lintel, or before setting a sill. Use a level and string line not only for plumb and straight, but also to confirm consistent joint thickness and alignment with openings or structural elements. If something is off by more than a tolerance you’re comfortable with, correct it immediately instead of “making it up later.”
Implement a simple “three-sides check” whenever you finish a segment: look at the work from straight on, from one end, and from the other end. Different angles reveal different flaws—bulges, step cracks, crooked joints, or shadow lines from inconsistent tooling.
Finally, do a deliberate “handover walk” before any phase that will conceal your masonry: insulation boards, cladding, interior framing, or finishes. Look specifically at penetrations, flashings, weeps, and movement joints. Getting into the habit of this last-looks review means that if something fails later, you know it wasn’t because you skipped the basics when they were still accessible.
Conclusion
Strong masonry isn’t only about the right mix or the right tool—it’s about reading what the wall is telling you as you build and inspect it. Focusing on joints instead of just faces, confirming units act as a system, understanding moisture behavior, controlling movement at the right locations, and scheduling short, targeted checks at key milestones will elevate both professional and DIY work.
These habits don’t require special equipment, only disciplined observation and a willingness to correct small issues early. Over time, they become second nature—and the walls you build will show it in fewer callbacks, longer service life, and more consistent performance in real-world conditions.
Sources
- [National Concrete Masonry Association – Crack Control in Concrete Masonry Walls](https://ncma.org/resource/crack-control/) - Technical guidance on movement, control joints, and crack behavior in masonry walls
- [The Masonry Society – Evaluating and Repairing Masonry Construction](https://masonrysociety.org/product/tms-restore-ebook/) - Professional reference on assessing existing masonry, moisture issues, and movement
- [U.S. General Services Administration – Masonry: Preservation Briefs from NPS](https://www.gsa.gov/technical-procedures/masonry/preservation-briefs-from-national-park-service) - Federal guidance on diagnosing masonry problems, moisture, and appropriate detailing
- [Portland Cement Association – Water Penetration and Control](https://www.cement.org/learn/concrete-technology/concrete-construction/water-penetration-and-control) - Explains how water moves through concrete and masonry and how to manage it
- [Building Science Corporation – Masonry and Water](https://buildingscience.com/documents/digests/bsd-105-masonry-and-water) - In-depth building science discussion of masonry moisture behavior and detailing strategies