This guide focuses on practical, field-ready ways to evaluate masonry conditions, plan work that lasts, and avoid hidden problems. Along the way, you’ll find five expert tips that apply whether you’re managing commercial work, running a small crew, or tackling your own project at home.
Understanding How Masonry Actually Carries Load
Many field problems start with assumptions about how masonry “should” behave rather than how it really works under load. Masonry is strong in compression, weak in tension, and very sensitive to how forces are introduced and restrained.
In a simple bearing wall, the load should travel down in as straight a path as possible. When support is uneven—like a footing that steps, a lintel that’s undersized, or a point load that wasn’t planned—stresses concentrate in pockets. These show up as stepped cracks, bulging courses, or hairline separations near openings.
Reinforced masonry (CMU with steel and grout) behaves differently than unreinforced brick veneer. The steel and grout carry tensile and flexural forces, while the block shells provide form and compression capacity. If bars are missing, lapped incorrectly, or not fully grouted, the wall may look fine at first but perform unpredictably under wind or seismic loads.
Veneer systems add another layer: they aren’t meant to be structural. They ride on support from the backup wall and shelf angles, with ties transferring wind loads. When veneer starts to carry unintended structural loads—like bearing directly on sidewalks, decks, or patio slabs—it often cracks around those contact points. Reading these patterns helps you distinguish between cosmetic issues and structural concerns that need engineering input.
Expert Tip #1: Trace the Load Path With a Pencil
On any wall you’re evaluating or building, literally sketch the load path on a printed elevation or tablet: where loads start (roofs, beams, floor diaphragms), where they collect (lintels, pilasters, bearing points), and how they exit to the foundation. Anywhere the path jogs, narrows, or depends on a “maybe” (like an unverified beam size or unknown reinforcing), flag it for closer inspection or redesign. This simple habit catches many failures before they’re built.
Moisture Behavior: What Stains, Efflorescence, and Cracks Are Saying
Water is the most persistent threat to masonry. It rarely causes dramatic failure overnight; instead, it quietly exploits small detailing errors until they become major repairs. Being able to interpret moisture clues saves both money and reputation.
Efflorescence—the white, powdery deposits on the surface—tells you soluble salts and moisture are moving through the wall and reaching the drying surface. It doesn’t automatically mean structural trouble, but chronic efflorescence signals that water management is poor: missing or clogged weeps, insufficient flashing, or trapped water at base or sills.
Discoloration patterns matter. Vertical streaks below copings, parapets, or window heads often point to failed sealant or flashing above. Wider, diffuse darkening at the base of walls can indicate rising damp, poor grading, or splashback from hardscapes without drip edges or gravel breaks.
Cracks also reveal moisture stories. Vertical cracks near downspouts, planters, or hose connections may be related to localized saturation and freeze-thaw cycling. Spalled faces, particularly in freeze-prone climates, commonly occur where water sits in pockets—low mortar joints, undersloped sills, or tight contact with horizontal concrete that traps water.
Expert Tip #2: Follow Water With a “Dry Day / Wet Day” Walk-Through
Inspect the same masonry on a dry day and within 24 hours of a significant rain. Compare:
- Where darkening appears and how long it lingers
- Whether staining is tied to joints, penetrations, or material transitions
- If water is draining where it’s intended (through weeps, over flashings)
Photograph both conditions and overlay notes. This practice turns vague observations (“it gets damp here”) into actionable patterns you can address with detailing, drainage paths, or targeted repairs.
Movement Joints and Restraints: Planning for Masonry to Move
All masonry moves—because of temperature, moisture changes, foundation settlement, and structural deflection. The question isn’t whether it will move, but where and how much. When we don’t plan for that, the wall answers with random cracks.
Control joints in CMU and expansion joints in brick relieve horizontal movement. Without them, stress finds weak points: around windows, at corners, and where different materials meet. Telltale cracks often form at 45 degrees from corners of openings or at sharp re-entrant corners in the plan.
Improper restraint is just as problematic as missing joints. When masonry is locked at both the top and bottom (for example, hard-bolted to a stiff roof diaphragm and also fully grouted into a foundation), it can’t accommodate flexing and differential movement. This restraint may not cause a problem immediately, but as thermal cycles accumulate, microcracks form and gradually coalesce.
Pay particular attention to transitions: masonry meeting concrete frames, steel frames, wood framing, or existing buildings. These interfaces require slip connections, soft joints, or compressible fillers so that differential movement doesn’t shear masonry units or crush sealant lines.
Expert Tip #3: Pre-Map Joints on Elevations Before Any Field Layout
Before string lines go up, overlay your control and expansion joints on the architectural elevations and section details. Check:
- Maximum joint spacing per code and manufacturer guidance
- Joint alignment with openings, corners, and structural breaks
- How joints terminate at parapets, foundations, and adjacent assemblies
Then walk the site with these marked drawings. Verify that real-world elements (like hidden pilasters, embedded columns, or joint locations in the structure) match the plan. Adjust on paper before cutting in the field—moving a joint a few inches on a drawing is far cheaper than reworking several courses of installed masonry.
Interface Details: Where Masonry Meets Other Materials
Many masonry problems aren’t “masonry problems” at all—they’re interface problems. The weak points usually sit where brick, block, or stone meets windows, doors, siding, roofing, or concrete flatwork.
Around openings, flashing and end dams control water entry, while proper backer rod and sealant joints manage movement. When painters or caulkers bridge masonry to rigid frames without the right joint design, these “stuck” interfaces often crack or open within a few seasons. You’ll see meandering hairline cracks along one side of a window or diagonal splitting from the corner.
At grade, masonry should not be buried in soil or heavy mulch. Trapped moisture and freeze-thaw action accelerate deterioration, and pests use hidden cavities as pathways. A visible break—gravel strip, drip edge, or concrete curb—creates a drying zone and inspection line.
Roof and parapet interfaces need particular care. Poorly detailed copings, missing reglets, and short flashing legs allow water into the top of walls, where it’s hardest to see. Inside corners and transitions (like a step-down in parapet height) often leak first.
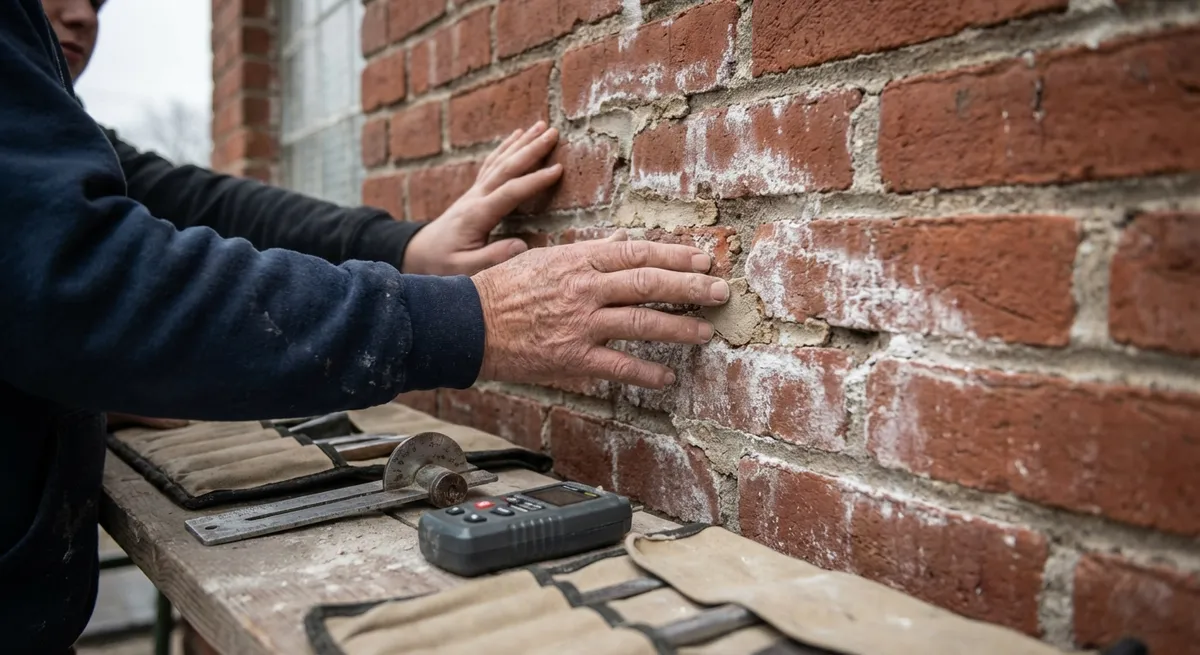
Expert Tip #4: Use the “Finger Test” on Every Transition
On inspections or punch walks, physically run your finger along every material transition:
- If you feel a hard, continuous bond with no obvious joint or sealant, assume movement and water are not properly accommodated.
- If the joint is brittle, cracked, or missing backer behind sealant, flag it.
- If you can’t tell where water is expected to exit at that interface, the detail is suspect.
This tactile check forces you to think about both movement and drainage at each junction, rather than relying on appearance alone.
Practical Quality Checks Before You Call It “Done”
Whether it’s a new build, a retrofit, or a repair, closing out masonry work should be more than a quick visual once-over. A structured, field-friendly checklist protects you from callbacks and helps clients understand what “good work” actually looks like.
Start with alignment and plane. Check coursing with a level and long straightedge, not just eyeballing. Irregularities might point to hidden issues—like foundations that are out of level, inconsistent joint thickness compensating for layout errors, or misaligned embeds creating point loads.
Next, examine joints and terminations. Mortar joints should be full, properly tooled, and free of visible voids. At the top of walls, check that copings, sealants, and flashings are installed exactly as detailed, not “field interpreted.” At the base, verify that weeps are clear, grade slopes away, and there’s no direct masonry-to-soil contact unless specifically designed for it.
Finally, pay attention to compatibility: mortar type matched to unit, reinforcement corrosion protection, anchor and tie type appropriate to the backup structure, and sealants compatible with masonry and adjacent materials. Many premature failures stem from combining good products that were never meant to work together.
Expert Tip #5: Build a Simple “First Panel” Standard on Every Project
Before full production begins, construct and approve a representative section of wall—a mockup or “first panel”—that includes:
- Typical coursing and joint tooling
- At least one opening with flashing, lintel, and sealant
- A base condition and any planned control/expansion joint
Review and sign off on this panel with all stakeholders (owner, architect, GC, or for DIY, document for yourself with detailed photos). Use it as the on-site standard for workmanship, layout, and detailing. This single step aligns expectations and gives you a clear reference for evaluating the rest of the work.
Conclusion
Reliable masonry isn’t just about mixing mortar correctly or laying straight courses. It’s about understanding how loads move, how water behaves, how materials expand and contract, and how all those forces show up in the field as subtle clues—stains, cracks, bulges, or stubborn damp spots.
By tracing load paths, reading moisture patterns, deliberately planning movement joints, scrutinizing interfaces, and formalizing your quality checks, you move from reacting to problems to preventing them. The five expert habits in this guide are small shifts in how you observe and plan, but they compound into masonry work that performs predictably, ages gracefully, and reflects well on everyone involved—from the architect and GC down to the last person on the scaffold.
Sources
- [International Code Council – International Building Code (Masonry Provisions)](https://codes.iccsafe.org/content/IBC2021P1) – Official building code text that defines structural, fire, and durability requirements for masonry construction.
- [The Masonry Society – TMS 402/602 (Building Code Requirements and Specification for Masonry Structures)](https://masonrysociety.org/product/tms-402-602-22-building-code-requirements-and-specification-for-masonry-structures-2022/) – Primary U.S. reference for masonry design, construction, and quality assurance, including movement joints and reinforcement.
- [Portland Cement Association – Efflorescence: Causes, Prevention, and Remediation](https://www.cement.org/learn/concrete-technology/durability/efflorescence-what-why-how) – Technical overview of efflorescence, moisture movement, and practical strategies to limit salt deposits.
- [Brick Industry Association – Technical Notes on Brick Construction](https://www.gobrick.com/technical-notes) – Detailed guides on flashing, weeps, moisture control, expansion joints, and interfaces for brick masonry.
- [University of Florida IFAS Extension – Diagnosing and Repairing Masonry Cracks](https://edis.ifas.ufl.edu/publication/AE563) – Educational resource explaining common crack patterns, likely causes, and repair considerations for masonry walls.