Below are five expert habits that improve your eye for masonry problems and give you clear next steps when you find them.
Know What Healthy Masonry Actually Looks Like
You can’t catch problems early if you don’t have a mental picture of what “right” looks like.
On a sound wall, mortar joints are full, tight against both units (brick/block/stone), and relatively uniform in thickness. Hairline cracks may exist in older work, but they’re usually short, stable, and not clustered in structural patterns (like large stair-step lines). Brick faces should be solid, with no widespread flaking, spalling, or deep surface erosion.
Make a habit of visually “calibrating” yourself with good examples. When you walk a jobsite, intentionally study sections you know are performing well: note joint profiles, joint hardness, color consistency, and the general alignment of the units. Pay attention to how proper weep holes, flashing, and copings are detailed.
For DIYers, this might mean walking your own home and nearby buildings in good condition, taking close-up photos, and comparing them to areas you suspect are failing. For pros, this calibration step is useful when you arrive at any project: you want a known-good reference on that specific building before you start diagnosing problems elsewhere.
Once you know how healthy masonry presents, subtle changes—like light mortar powdering, slight bulging, or hairline cracks across multiple courses—start to stand out immediately.
Create a Repeatable Inspection Routine (Not Just a Quick Look)
The most useful habit isn’t a specialty tool—it’s a routine. Professionals often follow a top-down inspection pattern; DIYers should do the same so nothing gets missed.
A practical exterior masonry inspection sequence:
- Start at the top: Look at parapets, copings, chimney caps, and the top courses of brick or stone. Failures up high often drive water into the wall below. Check for cracked caps, open joints on copings, missing flashing, or deteriorated sealant at roof-to-wall intersections.
- Scan full wall faces: Stand back to see the whole elevation. Look for bulges, waves, or areas that seem “softer” or less crisp in shadow. Changes in brick color or mortar tone sometimes indicate repairs, moisture exposure, or different ages of construction.
- Check details and openings: Around windows, doors, and vents, inspect the masonry lintels, head joints, and vertical joints. Look for stepped cracking from corners, rust jacking from steel lintels, or joint separation at frames and trim.
- Drop to grade level: Inspect the base of the wall and any exposed foundation. Note joint erosion, efflorescence (white salts), and soil or mulch piled against brick. Pay special attention to transitions from brick to concrete, or from wall to paved areas.
- Look inside where you can: In basements or crawlspaces, inspect interior faces of masonry walls for damp areas, efflorescence, or cracks that mirror exterior defects. Interior symptoms often confirm whether a problem is structural, moisture-related, or both.
Use a small inspection checklist, even if it’s just a note-taking app on your phone. Record where you see issues (e.g., “South wall, near second-floor window, stepped cracks from lintel to sill”) and snap photos. For contractors, these become part of your documentation and proposal. For homeowners, you build a record you can compare year to year.
Read Cracks, Efflorescence, and Stains as Clues—Not Just Eyesores
Not all cracks or stains are emergencies; some are normal aging. The professional advantage is learning what each sign typically means so you choose the right response.
Cracks
- Vertical cracks near corners or mid-wall can be related to differential settlement or thermal movement. Long, continuous vertical cracks in load-bearing walls should be evaluated by a structural professional.
- Stepped cracks along mortar joints (often diagonal or stair-step) usually indicate movement in the foundation or support below. They’re common around openings and at transitions between different foundation conditions.
- Hairline shrinkage cracks in mortar alone, especially in newer work, may be cosmetic if they don’t widen or extend over time. Mark their ends with pencil and date them to see if they’re growing.
Use simple tools: a crack gauge card, calipers, or even feeler gauges can help track whether cracks are active. Take measurements and photos at set intervals (e.g., every 3–6 months).
Efflorescence (white, powdery deposits)
Efflorescence itself isn’t usually harmful, but it tells you that water is moving through your masonry and dissolving salts. The focus should be on the water source, not just cleaning the surface. Check:
- Gutters, downspouts, and splash blocks for overflow near affected areas
- Grading that slopes back toward the wall
- Missing or blocked weep holes
- Cracked caps, parapets, or sealants above
Rust stains and dark streaks
Rust stains around lintels, anchors, or embedded metals often suggest corrosion. As steel rusts, it expands, putting pressure on surrounding masonry and causing cracking or spalling. Dark streaks or vertical stains can also indicate chronic water paths; trace them upward to find the entry point.
Approach each defect as a symptom with a root cause. Professionals win work (and prevent liability) by diagnosing the cause rather than just treating the visible damage. DIYers save time and money by doing the same—surface patching without addressing moisture or movement almost always fails early.
Test Before You Touch: Mortar, Moisture, and Movement
Before you jump into any repair—whether you’re an experienced mason or a homeowner with a pointing trowel—spend a few minutes testing the existing conditions. This habit prevents the classic mistake: using the wrong materials or methods on the wrong problem.
Check mortar hardness and type
Use a simple scratch test with a screwdriver or masonry nail on both the brick and the mortar:
- If the mortar scratches more easily than the brick, that’s usually good—mortar should generally be softer than the units, especially in historic work.
- If the mortar is hard as stone and the brick is relatively soft (common in older buildings where hard Portland mixes were added later), aggressive repointing with modern high-strength mortar could accelerate brick damage.
On historic or unknown masonry, pros often send samples to a lab for mortar analysis. DIYers can at least match hardness and color, and when in doubt on older brick, lean toward a lower-strength mortar (like a Type N instead of Type S), provided it aligns with local code and manufacturer guidance.
Evaluate moisture content
If you have access to a non-invasive moisture meter, check suspect interior surfaces behind exterior masonry. Elevated readings near cracks, efflorescence, or stains help confirm active moisture problems. Without tools, use practical indicators:
- Damp smells in basements, even when surfaces feel dry
- Condensation on cooler masonry surfaces
- Localized paint peeling or blistering on interior side
Look for active movement
Place a small, dated pencil mark across fine cracks or install simple crack monitors on larger ones. If gaps widen, even slightly, over months, you’re dealing with active movement. In such cases, pros should involve an engineer for structural or foundation issues, and DIYers should avoid “locking” moving joints with rigid, brittle repairs.
This test-before-touch mindset reduces rework. Professionals document their findings; homeowners keep a simple log. In both cases, decisions become evidence-based instead of guesswork.
Match the Repair to the Problem, Not Just the Symptom
Once you’ve identified what’s going wrong, your repair choice should be specific—not generic “patching.”
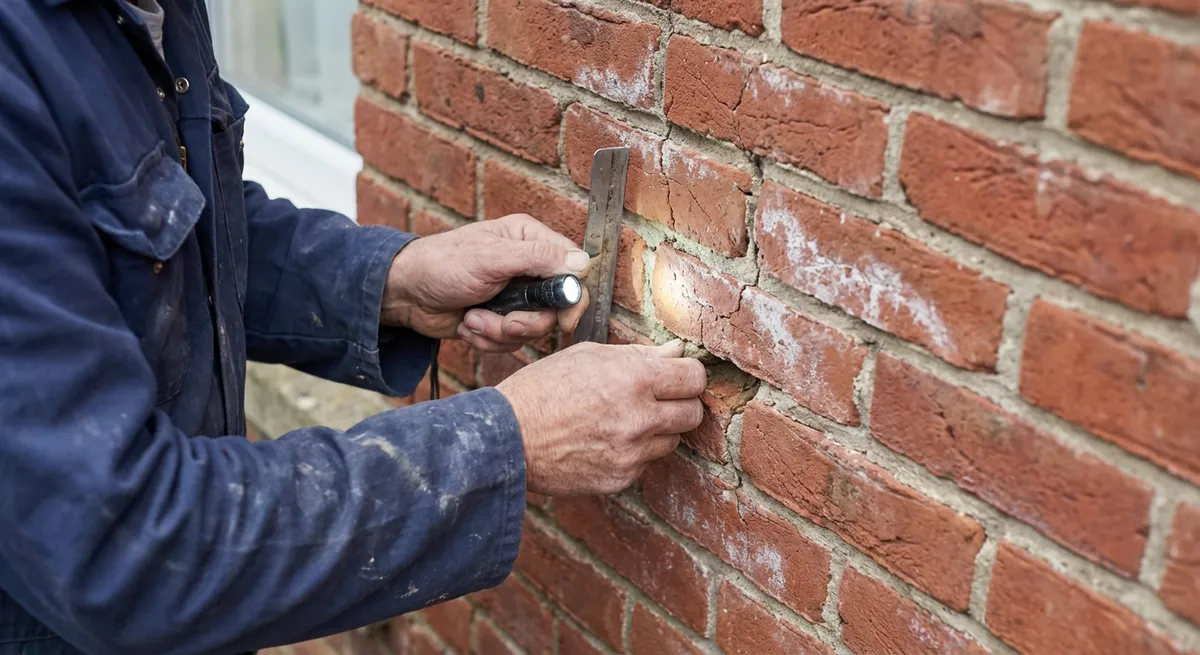
For minor mortar deterioration (repointing):
- Remove only failed mortar to about 2–2.5 times the joint width, taking care not to damage brick edges.
- Use hand tools or specialty saws with depth control; avoid high-speed grinders on historic or soft masonry unless you’re very experienced.
- Clean joints of dust and debris, lightly dampen them (not soaking), then place new mortar in layers, compacting thoroughly.
- Match joint profile and finish to the existing work so the repair doesn’t create water-catching ledges or obvious cold joints.
For moisture-related issues:
- Fix the source first: correct grading, extend downspouts, repair flashing, and re-seal or replace failed caps and copings.
- Consider adding or clearing weep holes in veneer walls where allowed and appropriate.
- Use breathable water-repellent treatments only when the masonry is dry, compatible, and when you’re sure you’re not trapping moisture inside the wall.
For localized cracking from movement:
- Stabilize structure or support where possible (e.g., foundation repair, lintel replacement) before cosmetic work.
- Where movement is likely to continue slightly (thermal, minor settlement), consider flexible sealants in selected joints or constructing proper control/expansion joints rather than rigid mortar in every crack.
- Only perform cosmetic crack filling alone when you’ve confirmed that the movement has stopped or is minimal and stable.
For rusting lintels or embedded steel:
- Clean accessible steel to sound metal where feasible and apply appropriate protective coatings, or replace severely deteriorated members.
- Maintain adequate bearing at ends and ensure that there is proper flashing and drip edges to protect the lintel and the wall below.
- Rebuild masonry where necessary after steel is addressed, not before.
Professionals should turn these decisions into clear scopes of work and explain to clients why each action is necessary. DIYers should be realistic: structural movement, significant bulging, or chronic water entry often justify bringing in a qualified mason or engineer rather than scaling up home repairs beyond a safe limit.
Conclusion
Catching masonry problems early isn’t about having the fanciest tools—it’s about habits: knowing what good work looks like, following a consistent inspection routine, reading visible signs as clues, testing before you touch, and tailoring each repair to the specific cause.
For contractors, these habits reduce call-backs, build trust, and set your work apart as durable and well-thought-out. For homeowners and DIYers, they turn your occasional walk around the property into a preventive maintenance step that protects both structure and budget.
Start by picking one habit from this list—perhaps a quarterly top-down inspection of your masonry—and do it consistently. Over time, you’ll develop the eye and judgment that separates guesswork from professional-level care.
Sources
- [U.S. General Services Administration – Preservation Brief 2: Repointing Mortar Joints in Historic Masonry Buildings](https://www.nps.gov/tps/how-to-preserve/briefs/2-repoint-mortar-joints.htm) - Detailed guidance on evaluating existing mortar and performing compatible repointing.
- [National Park Service – Preservation Brief 1: Assessing Cleaning and Water-Repellent Treatments for Historic Masonry Buildings](https://www.nps.gov/tps/how-to-preserve/briefs/1-cleaning-water-repellent.htm) - Explains moisture behavior in masonry and appropriate treatment selection.
- [Federal Emergency Management Agency (FEMA) – Homebuilder’s Guide to Earthquake-Resistant Design and Construction](https://www.fema.gov/sites/default/files/2020-07/fema-232.pdf) - Offers insight into crack patterns and structural movement in masonry under load.
- [Brick Industry Association – Technical Notes on Brick Construction](https://www.gobrick.com/technical-notes) - Provides best practices on brickwork, movement joints, lintels, and water management details.
- [Portland Cement Association – Concrete Masonry Crack Control](https://www.cement.org/learn/concrete-technology/concrete-construction/cracks-in-concrete) - Discusses causes and control of cracking in masonry and concrete, relevant to diagnosing field issues.