This guide focuses on practical, field-tested ways to tighten up and strengthen existing masonry so the building feels quieter, drier, and more solid underfoot. The five expert tips below are chosen for owners, facilities managers, and serious DIYers who want measurable improvement without turning the property into a long-term jobsite.
Start With a Wall “Health Check” Instead of Chasing Individual Cracks
Before buying materials or planning repairs, step back and treat the building envelope as a system. The goal is to understand where the wall is doing its job and where it’s falling behind.
Walk the exterior slowly and look for:
- Patterned cracking
- Stair-step cracks in brick or block often trace settlement or differential movement.
- Vertical cracks near corners or openings can indicate stress concentrations.
- Horizontal cracks in the middle of walls sometimes relate to out-of-plane movement or corroding reinforcement.
- Moisture signatures
- Efflorescence (white, salty dust) shows that water is moving through the wall and evaporating at the surface.
- Dark, damp-looking areas after rain reveal water entry points.
- Peeling paint or bulging plaster inside often lines up with exterior moisture pathways.
- Movement and separation
- Gaps opening at window and door heads or sills.
- Separation at the junction between masonry and wood framing, porch columns, or chimneys.
- Out-of-plumb walls when viewed from the corners (sight down the wall like checking a board for straightness).
Document everything with photos and notes before touching a tool. For most owners, this is also the right moment to:
- Check the age and type of masonry (solid brick, brick veneer, concrete block, stone with backup, etc.).
- Confirm whether the building is loadbearing masonry or veneer by reviewing drawings (if available) or having a professional inspect key areas.
- Flag anything that looks structural—wide, changing cracks; bowing walls; sagging lintels—for a licensed engineer or qualified mason to evaluate.
This “health check” keeps you from doing cosmetic patching where there’s a structural or moisture problem upstream. The quiet, solid feel you’re after comes from dealing with causes, not just symptoms.
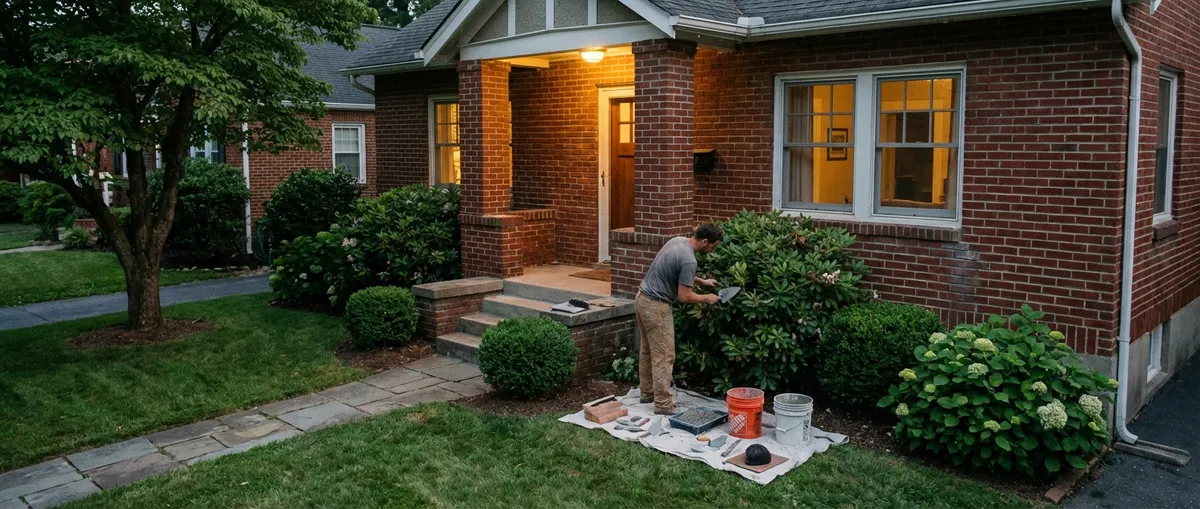
Expert Tip 1: Repoint Like a Pro, Not a Painter With a Trowel
Repointing (renewing the outer portion of mortar joints) is one of the most effective ways to tighten older masonry, but it’s also one of the easiest to do wrong. Poor repointing can trap moisture, spall brick, and visually scar historic walls.
Key steps to do it correctly:
Match the mortar, don’t overpower the brick
- Pre-1900 and many early-20th-century walls used softer, lime-rich mortars. - Modern high-strength Portland cement mortars (Type S, M) can be too hard and too impermeable, causing bricks or stones to crack instead of the joint. - When in doubt, use a mortar with equal or slightly lower strength and stiffness than the existing units. For historic brick, lime-based or NHL (natural hydraulic lime) mortars are often appropriate; for newer construction, a Type N mix is commonly used.
Cut joints properly — don’t smear over old mortar
- Rake out deteriorated mortar to about 2–2.5 times the joint width, or until sound, solid mortar is exposed. - Use hand tools or low-vibration power tools with depth control to avoid damaging brick edges. - Remove loose dust and debris with a stiff brush and compressed air or vacuum.
Pre‑dampen the joints
- Masonry should be damp—but not dripping—before repointing to prevent rapid suction that weakens bond and causes premature drying. - In hot or windy conditions, lightly mist the area several times ahead of work.
Pack, then tool, the joints
- Press mortar firmly into the back of the joint in lifts (for deep joints), compacting as you go. - Keep the joint slightly proud, then tool it once it’s thumbprint hard to your desired profile (concave, V, or flush for most exterior work). - A well-tooled joint sheds water better and lasts longer than a rough, struck-over patch.
Protect the work while it cures
- Shield new joints from direct sun, wind, and driving rain for at least 48–72 hours. - In cooler weather, keep the work above the recommended minimum temperature (check your specific mortar product), and avoid freezing conditions.
Thoughtful repointing provides immediate visual improvement and, more importantly, restores the wall’s ability to shed water and resist wind without brittle spots or hairline fissures.
Expert Tip 2: Tighten Openings With Better Lintels and Anchoring
Windows, doors, and miscellaneous penetrations are where many older masonry walls first show their age. Upgrading the support and anchorage around these openings is a high‑impact way to eliminate rattles, drafts, and seasonal cracking.
Upgrade or stabilize lintels
- Inspect existing lintels for rust, flaking, sagging bricks above, or cracks at the lintel ends.
- Steel lintels: when rusting, expand and jack up brick courses, opening cracks above the window head. If corrosion is advanced, replacement is often better than partial patching.
- Replacement approach (typically for pros or advanced DIYers):
- Needle-shore or brace above the opening if needed.
- Remove bricks above the existing lintel in controlled sections.
- Install a properly sized, primed, and painted or galvanized steel lintel (or engineered alternative) with adequate bearing at each end (commonly at least 4"–6", verify per code or engineer).
- Rebuild the brickwork and repoint carefully.
Improve window and door anchoring
- Where masonry surrounds a wood or vinyl window, ensure there is solid blocking or bucks to fasten into.
- Replace failing spray foam and caulk with a more disciplined setup:
- Backer rod and high-quality sealant at the exterior perimeter joint.
- Proper shims and mechanical fasteners (screws into framing or anchors into masonry).
- Low-expansion foam or mineral wool for air and thermal control in the cavity.
A properly supported, well-anchored opening reduces seasonal movement, cuts down on drafts and noise, and prevents the hairline cracking that often radiates from poorly detailed windows and doors.
Expert Tip 3: Add Subtle Drainage Paths Instead of Relying on Sealers
Trapping water in a masonry wall is one of the fastest ways to make a solid building feel damp, musty, and unstable over time. While sealers can be useful, they are not a fix-all. Controlled drainage is more reliable and durable.
Start at the top
- Confirm that gutters, downspouts, and scuppers are working and not dumping water onto walls or near foundations.
- Check that parapet caps, copings, and chimney crowns are intact and sloped to drain. Minor cracks in these elements admit a surprising amount of water.
Create or restore weep paths
- In brick veneer or cavity wall construction, check for weep holes at the base of the wall and above openings.
- If they are clogged or were never provided, consult codes and manufacturer guidelines to determine spacing (commonly 24"–33" o.c. for many veneers) and detail.
- Modern retrofit options include through-wall flashing and proprietary weeps that can be inserted in saw-cut joints by experienced masons.
Regrade and manage splashback
- Ensure soil and hardscape slope away from the building at least 5% for the first several feet.
- Avoid high mulch or soil lines that bridge the base of the wall and promote wicking into brick or block.
- Where concrete or pavers meet the wall, seal and detail the joint to limit water entry while still allowing modest movement.
When water has a clear, low-resistance way to exit or bypass the wall, the entire structure behaves more predictably. Paint and sealers can then be used strategically, not as the only defense.
Expert Tip 4: Use Interior Retrofits to Quiet and Stabilize Without Rebuilding Walls
You don’t always need to tear down or reface masonry to make an older building feel more solid. Thoughtful interior upgrades can dramatically improve acoustics, comfort, and perceived sturdiness while preserving exterior character.
Quiet the wall from the inside
- Add resilient channels and a new layer of drywall over interior masonry surfaces where noise is an issue, particularly on party walls or near traffic.
- Use sound-rated insulation (such as mineral wool) in stud furring cavities to absorb airborne sound.
- Keep penetrations (recessed lights, outlets) organized and sealed; each hole is a weak point for both sound and air leakage.
Stabilize surfaces without overloading
- For crumbling plaster-on-masonry, consider plaster consolidation or skim-coating with suitable basecoat and finish plasters instead of replacing everything with heavy cement-based mixes.
- When furring out walls for insulation, use masonry screws or anchors sized appropriately so furring strips are secure but not overstressing the masonry units.
Address thermal comfort
- If fully insulating solid masonry walls is impractical, even partial interior insulation—such as insulated window shades, thermally improved storm windows, or insulated interior shutters—can make rooms feel more stable in temperature.
- Small comfort gains significantly change how “solid” a room feels, especially in winter or shoulder seasons.
Interior retrofits are often easier to phase, budget, and reverse if needed, making them ideal for occupied buildings or historically sensitive facades.
Expert Tip 5: Upgrade Hardware and Contact Points Where You Actually Touch the Building
People judge how “solid” a building feels through touch: how a door closes, how a railing resists movement, how steps sound underfoot. Small masonry-related upgrades in these contact points can transform day-to-day perception.
Firm up steps and landings
- Inspect masonry stairs and stoops for loose treads, rocking units, and hollow-sounding spots.
- Rebed loose bricks, stone treads, or pavers using an appropriate mortar or thinset over a sound base.
- Address settlement at the base—sometimes as simple as packing and compacting gravel and re-laying the lowest courses.
Solidify railings and posts
- Where metal railings are embedded in masonry, rust can expand and crack the surrounding material, creating wobble.
- Clean out deteriorated pockets, remove rust, and re-anchor with appropriate epoxy anchors or mechanical fasteners into sound masonry or concrete.
- Use non-shrink grout or high-strength repair mortars to rebuild surrounding pockets, following manufacturer instructions for mixing and curing.
Refine thresholds and transitions
- Upgrade door thresholds where masonry meets wood or metal: cleanly cut and reset sills to be level, well-supported, and caulked where appropriate.
- Improve walkway-to-wall transitions (e.g., at garage doors, garden walls, or porch edges) to eliminate trip points and rattling joints.
These touchpoint improvements may not be dramatic visually, but they change how the building “feels” every time someone enters, leans, or walks across it. Combined with sound walls and controlled moisture, they complete the impression of a quiet, sturdy structure.
Conclusion
Older masonry doesn’t need to be flawless to feel solid and dependable. What matters is whether the critical parts of the system—mortar joints, openings, drainage, interior surfaces, and touchpoints—are working together instead of fighting each other.
By:
- Assessing wall health before starting repairs,
- Repointing with compatible mortars and proper technique,
- Prioritizing drainage over heavy-handed sealing,
- Leveraging interior retrofits for comfort and acoustics, and
- Tightening the hardware and surfaces you interact with daily,
you can extend the life of existing masonry and dramatically improve how the building feels from the inside out.
Approach each upgrade deliberately, follow manufacturer and code guidance, and bring in a structural engineer or experienced mason when cracks, movement, or loads are in question. The result is the kind of quiet, confident solidity that makes a building pleasant to live in and easier to maintain for decades to come.
Sources
- [National Park Service – Preservation Brief 2: Repointing Mortar Joints in Historic Masonry Buildings](https://www.nps.gov/tps/how-to-preserve/briefs/2-repoint-mortar-joints.htm) - Detailed guidance on proper mortar selection and repointing techniques for existing and historic masonry.
- [Brick Industry Association – Technical Notes on Brick Construction](https://www.gobrick.com/technical-notes) - Covers brick veneer design, weep systems, flashing, lintels, and best practices for durable brickwork.
- [U.S. Department of Energy – Energy Saver: Air Sealing Your Home](https://www.energy.gov/energysaver/air-sealing-your-home) - Explains principles of air leakage control around openings and intersections that apply directly to tightening masonry buildings.
- [U.S. General Services Administration – Historic Preservation Technical Documents](https://www.gsa.gov/real-estate/historic-preservation/historic-preservation-policy-tools/preservation-technical-documents) - Includes guidance on masonry, moisture management, and repair strategies for existing federal buildings.
- [International Code Council (ICC) – International Residential Code (IRC) Overview](https://www.iccsafe.org/advocacy/international-residential-code-irc/) - Reference point for lintel bearing, anchorage, and other structural and envelope requirements applicable to residential masonry work.