This guide focuses on five expert-level habits that improve accuracy, appearance, and durability without adding much cost. Each tip is practical, field-ready, and designed to help your masonry look intentional—not improvised.
Tip 1: Build a Reliable Layout Before You Lay the First Unit
Clean, straight masonry starts long before you open a bag of mortar. Professionals invest time in layout because errors compound quickly once you begin stacking.
Start by snapping clear, contrasting chalk lines for both your wall alignment and key openings (doors, windows, control joints). Use a quality line that’s UV-resistant if working outside. Double-check the base with a level or laser: if the foundation or slab is out of level, decide whether to correct it with a leveling course or cut units to suit. Don’t assume the concrete is perfect—measure and verify.
Dry-lay a short run of units at corners and intersections to test bond patterns. This previews where you might be forced into slivers or awkward cuts. Adjust head joint widths slightly (within manufacturer and code guidance) to center units around openings or to avoid very narrow pieces. Mark critical reference points on the base (like the center of openings) and transfer them up with a plumb bob, level, or laser to keep courses aligned vertically.
Finally, commit to a system for checking plumb, level, and square as you lay: for example, corner blocks checked every course, a string line for horizontal alignment, and diagonal measurements for squareness on larger projects. A few minutes of layout discipline can prevent hours of grinding, re-setting, or trying to “hide” alignment issues later.
Tip 2: Treat the Mortar Mix Like a Precision Component, Not Filler
Mortar is not just glue—it’s a structural and aesthetic element that needs consistent performance. Pros keep their mix proportions, water content, and working time under tight control.
Choose the right mortar type for the job: for example, Type N is common for above-grade, non-load-bearing walls and veneers, while Type S offers higher compressive strength and better suitability for retaining walls or below-grade work (always confirm with applicable codes and manufacturer guidance). If you’re using preblended bags, measure water by volume, not guesswork. Record the exact amount used for the first batch so you can match it consistently.
Aim for a workable, plastic mix that holds its shape on the trowel without slumping but is soft enough to spread easily. Overly wet mortar is easy to spread but weakens the joint and increases shrinkage and efflorescence risk. Too dry, and you’ll fight to bed units properly, leaving voids that compromise bond and insulation.
Mix in smaller batches that you can place within the recommended pot life (often around 2–2.5 hours, but check the manufacturer’s data). Re-tempering—adding water to stiffening mortar—should be limited and only done within the product’s guidelines. If the mortar has begun to set or has been sitting in hot, dry conditions, discard it instead of trying to revive it.
For consistency, especially on visible facework, assign specific roles on site: one person focuses on mixing and delivering mortar, others lay. This reduces variation in mix quality, color, and performance over the course of the day.
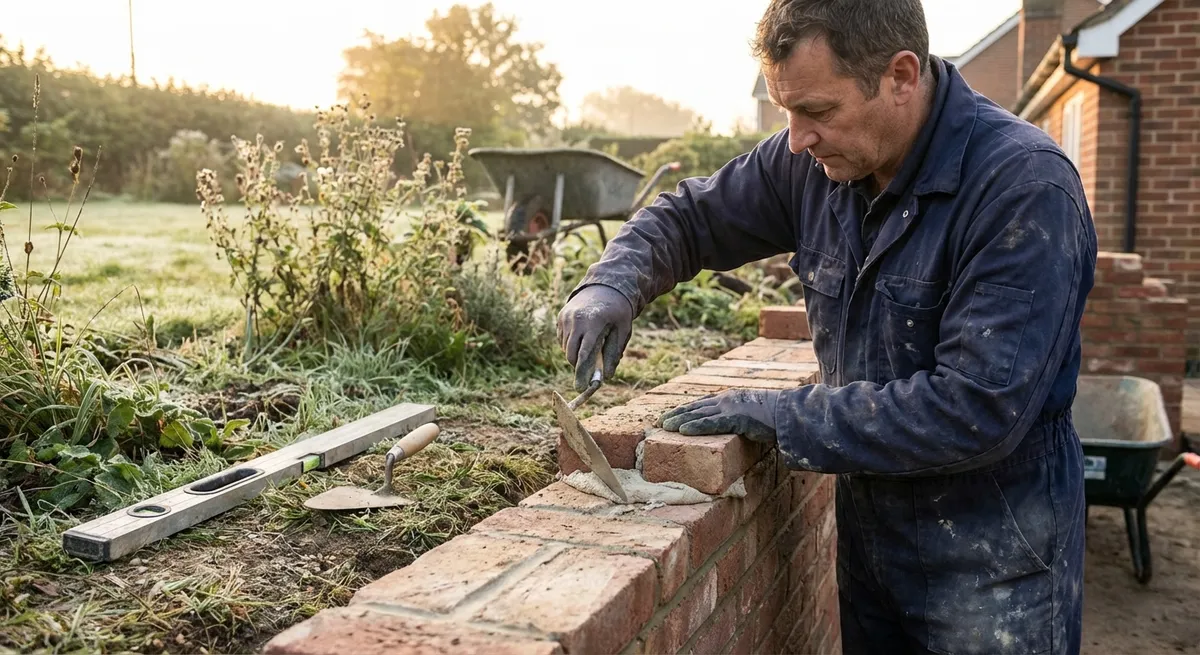
Tip 3: Use String Lines and Story Poles to Control Alignment and Course Heights
Straight, even courses and consistent joint heights are the hallmark of professional masonry. Achieving that look depends heavily on a string line and some form of story pole or gauge.
Set solid corner leads first—two or more courses built accurately at the ends or intersections of a wall. These become your “stations” for the string line. Use line blocks, line stretchers, or brick line pins that grip each corner without moving under tension. Pull the line just clear of the units (often 1–2 mm out) so it doesn’t get smeared with mortar and lose accuracy.
Work to the line, not over it. Each brick or block should just touch or come very close to the line; if you find yourself pushing units into the line repeatedly, you’re likely introducing a bow. Check the line periodically for sag. On long runs, add an intermediate line pin or a brick turned “on edge” under the line at midspan to keep it straight.
To maintain consistent course heights, use a story pole or a marked level with course lines penciled in, reflecting unit height plus intended bed joint. Transfer these measurements to corners as you build, and periodically check that the actual courses are matching your gauge. This is especially vital around windows, doors, and other horizontal alignments where mismatched course heights become very obvious.
On visible facades, take an extra moment every few courses to step back 10–15 feet and sight along the wall. A slight curve or lift is often easier to see from a distance than up close, allowing minor corrections before they become pronounced.
Tip 4: Refine Joint Technique for Better Durability and Appearance
Joint quality is where professional masonry often reveals itself. Even if the units are nicely aligned, poorly formed or inconsistent joints can make a wall look rushed and can invite moisture problems.
Decide on your joint profile (concave, V, raked, flush, etc.) based on design, exposure, and local best practice. Concave joints are common because they compact the mortar, shed water well, and tend to resist freeze-thaw damage. Whatever profile you select, use the correct jointer tool sized to your joint thickness.
Let the mortar set to a “thumbprint-hard” state before tooling—it should be firm enough that your finger leaves only a shallow dent, not a deep impression. Tooling too early can smear mortar over the face of the units; too late, and you’ll get crumbly, weak joints with poor bond. Work in logical sections so that by the time you finish laying, the earliest joints in that section are ready for tooling.
Tool joints in a consistent direction (usually from one end of the wall to the other) and clean the tool regularly. This gives more uniform compaction and texture. Brush the wall lightly after tooling to remove loose crumbs, but avoid aggressive brushing that drags mortar out of the joint.
On interior or architectural work, consider mock-ups: build a small sample panel to test joint profiles, color, and spacing under real lighting conditions. This helps both pros and DIYers lock in a standard before committing to an entire wall.
Tip 5: Protect Fresh Work and Plan for Real-World Conditions
Even perfectly executed masonry can be compromised if it isn’t protected while it cures. Professionals plan for weather, site traffic, and adjacent trades before the first unit goes down.
In hot, windy, or low-humidity conditions, masonry can dry too quickly, weakening bond and increasing cracking risk. Lightly dampen porous units in hot weather (following manufacturer guidance) and use windbreaks or shade cloths where feasible. In cold conditions, follow cold weather masonry practices: keep units and mortar above recommended minimum temperatures, avoid frozen substrates, and use insulated blankets or temporary enclosures when necessary.
Protect the top of newly built walls from rain with plastic sheeting or tarps, secured so water can’t pool and force its way into joints. Remove coverings when conditions are dry to avoid trapping moisture. At ground level, keep fresh work away from splashing mud and standing water, both of which can stain or erode green mortar.
Plan your sequence so that other trades or equipment don’t need to lean ladders, scaffolds, or materials against fresh walls. Where foot traffic is unavoidable, create clear access paths and mark “no contact” zones around new masonry.
Finally, respect curing time before washing, sealing, or painting. Mortar and grout continue to gain strength and shed moisture for days and even weeks. Check manufacturer and code recommendations for minimum cure periods before applying cleaners, sealers, or coatings to avoid softening joints or trapping moisture that can cause efflorescence or spalling later.
Conclusion
Professional-looking masonry isn’t about working faster or buying the most expensive tools. It’s about consistent control: of layout, mix, alignment, joints, and protection as the work cures. By tightening up these five areas—layout precision, mortar management, line and gauge control, joint craftsmanship, and real-world protection—you create walls that not only look sharp on day one but also hold their shape, color, and performance for years.
Whether you’re a contractor refining crew standards or a serious DIY builder learning to “think like a mason,” treating these details as non-negotiable habits will raise the quality of every project you touch.
Sources
- [Portland Cement Association – Mortar Types and Uses](https://www.cement.org/cement-concrete/paving/buildings-structures/masonry-mortar) - Technical overview of mortar types, selection, and performance characteristics
- [The Masonry Society – Cold and Hot Weather Masonry Construction](https://masonrysociety.org/resources/faq/cold-and-hot-weather-masonry-construction/) - Practical guidance on protecting masonry in challenging weather conditions
- [International Code Council – International Building Code (IBC)](https://codes.iccsafe.org/content/IBC2021P1) - Reference for structural and materials requirements affecting masonry construction
- [NCMA (National Concrete Masonry Association) – TEK Resources](https://ncma.org/resources/) - Technical notes on unit masonry design, construction practices, and detailing
- [Clemson University – Masonry Wall Construction Guide](https://www.clemson.edu/extension/hgic/plants/landscape/structural/hgic1716.html) - Educational overview of masonry wall construction steps, tools, and good practice