This guide walks through five field-tested repair practices that focus on what’s happening behind the scenes: moisture, movement, load paths, bond quality, and future access. Each tip is practical, repeatable, and designed to help your work last longer and generate fewer callbacks.
1. Start with Diagnostics, Not Tools
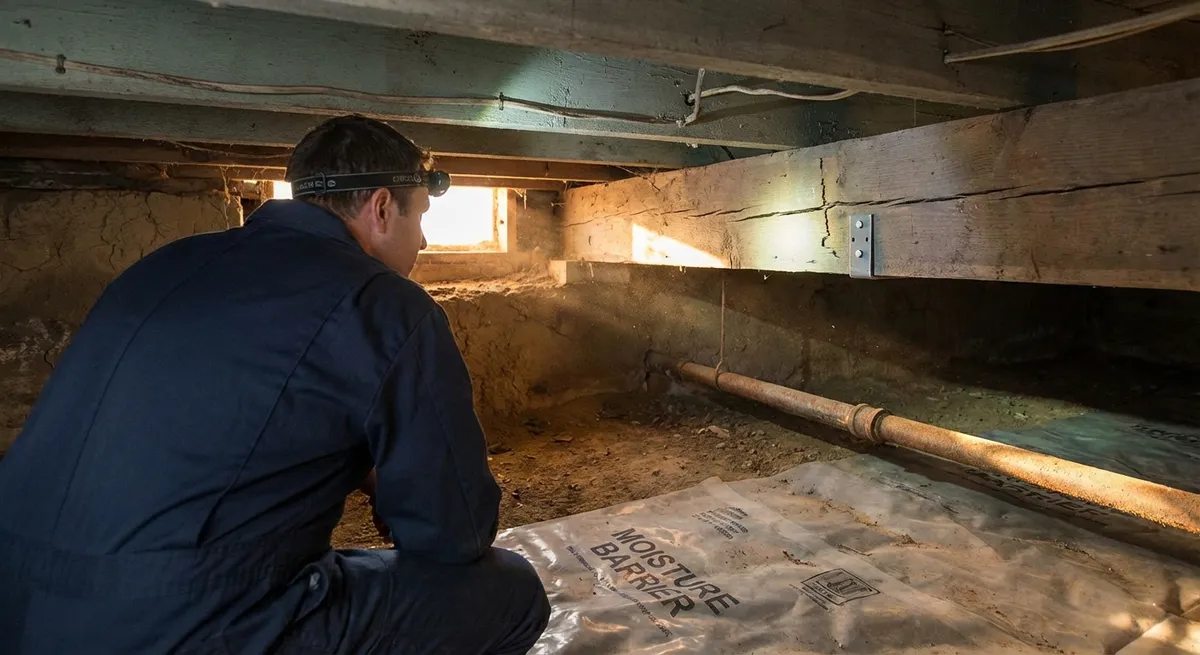
Most people reach for a grinder or chipping hammer first. The better move is to treat every repair like a small investigation.
Begin with three basic questions:
Where is the water coming from (if any)?
Track staining, efflorescence (white powdery deposits), rust, and damp spots. Check: - Grade slopes (does water run toward the structure?) - Gutters and downspouts (discharges near footings or walls?) - Nearby irrigation or hose bibs - Cracks that align with joints, penetrations, or previous patches
What’s moving—and where?
Use a straightedge, string line, or laser to check: - Vertical displacement across cracks (one side higher than the other) - Bowed or bulged walls - Repeated cracking in the same pattern (stair-step in masonry, drive-lane lines in slabs)
Is this structural, cosmetic, or functional?
- Structural: Movement, load-bearing elements, rebar corrosion, major settlement - Cosmetic: Hairline surface cracks, minor spalling with no movement - Functional: Water intrusion, air leakage, safety tripping hazards
Document what you see with photos and notes before you touch anything. On repeat work for the same client, those records help you show patterns (and justify scope and cost).
If you suspect significant movement, rebar corrosion, or load-bearing damage, pause and get an engineer’s input before committing to a repair approach. A small fee up front can prevent tearing out a failed “fix” later.
2. Match Materials to the Original – Not Just to the Shelf
Mis-matched materials are one of the fastest ways to turn a simple repair into a future failure. The goal is not “stronger than before.” The goal is compatible with what’s there.
Focus on three compatibility points:
Strength and stiffness (modulus)
- Old brick and lime mortar are softer and more flexible than modern Portland mixes. - Using a very strong, stiff patch on softer surrounding material forces cracks to relocate just outside your repair. - For historic or softer masonry, lean toward mortar mixes with lower compressive strength and higher flexibility (often lime-rich, lower cement content).
Thermal and moisture behavior
- Different materials expand and contract at different rates with temperature and humidity. - For concrete patches, use repair materials with similar coefficient of thermal expansion and similar moisture movement characteristics when possible. - For exterior masonry, prioritize vapor-permeable materials so moisture can escape instead of getting trapped behind your repair.
- Bond vs. compatibility balance
- You want good adhesion, but not at the expense of creating a rigid “island” surrounded by more flexible material.
- Use manufacturer-recommended bonding agents and primers, but still verify that the final composite behavior (old + new together) makes sense for that assembly.
Practical steps:
- For brick and block: Try to determine the original mortar type (color, hardness, age, region). When in doubt on older buildings, assume softer and avoid high-strength, high-cement mixes.
- For concrete: Check if the existing concrete appears high-strength (industrial floors, post-tensioned slabs, structural elements) or standard residential. Pick a repair mortar with similar design strength and application (horizontal/vertical/overhead).
When a perfect match isn’t possible, lean slightly weaker and more flexible for non-structural repairs. It’s easier to replace or touch up the repair area later than to address surrounding damage caused by an overly rigid patch.
3. Control Movement Before You Try to Hide It
If you don’t manage movement, your repair becomes a temporary bandage. Movement typically comes from:
- Settlement or heave (soil issues)
- Thermal expansion and contraction
- Shrinkage of materials
- Live loads (vehicles, equipment, people)
- Moisture cycles (wet–dry expansion)
Before installing any patch or repair:
Locate existing joints and discontinuities
- In slabs: control joints, expansion joints, cold joints. - In walls: vertical control joints in masonry, changes in material (brick-to-concrete, block-to-stone), openings (doors, windows).
Decide where you want future movement to occur
- For slabs, movement should concentrate at properly cut or tooled joints, not randomly across patched areas. - For walls, plan for vertical control joints where long runs of masonry or mixed materials meet.
Realign your repair with a movement strategy
- If a crack lines up neatly with where a control joint should have been, consider turning it into a deliberate joint rather than trying to erase it. - For recurring slab cracks, sawcut or widen along the crack and convert it into a semi-isolated joint, then fill with an appropriate joint sealant instead of rigid repair mortar.
Don’t bridge active movement with rigid materials
- Use flexible sealants or joint systems over known movement areas, especially where dissimilar materials meet (masonry to wood framing, slab to column base, wall to slab edge). - For dynamic joints, use backer rod and a sealant rated for expected movement (consult the product’s movement capacity, usually given as ± percentage).
If you see evidence of significant ongoing movement—like seasonal opening/closing of cracks beyond a few millimeters—plan for monitoring. Mark both sides of a crack and date them, or use crack gauges on critical work. A short observation period can keep you from installing a repair that will be torn apart by the next movement cycle.
4. Prepare the Substrate Like the Repair Depends on It (Because It Does)
Even premium repair materials will fail on a poorly prepared surface. Field experience consistently shows that surface prep is responsible for a large share of success or failure.
Key preparation steps that should not be skipped:
Remove all loose, unsound, or contaminated material
- Chip back to solid, sound base with well-defined edges. Avoid feather-thin transitions. - Remove oil, grease, curing compounds, paint, sealers, and biological growth from concrete or masonry with appropriate cleaning methods (mechanical, chemical, or both).
Create an appropriate surface profile
- For concrete, aim for a roughened surface (often similar to ICRI CSP 3–5, depending on product requirements) to give the new material something to grip. - Avoid polished or very smooth surfaces unless a specific bonding system is designed for that condition.
Address steel and embedded elements
- Expose corroded rebar or steel at least 1 inch (25 mm) behind rusted areas, or follow product/engineering guidance. - Mechanically clean rust back to near-bright metal when possible and apply appropriate corrosion protection coatings if specified.
Manage moisture condition correctly
- For cement-based repairs on concrete, pre-dampen the substrate to a saturated surface-dry (SSD) condition: fully damp but with no standing water. - Too dry, and the substrate pulls water out of the repair mix, weakening the bond. Too wet, and you can dilute the repair mix at the interface.
Follow the repair product’s instructions precisely
- Check mixing ratios, working time, application thickness limits, and curing requirements. - Mix entire bags or use precise weight/volume measures when proportioning partial batches; guessing leads to inconsistent performance.
Think of the substrate as the foundation of your repair. If it’s dusty, smooth, contaminated, or still moving, no patch material can make up for those conditions. Time spent on prep is your cheapest durability insurance.
5. Build in Access, Drainage, and Documentation for the Next Person
A repair isn’t just about today’s fix. It’s about making the next inspection, adjustment, or repair easier and cleaner—whether that’s you or someone else years from now.
Three habits separate short-term patches from professional-grade repairs:
Provide paths for water to leave, not just be blocked
- Where water has been an issue, integrate weep paths, drainage cavities, or relief points. - In masonry, maintain or install proper weep holes where appropriate and keep base flashing functional. - For slabs or exterior hardscape, ensure that grades, swales, or surface slopes direct water away from the structure and patched areas.
Make critical components accessible
- Avoid completely burying cleanouts, anchor locations, control equipment, or inspection points under solid repairs without marked access. - Where utilities or anchors are covered, use access covers, labeled plates, or mapped measurements from permanent reference points.
Document what you did and what you saw
- Record: - Date of repair - Materials used (brand, product name, mix proportions) - Conditions observed (moisture, movement, corrosion, soil conditions) - Any movement strategy (where you added joints, allowed flex, or isolated components) - For commercial or multi-unit work, provide clients with a brief repair summary. It reduces confusion when future issues arise and demonstrates a professional standard of care.
Leave the repair visually honest
- Don’t try to disguise joints as monolithic surfaces if they are intended to move. - Subtle color differences or visible joint lines are acceptable if they signal where movement is supposed to occur or where access exists.
By planning for future service and access, you reduce the chance that someone later will accidentally compromise your work while trying to solve a new problem.
Conclusion
Durable repairs are less about the brand name on the bag and more about how you think before you mix. When you:
- Diagnose causes before touching tools
- Match materials to existing assemblies
- Control and direct movement instead of fighting it
- Treat surface prep as non-negotiable
- Build in drainage, access, and documentation
…you shift from patching symptoms to correcting conditions.
These practices don’t just keep walls and slabs together—they protect your reputation, reduce callbacks, and turn one-off repairs into long-term client relationships. Whether you’re on a commercial site or at your own house on a Saturday, the same principles apply: respect the structure you can’t see, and your visible work will last.
Sources
- [U.S. General Services Administration – Historic Masonry: Mortar Types and Materials](https://www.gsa.gov/technical-procedures/historic-masonry-mortar-types-and-materials) - Covers mortar compatibility, strength, and composition, especially relevant for matching repair materials to existing masonry
- [Portland Cement Association – Concrete Repair](https://www.cement.org/learn/concrete-technology/concrete-construction/concrete-repair) - Technical guidance on concrete repair fundamentals, including surface preparation and material selection
- [International Concrete Repair Institute (ICRI)](https://www.icri.org/page/About_Concrete_Repair) - Industry organization offering standards and resources on surface preparation, repair methods, and best practices
- [U.S. Department of the Interior – Preservation Brief 2: Repointing Mortar Joints in Historic Masonry Buildings](https://www.nps.gov/tps/how-to-preserve/briefs/2-repoint-mortar-joints.htm) - Detailed discussion of diagnostic steps, material compatibility, and proper preparation for mortar repairs
- [Federal Highway Administration – Concrete Repair Best Practices](https://www.fhwa.dot.gov/publications/research/infrastructure/structures/97148/) - Research-based review of repair performance, bond issues, and durability considerations for concrete structures