Start With a Layout That Respects Real-World Tolerances
A clean drawing isn’t enough; your layout has to work in the field.
Begin by checking the substrate or slab before you snap a single line. Use a long straightedge and level or a laser level to identify high and low spots. Mark problem areas with chalk or spray paint so you can either grind down high points or plan bed-joint adjustments where minor variation is acceptable.
When snapping layout lines for walls:
- Pull control dimensions from one consistent reference (a benchmark wall, gridline, or column) rather than measuring from multiple unrelated edges.
- Use a chalk line with contrasting color to the substrate so you can see your layout when dust and debris start building up.
- Double-check critical dimensions—door and window locations, corners, intersections—before setting any units.
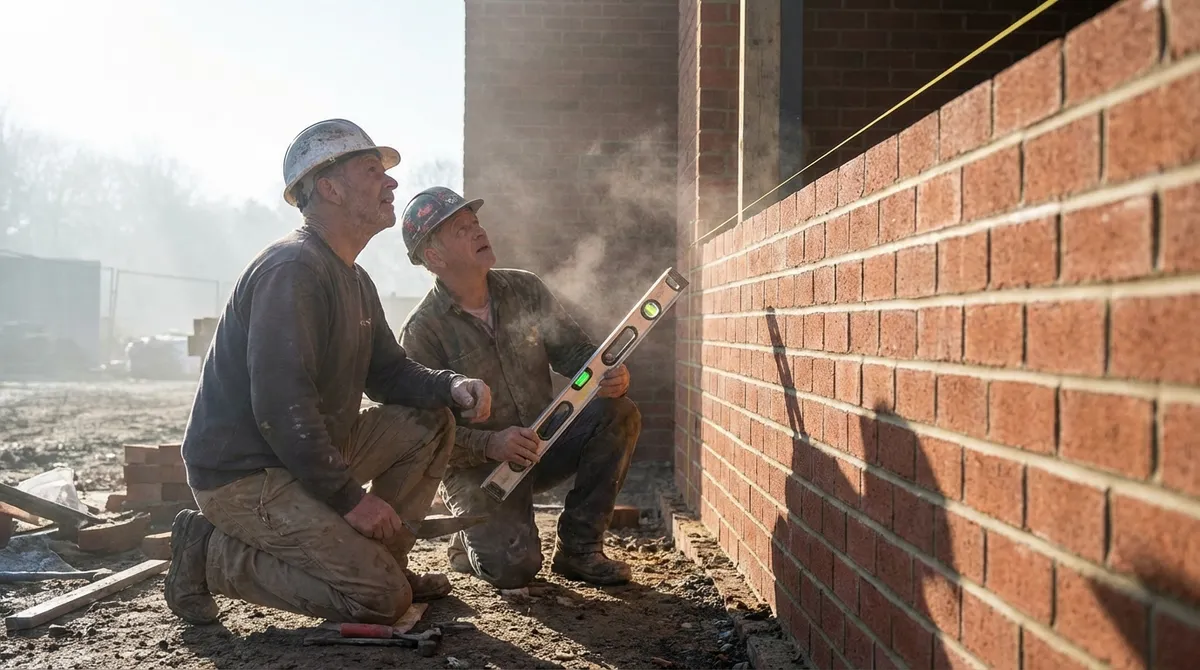
- Confirm squareness with the 3-4-5 triangle method (or larger multiples like 6-8-10) to verify that corners are truly 90 degrees.
- Mark control points with drilled anchors or paint dots at key transitions so lines can be re-snapped if they’re scuffed or washed away.
Build in tolerance from the start. If specs allow ±1/4" over a certain run, don’t use the full tolerance in the first 8 feet. Distribute small adjustments over longer distances where they’re less noticeable and easier to maintain.
Use Control Lines and Story Poles to Keep Courses Consistent
Once the layout is correct, your next priority is to keep courses straight, level, and on module.
Run mason’s line for every course you lay on exterior faces and key interior runs. Use line blocks, line pins, or corner poles depending on the setup, and keep line tension consistent so it doesn’t sag or pull your units out of true. For long walls, introduce intermediate line hooks or stakes to prevent bowing.
A story pole (or story stick) is a simple but powerful tool:
- Use a straight 2x or aluminum pole.
- Mark the exact height of each course, including bed joint thickness, from finished floor or another fixed benchmark.
- Mark all openings and structural features (lintels, bond beams, shelf angles) at their exact heights.
- Keep the story pole protected and use the same one across the job to avoid cumulative measurement drift.
When laying units:
- Check each corner course to the story pole rather than “eyeballing” joint size.
- Use the line as a reference, not a resting point—do not let the units touch or push the line out.
- Regularly check for plumb at corners and intersections with a 4' level or plumb laser, then pull the wall to match.
This system reduces cumulative error. Instead of each mason interpreting the drawing differently, everyone is building to the same physical reference.
Control Joint Placement and Reinforcement Before Cracks Choose for You
Uncontrolled cracking is one of the fastest ways to make otherwise good masonry look defective. Planning for movement is as important as compressive strength.
Before work begins in the field:
- Review structural drawings for specified control joints (CJs) and expansion joints (EJs).
- Confirm joint locations align with likely stress points—changes in wall thickness, height changes, re-entrant corners, and openings.
- Verify spacing compared to accepted standards (for example, many clay brick veneers place vertical CJs every 20–30 feet; CMU walls often use similar spacing, adjusted for building design and climate).
In the field:
- Mark joint locations clearly on the layout and on the story pole.
- Use pre-formed joint materials, smooth dowels, or bond breakers where design requires them, and make sure the crew understands that joints are intentional and must not be bridged with mortar or reinforcement unintentionally.
- For reinforced masonry, ensure vertical and horizontal reinforcement (rebar, joint reinforcement) follows the plans precisely. Avoid missing bars at jambs, corners, and concentrated load areas.
- Keep cells fully grouted where required—use appropriate slump for grout, consolidate with a vibrator or rodding, and inspect for voids at anchor bolt and rebar locations.
Pairing properly placed joints with accurate reinforcement detailing gives cracking a controlled path—and keeps the wall structurally and visually sound.
Mix and Handle Mortar to Match the Job, Not Just the Bag
Good units and careful layout can still fail if the mortar is inconsistent or mismatched to the conditions.
First, confirm the mortar type specified—Type N, S, or M—fits the project’s structural and exposure requirements:
- Type N is common for above-grade, non-load-bearing or light-load-bearing walls.
- Type S is often used for higher loads or below-grade applications.
- Type M provides higher compressive strength but is more brittle and typically used for heavy loads or foundations.
In the field:
- Use consistent batch sizes and measuring methods (full shovels, measured buckets, or preblended products) so proportions stay predictable.
- Add water in controlled amounts and record typical water volumes per batch to help maintain uniformity across days and crews.
- Aim for a workable, plastic consistency that holds shape on the trowel but spreads smoothly. Mortar that is too wet shrinks more and can weaken the bond; mortar that is too stiff may not properly key into the units.
- Respect pot life—most mortar should be used within 2–2.5 hours. Re-tempering (adding water) should be kept to a minimum and not used to revive mortar that has begun to set.
Weather adjustments are critical:
- In hot, dry, or windy conditions, pre-dampen highly absorptive units (without leaving standing water) so they don’t pull water out of the mortar too quickly.
- In cold weather, keep materials above freezing, protect walls from rapid cooling, and avoid laying on frozen or ice-covered surfaces. Follow local codes and standards for cold-weather masonry practices.
Consistent mortar performance reduces bond failures, uneven curing, and color mismatches in the finished wall.
Finish Joints and Protect New Work Like It Will Be Inspected Tomorrow
The last phase of work often determines how the client—and inspectors—judge the entire project.
Joint tooling is more than appearance:
- Tool joints when the mortar has “thumbprint” hardness—firm enough to resist smearing but still pliable.
- Use a consistent joint profile (concave, vee, or raked) across the project as specified. Concave joints generally provide better weather resistance because they compress the mortar and shed water.
- Keep tooling direction consistent to avoid differential shading and streaking.
As you clean, be deliberate:
- Brush off loose mortar as you go instead of leaving heavy droppings to harden at the base of the wall.
- Use minimal water for initial cleaning to avoid driving lime and fines into the face of brick or block.
- Test any chemical cleaner on a discreet area first, especially with brick, manufactured stone, or integrally colored units, and follow the manufacturer’s dilution and dwell time instructions.
Protection is non-negotiable:
- Cover the top of unfinished walls with waterproof yet breathable materials to prevent water from filling cores or saturating the wall.
- Shield fresh masonry from heavy rain, rapid drying sun, or strong wind to avoid washout, surface crusting, or rapid shrinkage.
- Keep scaffolding and adjacent work from impacting the face of the wall before the mortar reaches adequate strength.
Assuming someone will inspect your work at any time helps keep quality consistent and reduces last-minute patching that rarely matches original work.
Conclusion
Accurate, durable masonry is the result of disciplined habits, not just craftsmanship. Solid layout, consistent control lines, planned movement joints, properly mixed mortar, and careful finishing form a practical framework that works on everything from small residential projects to complex commercial builds. For both construction professionals and serious DIY builders, treating these techniques as standard practice—not special effort—pays off in straighter walls, fewer callbacks, and masonry that holds its line and performance for years.
Sources
- [The Masonry Society (TMS) – Masonry Standards and Resources](https://masonrysociety.org) - Provides widely referenced masonry design and construction standards, including TMS 402/602 used by many codes and specifiers.
- [NCMA – National Concrete Masonry Association Technical Resources](https://ncma.org/resource-library) - Offers technical guides on CMU construction, control joints, reinforcement, and best practices.
- [Brick Industry Association – Technical Notes](https://www.gobrick.com/technical-notes) - Contains detailed guidance on brick masonry, mortar selection, jointing, cleaning, and movement joints.
- [Portland Cement Association – Mortar for Masonry](https://www.cement.org/learn/concrete-technology/concrete-construction/mortar-for-masonry) - Explains mortar types, proportions, field mixing considerations, and performance characteristics.
- [U.S. General Services Administration – Masonry (PBS-P100)](https://www.gsa.gov/technical-procedures/masonry) - Federal guidelines and technical procedures for masonry construction and maintenance, including inspection and quality expectations.