This guide focuses on practical, field-ready habits that apply on both professional sites and serious DIY projects, with five expert tips you can put to work immediately.
Start With the Base: Subgrade, Footings, and First Course
Masonry fails most often from the bottom up, not the top down. A wall or pier is only as reliable as what it sits on, so the first priority is a stable, well-prepared base.
Begin with the subgrade. Remove organic material like roots and topsoil until you reach firm, undisturbed soil or properly compacted fill. If you’re working over fill, compact in thin lifts (4–8 inches) with a plate compactor or jumping jack, testing firmness underfoot—there should be no pumping or visible movement.
Footings should be sized and reinforced according to code and soil conditions. Follow your local building authority or engineering specifications for width, thickness, and rebar spacing. Keep formwork straight, level, and well-braced; even small deviations here will amplify in the masonry above.
After the footing cures, snap control lines for the first course using a chalk line or laser. Check for level across the entire run—not just at the ends—and correct low spots with mortar, not by forcing units out of plane. Take extra time setting the first course perfectly plumb, level, and to line. Every course above will go faster and truer if you treat this step as non-negotiable.
For paver or small retaining projects, use a compacted granular base (e.g., crushed stone) and a screeded leveling layer. Don’t skip compaction or substitute loose sand as a structural base; it will shift and settle over time.
Control Your Mortar: Mix, Consistency, and Open Time
Mortar is more than “glue”—it’s a structural and weather-resisting component. The right type, mixed correctly, can be the difference between a tight wall and one that cracks or sheds joints prematurely.
Choose a mortar type appropriate to the unit and exposure. Type N is common for above-grade, non-load-bearing brick; Type S is stronger and used for below-grade or structural masonry; softer historic masonry often requires lime-rich, lower-strength mixes to avoid damaging old bricks or stone. Match to project needs rather than defaulting to the strongest option.
Watch your water content. Aim for a consistency that holds its shape on a trowel but can still be spread easily—a plastic, workable mix, not soupy. Too much water reduces strength, increases shrinkage, and leads to joints that are weak or powdery. Add water in small increments, and allow the batch to “rest” a few minutes after initial mixing so the materials fully hydrate.
Respect open time. Mortar that has started to stiffen should not be retempered excessively with water. A light retempering within the manufacturer’s time window is acceptable, but if the mix has begun to set, discard it. Using over-tempered or partially set mortar leads to poor bond and inconsistent joints.
On hot or windy days, keep your mortar out of direct sun and mix smaller batches more frequently. In cold weather, protect materials from freezing and follow cold-weather masonry procedures: warm (not hot) mixing water, no frozen sand, and no laying on frozen units.
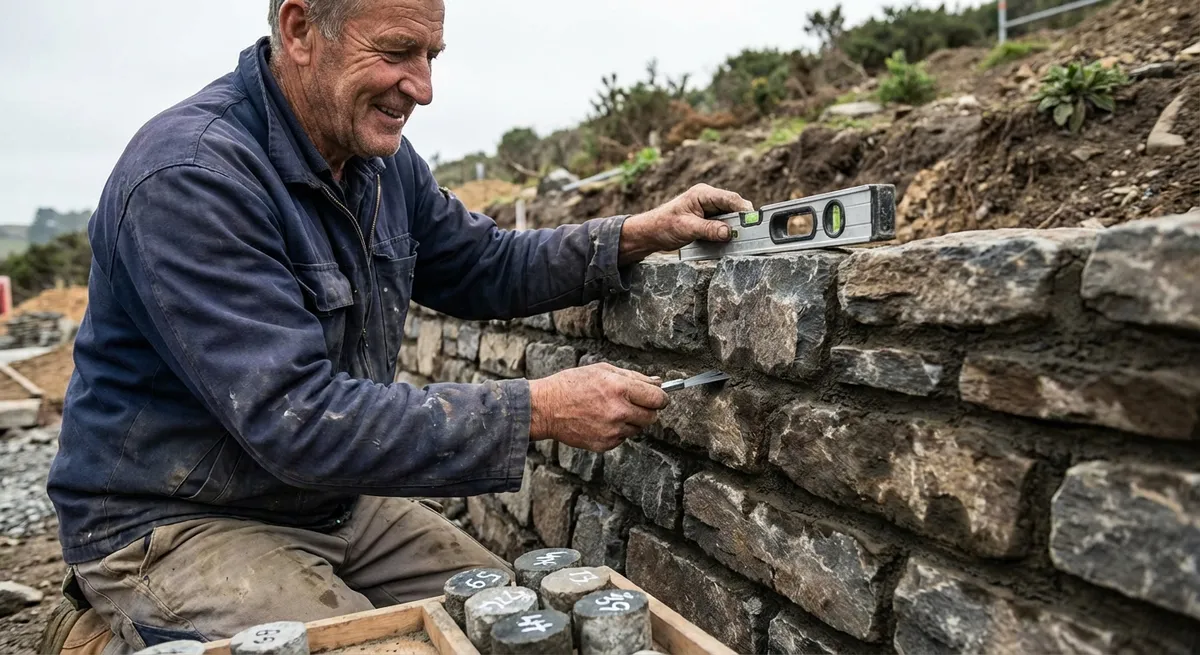
Work the Line: Layout, Bonds, and Joint Consistency
Straight, visually coherent masonry doesn’t happen by eye alone; it’s the result of disciplined layout and management of lines, bonds, and joints.
Use story poles or layout sticks marked for course heights, window sills, lintels, control joints, and bond changes. This prevents accumulating errors that show up as misaligned openings or awkward cuts. Before you spread mortar, dry-lay a short section to verify that your bond pattern works with given dimensions and doesn’t create slivers at corners or openings.
For running bond or more complex patterns, maintain consistent head and bed joint thickness. Standard joints are typically around 3/8 inch, but always follow the project specifications. Use joint spacers on small-format units if needed to maintain uniformity, especially on highly visible facades or interior feature walls.
Keep a tight mason’s line, properly tensioned and supported by line blocks, line pins, or corner poles. Check it frequently for sag; even a small dip over a long run can show up as a visible wave in the wall. Lay to the line, not over it—your units should just kiss the line without pushing it out of position.
In corners and around openings, prioritize bond and visual continuity. Adjust within the field area when necessary rather than stacking all irregularities into one narrow strip of cuts. A small amount of distributed adjustment (slightly varied joint width within tolerance) often looks better than one glaring misfit at the end of a wall.
Protect Against Water: Detailing, Flashing, and Drainage
Water is the long-term enemy of masonry. Even strong, well-laid brick or block can deteriorate if moisture is not managed correctly. Professional-grade work pays careful attention to how water enters, moves through, and exits the assembly.
For exterior walls, include properly detailed flashing at critical transitions: above openings, at shelf angles, base of wall, and roof intersections. Lapped correctly with weather-resistant barriers and weep systems, this redirects water out of the wall instead of letting it accumulate inside.
Install weep holes or vents at the base of cavity walls and over lintels, following spacing recommended by code or manufacturer guidelines. Don’t mortar them shut or block them with debris. Ensure the cavity remains clear of mortar droppings so water can drain freely—using mortar collection devices or cavity trays can help in professional work.
Use appropriate sealants at control joints, dissimilar material transitions, and penetrations. A flexible joint designed to accommodate movement is far more durable than a rigid patch that cracks and invites leaks. Choose sealants rated for exterior use, UV exposure, and joint movement expected in the assembly.
Where masonry meets grade, maintain proper clearance above soil or pavement to prevent constant wetting and wicking. In freeze-thaw climates, saturated masonry near grade is particularly vulnerable to spalling as water freezes and expands. Good site drainage, sloped grading, and functional gutters and downspouts are as important as the wall details themselves.
On interior or veneer applications, don’t assume masonry alone is a moisture barrier. Coordinate with vapor retarders, air barriers, and insulation to prevent condensation problems, especially in climate-controlled spaces like basements and conditioned attics.
Finish and Cure: Jointing, Cleaning, and Protection
A wall can be structurally sound but still fail prematurely or look poor if finishing and curing are rushed or ignored. The last stages are where durable, clean work is either secured—or compromised.
Time your joint tooling correctly. Mortar should be thumbprint-hard—not wet, not crumbly—when you run your jointer. Proper tooling compacts the mortar, improves bond at the interface, and forms a denser, more water-resistant surface. Concave joints are widely used because they shed water effectively and tolerate minor imperfections.
Clean as you go. Remove squeezed-out mortar from faces before it hardens, using a trowel edge or brush. Heavy acid cleaning later can damage both mortar and certain types of brick, and uneven cleaning can leave visible staining or etching. For many jobsite conditions, cold, clean water and a stiff brush applied at the right time are sufficient.
Protect fresh work from rain, rapid drying, and freezing. Use breathable mason’s curing blankets or tarps, supported so they don’t rest directly on the wall. In hot, dry, or windy conditions, light misting or fogging (without washing out joints) can help mortar cure more uniformly and reduce shrinkage cracking.
Avoid loading or backfilling against new masonry before it has reached adequate strength. Follow guidance from your structural engineer or building code; as a rule of thumb, give mortar a minimum of 24–48 hours before light handling and longer before critical loading, especially in cold or damp conditions.
Finally, document your materials, mix proportions, and procedures—particularly on larger or repeat work. Keeping a simple field log of what worked (and what didn’t) under specific site conditions provides a reference that improves quality from one project to the next.
Conclusion
Masonry that holds its line and resists the elements is not the result of one “trick,” but of a consistent approach across each stage: a stable base, controlled mortar, disciplined layout, reliable water management, and careful curing.
For construction professionals, these habits translate into fewer callbacks and stronger reputations. For serious DIY builders, they provide a path to professional-level results on smaller projects. Applied together, the five practices outlined here form a practical framework for masonry that stays put, looks right, and performs as intended for the long term.
Sources
- [The Masonry Society – Mortar for Masonry](https://masonrysociety.org/product/tms-402-602-building-code-requirements-and-specification-for-masonry-structures/) - Code and specification reference for masonry design and construction, including mortar requirements
- [Portland Cement Association – Masonry Construction Techniques](https://www.cement.org/learn/concrete-technology/concrete-construction/masonry-construction) - Practical guidance on masonry materials, construction practices, and detailing
- [U.S. General Services Administration – Preservation Briefs: Repointing Mortar Joints](https://www.nps.gov/tps/how-to-preserve/briefs/2-repoint-mortar-joints.htm) - In-depth discussion of mortar selection, mixing, and joint finishing, with emphasis on durability
- [International Code Council – International Building Code (IBC)](https://codes.iccsafe.org/codes/i-codes/ibc) - Model building code outlining structural, footing, and masonry-related requirements used by many jurisdictions
- [NCMA (National Concrete Masonry Association) – TEK Resources](https://ncma.org/tek/) - Technical notes on concrete masonry design, flashing, drainage, and construction practices