This guide walks through five expert-level tips that directly affect durability, alignment, and finish quality—without relying on specialty tools or complicated methods.
Tip 1: Match Mortar to the Masonry, Not Just the Bag Label
Many failures in masonry start with the wrong mortar for the unit or the application. Stronger is not always better. A mortar that’s too hard can crack or damage softer masonry units; one that’s too weak can crumble under load or weather.
For modern concrete block and many newer bricks, pre-blended Type N or Type S mortars generally perform well, but it’s essential to confirm the compressive strength, exposure conditions, and local code requirements. Type S is commonly used below grade and in structural or high-load applications, while Type N is often suitable for above-grade walls not taking heavy structural loads. Historic or soft-fired brick, stone, or lime-based construction often requires more flexible, lower-strength mortar, frequently lime-rich mixes, to accommodate movement and allow moisture to escape.
Before mixing, read the product data sheet, not just the front of the bag. Check recommended uses, curing times, and water demand. On site, keep water content consistent from batch to batch. Too much water weakens the mix, causes excessive shrinkage, and leads to color variation across the wall. Use clean, potable water; avoid retempering mortar that has already started to set, as this can reduce bond strength and long-term durability. For critical work, mix in smaller batches you can place within 60–90 minutes, and document the mix ratios for repeatability on larger projects.
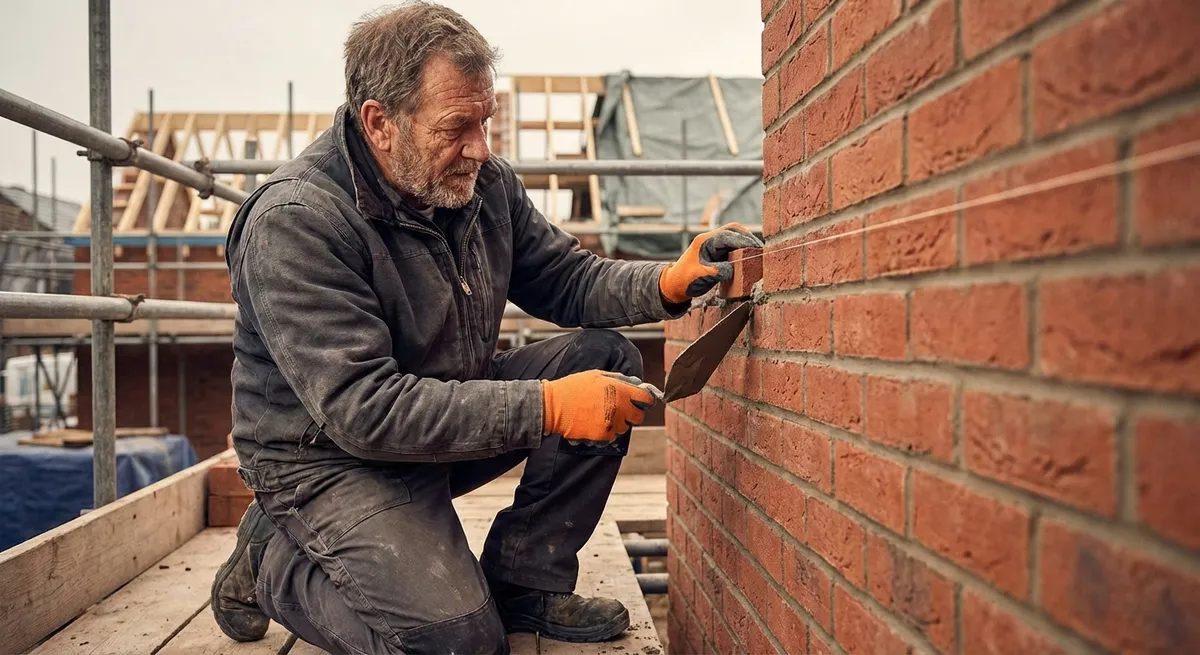
Tip 2: Control Layout Early with Dry Runs and Reference Lines
Straight, plumb, and level walls don’t happen by accident; they’re built on good layout. Relying only on visual judgment or “following the last course” is how minor deviations become visible waves across a wall. Professional masons invest time up front in layout because it prevents corrective grinding, cutting, and rework later.
Start with a dry layout, especially where wall lengths, openings, or corners must land cleanly. Lay a course of units on the ground without mortar to confirm bond pattern, joint size, and how full units and cuts will fall at corners, doorways, and windows. Adjust joint thickness or shift your starting point to avoid slivers—narrow cuts are weak, unattractive, and harder to point neatly.
Snap durable chalk lines (or mark with masonry crayons on rough surfaces) for both the wall line and control lines at critical dimensions. Use story poles or gauge rods to keep course heights consistent, especially when aligning new work to existing elevations, windowsills, or control joints. Set up string lines anchored to firm corner leads or profile boards, and check them frequently. If a string line gets bumped or sagged, stop and reset before continuing. Early, intentional layout makes every bed joint and head joint easier to place consistently and protects the visual rhythm of the finished wall.
Tip 3: Keep Joints Consistent and Tooled at the Right Time
Joint quality directly affects both performance and appearance. Inconsistent joint thickness and poor tooling are often what give DIY masonry a “homemade” look, even when the wall is structurally sound. Professionals manage joint size, compaction, and timing to control moisture resistance and shadow lines.
Target a consistent joint width—typically around 3/8 inch for many brick and block applications—unless project documents specify otherwise. Use joint spacers, gauging rods, or visual reference to maintain uniformity. As you lay units, fill both bed and head joints completely; voids in head joints can channel water and reduce bond area. Avoid excessive mortar squeeze-out into cores that may need to be grouted later, but don’t underfill face joints to speed up production.
Tool joints after the mortar has “thumbprint hard”—firm enough to resist deformation but still plastic enough to compress and seal. For exterior walls, concave or V-joints are common because they compact mortar and shed water effectively. Flush or raked joints may be specified for certain designs but provide less weather resistance if not detailed and sealed properly. Work in logical sections so you can return and tool joints at the correct time across a whole area; tooling too early can smear joints and drag mortar, while waiting too long leads to weak, sandy joints that don’t bond to the unit edges.
Tip 4: Protect Fresh Work from Weather, Not Just Rain
Weather can undermine good masonry long after the last unit is set, especially in the first 24–72 hours. Protecting fresh work is more than throwing a tarp over it if rain shows up; it means planning for sun, wind, temperature, and precipitation before you start.
In hot, dry, or windy conditions, mortar and units can lose moisture too quickly, reducing bond strength and increasing cracking risk. Dampen very dry, porous units before laying (without leaving standing water), and consider working smaller sections so you can tool and cure them correctly. Use windbreaks or temporary shade where feasible, and avoid direct sun on critical, visible faces during initial curing.
In cold weather, follow cold-weather masonry guidance: do not lay units on frozen surfaces; keep mortar above the minimum recommended temperature; and protect the wall from freezing until the mortar has gained adequate strength. Use insulating blankets or temporary enclosures if needed, and mix with warm—not hot—water to bring materials into the recommended range. Even mild overnight freezes can damage green mortar, leading to weak joints and surface flaking. For rain, protect the top of fresh walls from saturation and washout with properly secured covers that allow airflow. Edge protection helps prevent staining and efflorescence from runoff carrying salts down the face of the wall.
Tip 5: Plan for Movement and Moisture with Intentional Details
Many masonry issues—cracking, bulging, efflorescence, or interior leaks—are not “bad brick” or “bad mortar,” but the result of missing or poorly executed details for movement and drainage. Experienced builders design and build these details in from the beginning rather than trying to “seal” problems later.
For longer walls or changes in height and geometry, control joints and expansion joints are essential. Follow project drawings or established guidelines for spacing and location, and ensure they run continuously through units and mortar where required. Use proper joint materials (backer rod and sealant or proprietary systems) to keep joints functional, flexible, and watertight. Do not fill intended movement joints with rigid mortar during construction.
At the base of cavity walls, over window and door openings, and at horizontal transitions, properly sloped flashing and weeps are critical. Flashing must extend sufficiently to daylight or into compatible drip edges, and laps should be sealed to prevent water bypass. Weeps—either open head joints, vents, or proprietary inserts—belong at appropriate intervals per code or design to allow moisture to exit. Inside, ensure that attached finishes, insulation, and air barriers do not block these drainage paths. On the exterior, use breathable coatings or sealers where specified rather than non-permeable products that can trap moisture in the wall.
By anticipating how masonry will move and get wet over time, and by integrating the correct joints, flashings, and drainage paths, you improve durability far more than any single “strong” mix or thicker joint can achieve.
Conclusion
High-performing masonry is the product of deliberate decisions at every stage: from choosing mortar that suits the units and conditions, to disciplined layout, consistent joint work, weather protection, and thoughtful detailing for movement and moisture. These five techniques are not complicated, but they do require planning and discipline to apply consistently on site.
For construction professionals, standardizing these practices across crews turns “good days” into repeatable outcomes. For serious DIY builders, adopting them bridges the gap between a passable wall and work that looks and behaves like it came from a seasoned crew. Over the life of the structure, those choices pay off in fewer callbacks, less maintenance, and masonry that continues to perform as intended.
Sources
- [The Masonry Society – TMS 402/602 Resources](https://masonrysociety.org/design/resources/tms-402-602/) - Technical references and standards for masonry design and construction, including mortar types and structural considerations
- [Portland Cement Association – Mortar Types and Uses](https://www.cement.org/learn/concrete-technology/concrete-construction/mortar-types-and-uses) - Overview of ASTM mortar types, properties, and selection guidance for various masonry applications
- [NCMA (National Concrete Masonry Association) – TEK Notes](https://ncma.org/teks/) - Technical guides on concrete masonry, including control joints, flashing, and moisture management
- [International Code Council – International Building Code (General Info)](https://www.iccsafe.org/advocacy/building-safety-journal-articles/international-building-code/) - Background on the IBC, which contains code requirements related to masonry, weather protection, and structural performance
- [WSP / Canada.ca – Best Practices for Masonry Construction](https://www.canada.ca/en/treasury-board-secretariat/services/federal-real-property/masonry-structural-guidelines.html) - Government guidance on masonry construction and detailing, with focus on durability, movement control, and moisture management