This guide focuses on dialing in your mixes—by volume, by feel, and by field testing—so your work performs well and looks deliberate, not lucky.
Understanding What Your Mix Actually Has to Do
Before you adjust a single shovel of sand, you need clarity on what the mix must handle. Not every wall, slab, or joint needs the same strength or workability, and chasing “strongest possible” often creates avoidable cracking, poor bonding, and premature failure.
Start by defining the job:
- Structural or non-structural: A load-bearing CMU wall, reinforced footing, or structural lintel needs a specified compressive strength and strict adherence to the design mix. A garden wall or patio paver base is more forgiving but still needs consistency.
- Exposure conditions: Freeze–thaw zones, de-icing salts, coastal environments, and high rainfall require attention to air entrainment, water–cement ratio, and durability over raw strength.
- Finish and appearance: Pointed joints, exposed aggregate, or visible block faces demand more control over color, sand gradation, and slump to avoid streaking and segregation.
- Speed of work: Hot days, tight schedules, or complex layouts may benefit from plasticizers, retarders, or using smaller batches to maintain workable time.
Read the bag, spec sheet, or structural notes before mixing. Treat those documents as the starting point, then fine‑tune your on‑site routine to consistently hit what they require in the real-world conditions you’re facing.
Expert Tip 1: Standardize Your Volume Measures (And Stick to Them)
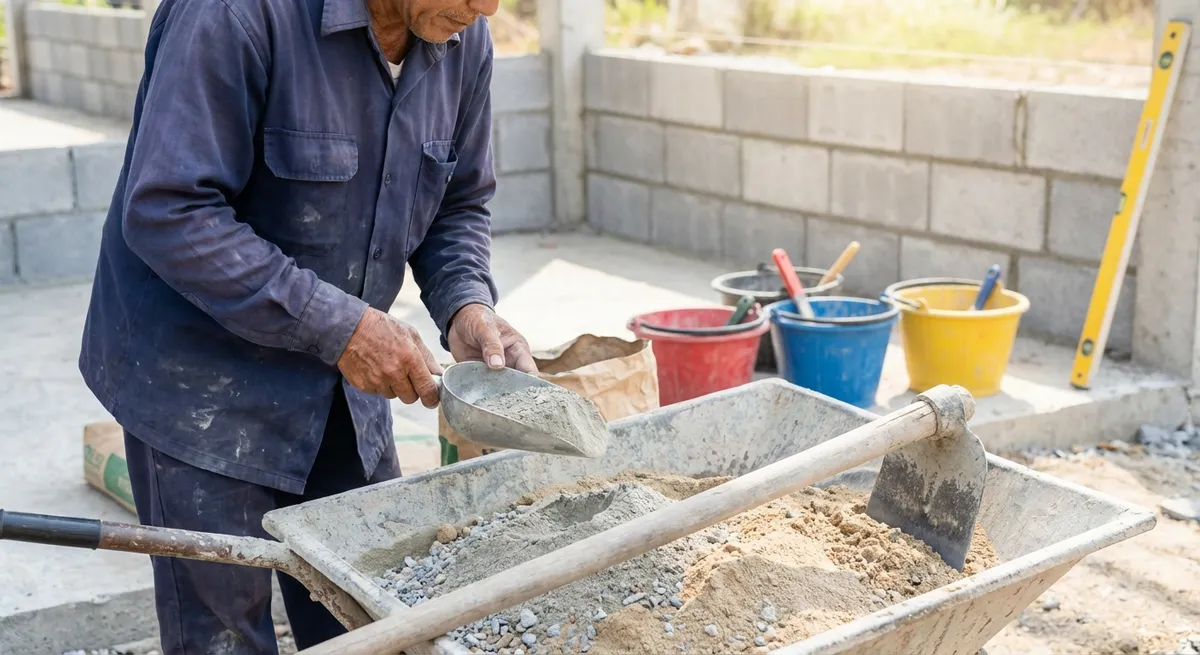
Eyeballing “about a half bag” or “a few shovels” is how one day’s perfect mix becomes the next day’s problem. Professionals who get repeatable results use simple, repeatable volume controls—even when batching by hand.
Practical ways to standardize:
- Use a dedicated measure for sand and cement: A cut 5‑gallon bucket, a concrete pan, or a clean masonry tub can all serve as repeatable volume units. Mark fill lines with a permanent marker or paint and use them every time.
- Lock in a basic ratio and record it: For common work, you might settle on a 1:3 mix (cement : sand) for many mortars or a 1:2:3 (cement : sand : coarse aggregate) for some on‑site concrete, always aligned with relevant codes and manufacturer guidance. Write the “recipe” where you mix.
- Control partial bags: If you’re not using full bags, score or weigh them. Cutting a 94 lb cement bag in “half” by eye is rarely even. Better: measure partial use by volume (e.g., “one full bucket per batch”) after checking once with a scale.
- Keep your shovel count honest: If you must use shovels, use the same worker, same shovel, and same loading technique for a given job. It’s crude, but consistency beats precision you can’t maintain.
- Account for damp sand: Wet sand packs tighter than dry. If your sand is noticeably moist, reduce volume slightly or, better yet, store a small reserve under cover for more predictable batching.
By standardizing volumes, you turn “a good mix” from a lucky accident into a repeatable process, making it easier to troubleshoot and adjust as conditions change.
Expert Tip 2: Control Water Like a Critical Ingredient, Not an Afterthought
Water is the most abused and misunderstood component in masonry and concrete mixes. Too little, and the mix is unworkable and poorly consolidated; too much, and you permanently weaken the material and encourage cracking and scaling.
Refine your water control with these habits:
- Pre‑measure a starting amount: For small batches, use a measured container (marked bucket or jug) for water. Pour in 80–90% of what you expect to need initially, not all at once.
- Adjust slowly in the mixer or pan: Add the last 10–20% in small increments while the mixer is running or while you’re actively turning by hand. Stop as soon as workability is acceptable.
- Use workability tests, not just look: For mortar, perform a simple “board test”: scoop a trowelful, flip it onto a board at a slight angle, and see if it hangs without slumping off. For concrete, check slump according to project needs—while DIYers may not use a full slump cone, they should still watch for mixes that run like soup or stand up overly stiff.
- Account for environmental conditions: Hot, dry, or windy conditions draw moisture quickly. Instead of overwatering the mix, lightly pre‑dampen the substrate or aggregates, work in smaller batches, and cover fresh work appropriately.
- Never “retemper” past safe limits: Light retempering of mortar (adding a small amount of water while still within specified working time) can be acceptable if allowed by the material manufacturer and code. Concrete is less forgiving—once it starts to set, adding water to “bring it back” significantly degrades strength and durability.
When in doubt, favor a slightly stiffer mix that can be properly consolidated over a wet, easy‑to‑place one that will never reach its design potential.
Expert Tip 3: Match Your Mix to Climate and Season
A “perfect” summer mix can turn into a failure in winter, and a cold‑weather formula can be unworkable in peak heat. Your technique should shift with temperature, humidity, and wind conditions to keep performance on target.
Key seasonal adjustments:
- Cold weather (generally below 40°F / 4°C):
- Use warm (not hot) water to bring mix temperature into the recommended range.
- Store bags in a dry, warmer location before use.
- Never lay masonry on frozen units or over frozen ground.
- Follow manufacturer and code requirements for accelerators; avoid calcium chloride in steel‑reinforced or certain masonry situations where corrosion is a concern.
- Protect fresh work with insulated blankets or temporary enclosures as needed.
- Hot weather (generally above 90°F / 32°C or high sun/wind):
- Shade materials and mixing stations when possible.
- Use cool, clean water and, if permissible, admixtures that extend set time.
- Pre‑dampen masonry units and formwork (without leaving standing water) to reduce suction.
- Place and finish in smaller, faster batches; avoid long delays between mixing and placing.
- High wind or low humidity:
- Increase curing attention: cover fresh work with plastic sheeting or damp burlap as appropriate.
- Mist surfaces lightly (for materials that allow it) to prevent flash drying and shrinkage cracking.
Treat climate planning as part of your mix design. A technically correct ratio is only successful if it remains workable long enough to be properly placed and cured in the conditions at hand.
Expert Tip 4: Use On‑Site “Sanity Checks” Before You Commit
Running full lab tests is ideal for critical structural work, but most day‑to‑day masonry and small concrete tasks rely on quick, on‑site checks to prevent preventable problems. A few minutes of testing can save hours of rework.
Integrate simple field checks into your routine:
- Visual and tactile inspection:
- Mortar should cling to the trowel yet release cleanly under light pressure.
- Concrete should be cohesive, not segregated—no obvious pools of water or dry pockets.
- Slump or consistency check:
- Even if you don’t use a formal slump cone, get in the habit of judging how the mix stands or flows in a consistent container. Note what works well, and recreate it next time.
- Bond and suction test for masonry:
- Butter a test unit, press it to another, and observe bond and squeeze-out. If the mortar skins too quickly or the unit sucks water immediately, adjust your moisture management or mix.
- Small test placements:
- For visible work, try a short test section or small pour in a non‑critical area first. Check color uniformity, surface finish, and bleed water.
- Set-time tracking:
- On larger jobs, note start and end times for batches and observe initial and final set. This helps you plan successive lifts, control joint cutting, and schedule curing.
Think of these as “pilot runs” that let you catch errors when they’re cheap to fix, instead of after the wall is built or the slab has hardened.
Expert Tip 5: Protect the Mix Investment with Proper Curing
The quality of your mix matters far less than how you cure it. Inadequate curing is one of the most common reasons strong designs become weak in practice. Proper moisture and temperature control during the early days can dramatically improve strength, durability, and crack resistance.
Apply curing discipline as part of the job, not an afterthought:
- Respect early-age vulnerability: Concrete and mortar gain strength rapidly at first, but the first 24–72 hours are critical. Protect from rapid drying, freezing, impact, and vibration.
- Use appropriate curing methods:
- For concrete slabs: water curing (ponding or sprinkling), wet coverings (burlap kept damp), or curing compounds as specified.
- For masonry: protect from direct sun, wind, and driving rain; avoid aggressive washing or tooling too early.
- Avoid premature loading: Don’t place heavy loads, equipment, or scaffolding on fresh slabs or newly built walls before they reach adequate strength as defined in the specs.
- Manage joints and cracking: Cut control joints in concrete within the recommended window—too late and random cracking will choose its own path. In masonry, follow specified joint reinforcement and spacing to manage movement.
- Follow manufacturer and code guidance: Different mixes (high‑early‑strength, air‑entrained, specialty mortars) often have specific curing requirements. Ignoring them risks losing the very benefits you paid for.
Curing is where you “cash in” on all the care you took with ratios, water control, and placement. Skipping this step is effectively throwing away strength and durability you already earned.
Conclusion
Consistent, professional masonry and concrete work isn’t about secret formulas—it’s about disciplined, repeatable habits. When you standardize your volume measures, treat water as a critical design parameter, account for climate, verify mixes on site, and protect your work through proper curing, you transform every batch from a gamble into a controlled, predictable process.
Whether you’re a seasoned contractor or a serious DIY builder, these five practices give you a framework to refine, document, and improve your mixes over time—so your next project doesn’t just look solid on day one, it stays that way for years.
Sources
- [Portland Cement Association – Concrete Basics](https://www.cement.org/cement-concrete/concrete-materials-properties/concrete-basics) - Overview of concrete materials, mixing, and curing fundamentals
- [The Masonry Society – Mortar for Masonry](https://masonrysociety.org/masonry-basics/mortar-for-masonry/) - Technical guidance on mortar types, proportions, and field practices
- [U.S. Federal Highway Administration – Concrete Mixing and Placing](https://www.fhwa.dot.gov/pavement/concrete/pubs/hif18001.pdf) - Detailed FHWA document covering mixing, placing, and curing concrete in the field
- [ASTM International – C270 Standard Specification for Mortar for Unit Masonry](https://www.astm.org/c0270-19.html) - Industry standard for masonry mortars, including proportion and property specifications
- [Portland Cement Association – Cold Weather Concreting](https://www.cement.org/learn/concrete-technology/concrete-construction/cold-weather-concreting) - Best practices for adjusting mixes and curing in cold conditions