Treat the Space Like a Jobsite, Not a Room
Before pros start work, they “set the site.” At home, that same discipline turns a cluttered room or garage into a controlled workspace that makes better decisions easier.
Start by clearing more space than you think you need. Remove small furniture, boxes, and loose items—not just from the immediate work area, but from your access paths and material staging zones. You want clear routes for bringing in long lumber, concrete bags, tools, and ladders without shuffling things around mid‑project.
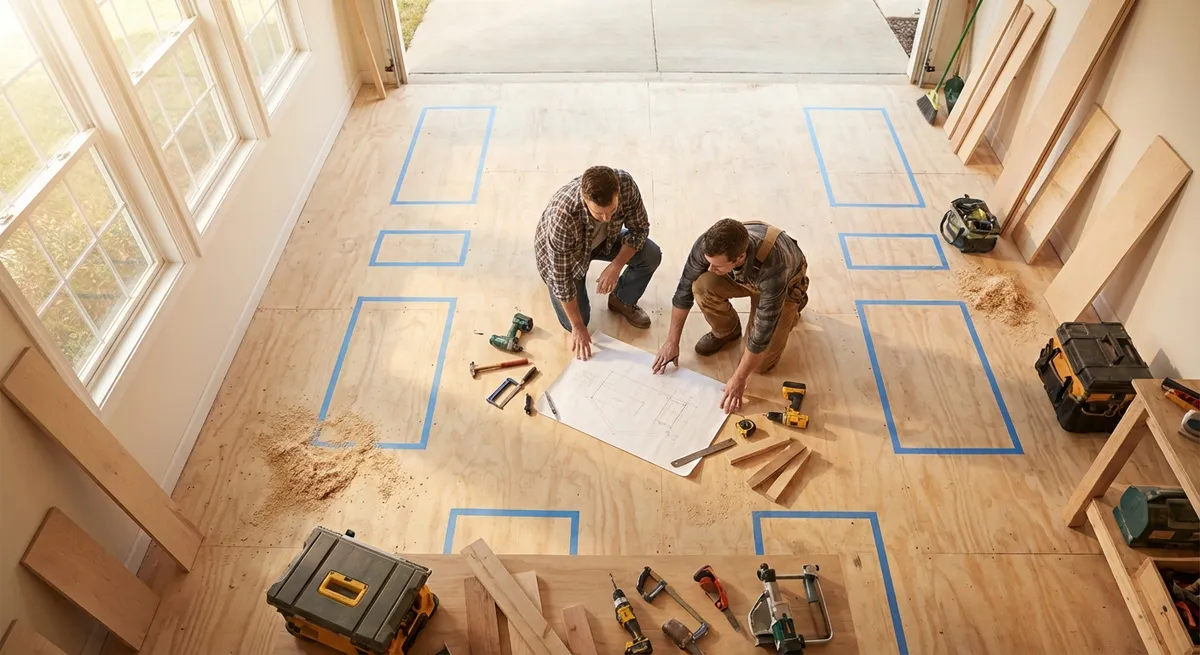
Next, define three zones with painter’s tape on the floor if space is tight:
- Work zone: Where cutting, drilling, mixing, or assembly happens
- Material zone: Where new materials are stacked, sorted, and measured
- Waste zone: Where offcuts, packaging, and debris go immediately
This simple zoning mirrors what contractors do on larger jobsites and helps prevent the two biggest DIY time‑wasters: hunting for things and tripping over them. Keep tools in a dedicated area (even a single rolling cart or a table) rather than everywhere you last set them down.
Finally, confirm your access and protection plan. Check door widths for large materials, note where dust will travel, and lay down floor protection and plastic sheeting where needed. Pros assume that dust goes farther and damage happens faster than you expect; planning for that up front saves cleanup, paint touch‑ups, and repair work later.
Build a Scaled Plan, Then Work Backwards from the Finished Look
Contractors almost never work from “eyeballing it.” Even basic home projects benefit from a scaled drawing and a clear picture of the finished result.
Begin by measuring the space carefully—lengths, widths, heights, diagonals if relevant—and sketch a scaled plan on graph paper or in a simple digital tool. One square can represent 6" or 1', depending on project size. Include windows, doors, outlets, and any obstacles like radiators or posts.
Then, instead of drawing how you think you’ll build it, draw the finished look first:
- For a patio: final paver pattern and edge locations
- For shelving: finished shelf heights and clearances for items
- For a wall: final fixture locations and visible joints or seams
Once you’re happy with the end result on paper, work backward to identify structure, supports, fasteners, and cut lengths. Pros call this “detailing from finish to structure.” For example, knowing exactly where you want the front edge of a countertop lets you set base cabinets with precise overhang and scribe lines, rather than adjusting later.
Use your scaled drawing to:
- Check that clearances are workable (door swings, walking paths, drawer pull distance)
- Confirm that standard material dimensions fit without excessive waste
- Spot conflicts (for example, a proposed wall-mounted TV overlapping an outlet or stud bay)
This method reduces on‑the‑fly changes—one of the main reasons DIY projects drift off schedule and budget.
Turn Specs and Codes into Practical Checklists
Pros routinely consult manufacturer instructions and building codes, not because they enjoy paperwork but because that’s where the performance details live. For DIY work, you can borrow the same discipline in a simplified, practical way.
Start by identifying the key systems involved in your project:
- Structural (framing, concrete, masonry)
- Moisture (waterproofing, drainage, sealants)
- Electrical or plumbing (if in scope and permitted for DIY in your area)
- Finishes (paint, caulk, tile, trim, sealers)
For each system, gather relevant manufacturer specifications and local code guidance:
- Product data sheets for adhesives, mortars, concrete mixes, and fasteners
- Installation manuals for fixtures, anchors, and specialty materials
- Local or model building code snippets for spans, fastener spacing, clearances, and safety
Then, distill these into a short, job‑specific checklist, for example:
- Minimum edge distance for anchors and fastener spacing
- Required substrate prep (clean, dry, primed, scarified, etc.)
- Cure times before loading, painting, or tiling over
- Slope requirements for drainage (patios, exterior slabs, and shower bases)
- Minimum clearances from combustibles or electrical devices
Keep this checklist printed or taped in your work area. Treat it as non‑negotiable, the same way a pro superintendent treats inspection items. This habit keeps you from skipping critical but invisible steps—like back‑buttering tile, installing expansion joints, or honoring control joints in concrete—that drastically affect long‑term performance.
Mock-Up Before You Commit: Dry Fits and Test Sections
On professional jobs, mock‑ups and dry fits are standard practice for managing risk. They reveal problems when the cost of changing your mind is still very low.
For DIY projects, build in at least one mock‑up stage:
- Dry layouts:
- Tile: Lay out a full row dry, including spacers, to see where cuts will land at corners.
- Pavers: Test your pattern, border, and alignment before compacting base or cutting.
- Trim: Dry fit casings and baseboards to confirm reveals and joint locations.
- Test assemblies:
- Use scrap lumber to test joinery, screw patterns, and pilot hole sizes.
- Try two or three fastener options for grip and appearance.
- Sample finishes:
- Apply paint, stain, or sealers on offcuts or inconspicuous areas.
- Check color in daylight and at night under your actual lighting.
During these mock‑ups, look for two categories of issues:
- Technical problems: Gaps that are too large, materials that chip too easily, thinset too thick or thin, fasteners pulling out, base not flat enough.
- Aesthetic surprises: Pattern alignment, grout color, sheen level, and how joints line up with doors, windows, and furniture.
Adjust your plan before you move to full production. Pros think in terms of “repeatable units”—if a single unit (like one tile corner or one cabinet section) isn’t working, they fix that unit until it’s right, and only then replicate it. Emulating this habit leads to cleaner lines, better joints, and a finished result that looks intentional.
Sequence the Work Like a Pro Crew, Even If You’re Solo
Construction crews rely on sequencing to keep multiple trades from working on top of each other. As a DIYer, you may be the only “trade” on site, but sequencing still determines how efficiently you move and how many rework steps you create.
Start by listing all tasks from demolition to final cleanup. Then, group tasks into logical phases:
- Prep and protection
- Layout and marking
- Rough work (framing, blocking, base prep, rough cuts)
- Services (as applicable: electrical boxes, plumbing rough‑ins)
- Primary installation (tile, pavers, framing, panels, etc.)
- Secondary installation (trim, caulk, hardware, fixtures)
- Finishes (painting, sealing, final surface treatments)
Within each phase, define dependencies:
- What must cure, dry, or set before the next step?
- Which tasks create dust or vibration that could damage finished work?
- Where do you need access that will be blocked later (for example, behind a built‑in)?
Then, sequence to protect the most delicate and visible elements:
- Do all heavy, dusty work before installing finished flooring or final paint.
- Install backing and blocking (for grab bars, shelves, TVs) while walls are open, not after.
- Finish ceiling work before wall painting; finish walls before floors where possible.
Time your work around cure and drying windows rather than convenience. It’s better to schedule your day so that patching, thinset, or concrete is done early, giving maximum drying time, while you move on to non‑invasive tasks like cutting trim or assembling hardware in another area.
Pros excel at “stacking” compatible tasks without touching what needs to stay undisturbed. With a written sequence, you’ll avoid painting too early, installing trim before final sanding, or loading shelves before fasteners have achieved full strength.
Conclusion
Professional results are rarely about having the most expensive tools; they come from the way the work is planned, laid out, and sequenced. By treating your home projects more like small jobsites—organizing space, working from scaled plans, following specs, testing your approach on a small scale, and sequencing like a crew—you dramatically reduce rework, waste, and frustration.
Adopt even two or three of these habits on your next project and pay attention to the difference: fewer surprises, cleaner outcomes, and a build that feels deliberate rather than improvised. Over time, these layout‑first practices become second nature, and your DIY work starts to carry the same quiet confidence you see in professional construction.
Sources
- [U.S. Department of Housing and Urban Development – Residential Rehabilitation Inspection Guide](https://www.hud.gov/program_offices/public_indian_housing/programs/ph/phecc/rehabguides) - Practical guidance on sequencing, prep, and inspection points for residential work
- [International Code Council – International Residential Code (IRC)](https://codes.iccsafe.org/codes/i-codes/irc) - Model residential building code used by many jurisdictions; useful for understanding structural, safety, and clearance requirements
- [The Family Handyman – Pro Tips for Planning a Remodel](https://www.familyhandyman.com/project/how-to-plan-a-home-remodeling-project/) - Accessible overview of staging, sequencing, and planning techniques adapted from professional practice
- [Fine Homebuilding – Layout Fundamentals for Trim and Tile](https://www.finehomebuilding.com/category/skills/layout) - Articles and videos on layout, dry fitting, and finish planning from professional builders
- [Portland Community College – Construction Technology Resource Guides](https://www.pcc.edu/programs/design-construction/construction/resources/) - Educational materials on construction planning, layout, and jobsite organization