This guide focuses on five expert-level, field-tested practices that directly affect performance: prep, placement, consolidation, finishing, and curing/early protection. Each section includes practical how-to steps you can apply on real jobs, not just on paper.
Tip 1: Treat Subgrade Prep as Structural Work, Not Housekeeping
Concrete behaves like a bridge between whatever is underneath it. If the support isn’t uniform, the slab will settle or crack where conditions change. Subgrade prep is therefore structural work, not cleanup.
Start by defining the slab’s job: driveway, patio, garage, shop floor, or structural slab with point loads. Heavier use or vehicles typically call for a compacted, well-drained granular base. Strip topsoil and organic material completely; leave nothing that can rot or compress.
Work in lifts no thicker than 6–8 inches (150–200 mm) when compacting gravel or crushed stone. Use a plate compactor or jumping jack, not just a truck tire or a quick pass with a skid steer. Make at least two perpendicular passes per lift and visually check for pumping or soft spots.
Pay attention to transitions: backfilled utility trenches, old stump holes, or cut-and-fill areas. Overbuild these with extra compaction and, if needed, higher-quality granular backfill. These are the places where differential settlement likes to start.
For exterior work, establish positive slope away from structures (commonly 1/8"–1/4" per foot or 1–2%) before you ever place concrete. Do not rely on finishing alone to create slope; you’ll end up too thin at the high end or too thick at the low. Set string lines and grade stakes that account for final slab thickness.
Finally, separate concrete from uncompacted or unstable edges. If the slab meets soft soil or fill along an edge, consider a thickened perimeter, deeper base, or a turned-down edge detail to reduce edge curling and corner cracking.
Tip 2: Control Water and Mix Consistency Before the Truck Arrives
Most durability issues start when water is added on site to “loosen up” the mix. Every unnecessary gallon of water cuts strength, increases shrinkage, and makes finish quality harder to control.
Clarify the specified slump and water-cement ratio before ordering. For many flatwork jobs, a 4–5 inch slump (with proper finishing tools and crew) provides a good balance of workability and performance. If you expect tight forming or congested reinforcement, talk to your ready-mix supplier about water-reducing admixtures instead of planning to add water in the field.
Set up a process: one person—usually the supervisor—controls any water or admixture adjustments, and nobody else touches the truck controls. If you must adjust slump, add water in small increments, let it mix at least 30 revolutions, then verify visually and, ideally, with a slump test.
Watch the weather and adjust ordering accordingly. Hot, dry, or windy conditions accelerate set times. Rather than adding water to “buy time,” use set-retarding admixtures specified on the ticket, schedule earlier or later pours, and ensure you have enough finishers on site.
For smaller DIY pours using bagged concrete, keep your water measurement consistent. Use the same bucket, filled to the same mark, for every batch. Mix to a uniform, plastic consistency that holds shape but is workable—if it pours like water or slumps into a puddle, it’s too wet. Consistent mix equals consistent cure, color, and strength.
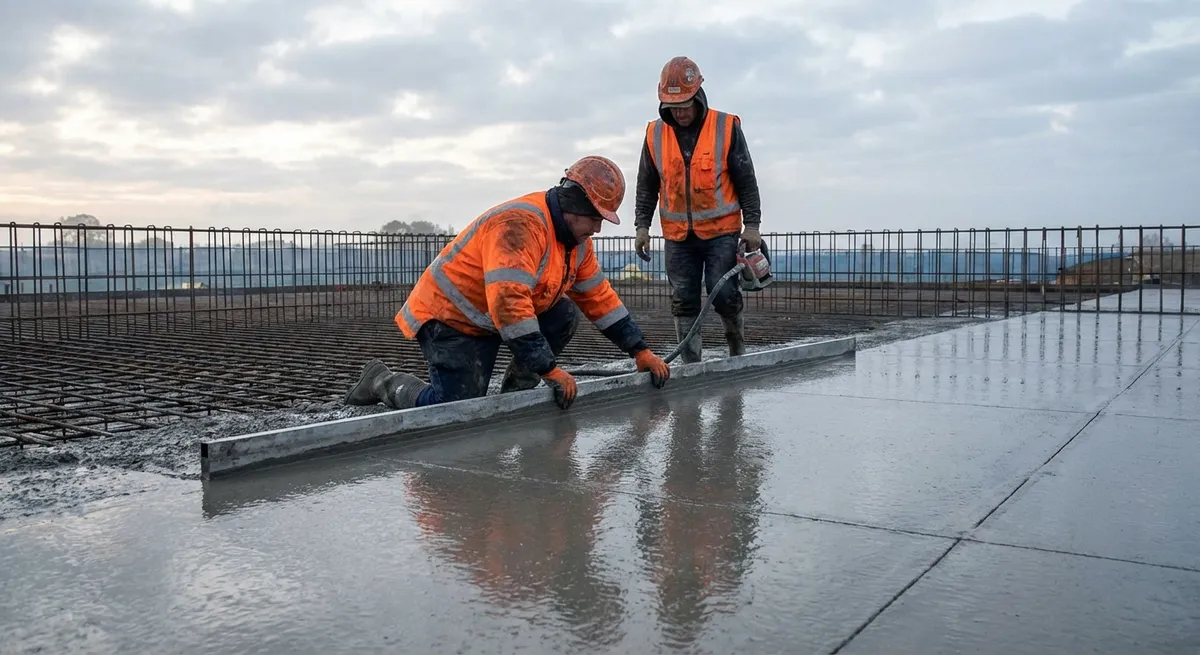
Tip 3: Place and Consolidate in Layers, Not Random Piles
How concrete goes into the forms matters as much as what’s in the mix. Poor placement practices trap air, segregate aggregate, and create weak zones that later show up as honeycombing, scaling, or random cracking.
Instead of dumping large piles and dragging them long distances, aim to place concrete close to its final location. Use a chute, buggies, or a pump to deposit in manageable strips or bays, then move it the minimum amount needed to level and consolidate.
Work to maintain a roughly level front as you advance. Avoid over-vibrating one area while another area is sitting untouched and already beginning to set. If you’re using a mechanical vibrator, insert vertically and withdraw slowly, overlapping insertion areas by about half the head’s radius.
Do not use a vibrator as a moving tool. Over-vibration can cause segregation: heavy aggregate sinks, paste rises, and you end up with weak, paste-rich zones prone to surface defects. The goal is just to remove entrapped air and ensure full contact with forms and reinforcement.
On thinner slabs and smaller placements, hand consolidation is often enough if you’re careful: use rakes and come-alongs with the tines kept up (to avoid tearing the base) and tap form faces with a hammer or hand float to help release trapped air.
Tie your rebar or wire mesh so it can’t float to the surface or fall to the bottom while placing. Use appropriate chairs or supports at the correct spacing. Concrete works because steel is embedded at a designed depth; reinforcement that’s too shallow or too deep is far less effective.
Tip 4: Time Your Finishing to the Concrete, Not the Clock
The most common finishing errors happen because someone tries to rush the process—or waits too long. The right timing depends on temperature, wind, humidity, and the mix, so use the concrete’s behavior as your guide.
After screeding and bull floating, let bleed water rise and fully evaporate before doing any steel troweling or hard finishing passes. Finishing while bleed water is present traps water at the surface, leading to scaling, dusting, and weak top layers. A shiny, wet sheen is your signal to wait.
Bull float immediately after screeding, perpendicular to the direction of screed passes, to push down aggregate and bring up paste just enough to close the surface. Avoid overworking with the bull float—too many passes will bring up excess paste and water.
As the surface becomes firm enough to support weight with only slight indentation, move to hand floats or power trowels, depending on the job. Light passes first, with the blades flat or floats used, then gradually increase blade angle on subsequent passes for a harder finish where appropriate (e.g., interior slabs, shop floors).
On exterior slabs exposed to freeze-thaw or deicing salts, avoid steel-troweled, glass-smooth finishes. A slightly textured broom finish provides better traction and reduces scaling risk. Pull the broom in straight, consistent strokes in one direction for an even pattern.
Be vigilant about edges and joints. Edge immediately after initial bull floating, and again after the surface has firmed up. Well-formed edges and properly tooled joints not only look professional; they reduce random cracking and chipping at slab perimeters, where damage often starts.
Tip 5: Lock in Performance With Jointing and Curing Right Away
Even perfectly placed and finished concrete will crack. The goal is to control where and how it cracks—and to keep the surface strong enough to resist long-term damage. That’s where jointing and curing practices matter most.
Plan joint layout before you pour, not after. For typical slabs, joints are often spaced no more than 24–36 times the slab thickness in inches (for a 4" slab, that’s roughly 8–12 feet), and panels are ideally close to square. Avoid long, narrow strips and “L” shapes; those are crack magnets. Use contraction joints to break up complicated shapes into simpler panels whenever possible.
Tool joints during finishing or saw-cut them as soon as the concrete is strong enough to resist raveling, but before random cracking can form. In warm weather, this can mean sawing within 4–12 hours; in cool weather, you may have a slightly longer window. Early-entry saws allow cutting sooner with shallower depth; conventional saws typically require cuts to at least 1/4 of the slab depth.
Immediately after finishing, start curing. This isn’t optional if you’re serious about strength, durability, and reduced cracking. Curing methods include continuous water curing (soaker hoses, wet burlap), curing compounds, or impervious coverings such as plastic sheeting that retain moisture.
For most applications, aim to keep the slab moist and protected for at least 7 days, especially in hot, dry, or windy conditions. Avoid allowing the surface to dry out and re-wet repeatedly during this early phase, which can create surface crazing and shrinkage cracks.
Protect the slab from premature traffic. Foot traffic is often acceptable after 24 hours in many conditions, light vehicle traffic after several days, and full load in about 7–28 days depending on the mix and design strength. If in doubt, check the mix design and consult your supplier or engineer—overloading a young slab is an easy way to cause permanent damage that won’t show immediately.
Conclusion
Quality concrete work isn’t about one “magic” trick—it’s the accumulation of disciplined habits at every stage: preparing a stable base, controlling mix consistency, placing and consolidating methodically, finishing in sync with the slab, and curing with intention.
Whether you run a crew or handle your own projects, treating these five areas as non-negotiable standards will cut down on callbacks, improve durability, and give your work a professional consistency that clients and inspectors notice. The pay-off isn’t just in how the concrete looks on day one; it’s in how it performs years after you leave the site.
Sources
- [Portland Cement Association – Concrete Basics](https://www.cement.org/learn/concrete-technology/concrete-construction/concrete-basics) - Overview of concrete materials, placement, and finishing fundamentals
- [American Concrete Institute (ACI) – Guide for Concrete Slabs (ACI 302.1R)](https://www.concrete.org/store/productdetail.aspx?ItemID=3021&Language=English) - Industry guidance on slab construction, finishing, jointing, and curing practices
- [U.S. Department of Transportation – Concrete Pavement Field Reference](https://www.fhwa.dot.gov/pavement/concrete/pubs/hif12001.pdf) - Practical field recommendations for subgrade prep, placing, finishing, and curing
- [National Ready Mixed Concrete Association – Curing Concrete](https://www.nrmca.org/wp-content/uploads/2020/10/2TipCuring.pdf) - Technical tip sheet on why curing matters and how to apply it correctly
- [Concrete Construction Magazine – Slump and Water-Cement Ratio](https://www.concreteconstruction.net/how-to/materials/slump-vs-water-cement-ratio_o) - Explanation of how water content and slump affect strength and durability