This guide focuses on five practical, field-tested tips that help you build straighter, tighter, longer-lasting masonry. They’re written for both construction professionals and serious DIYers who care about doing work that holds up.
1. Start With Sound Substrates and Layout, Not Just Level Lines
Masonry failures often trace back to what’s under or behind the wall, not the brick or block itself.
Before you set a single unit, confirm:
- Base support is uniform – For foundations and freestanding walls, compact granular base in thin lifts and verify with a plate compactor. Soft spots mean future settlement and cracking.
- Concrete is cured, not just “dry” – Give structural slabs and footings adequate cure time (often 7+ days before significant masonry loading, and longer for full design strength). Cold-weather pours may need more time.
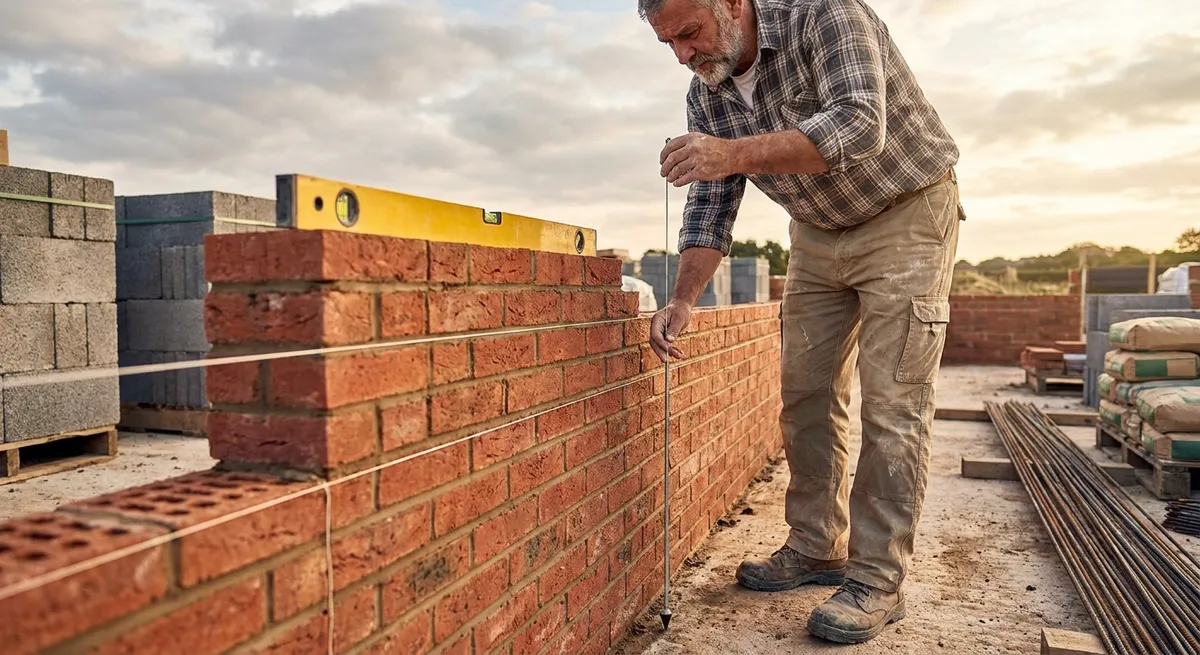
- Layout is checked in multiple ways – Don’t rely only on a tape measure. Use a builder’s square or 3-4-5 triangle, and cross-check diagonals for squareness.
- Control joints are planned, not improvised – For CMU and brick veneer, design vertical control joints where movement will happen (corners, long runs, changes in height), not where they’re convenient at the end.
Practical workflow:
- Snap clear, contrasting chalk lines for wall centerlines and faces.
- Mark door and window openings full-height on substrate or backup wall.
- Strike reference lines for course heights at key points (corners, openings, top-of-wall).
- Confirm all dimensions against plans before any mortar is mixed.
Starting from a straight, square, properly supported layout is the cheapest “insurance” you’ll ever buy in masonry.
2. Match Units and Mortar for the Environment, Not Just Appearance
The brick or block you choose isn’t just an aesthetic decision. Strength, absorption, and expansion characteristics all affect performance—and so does the mortar you pair with them.
Key considerations:
- Masonry units:
- High-strength, low-absorption brick is great for durability but may need careful detailing for moisture and efflorescence control.
- Lightweight CMU saves handling effort but can be more fragile at corners and openings.
- Pavers require compressive strength and freeze-thaw resistance appropriate for climate and traffic.
- Mortar type:
- Type N – Medium strength, good for most above-grade brick and block in standard conditions.
- Type S – Higher strength and better for structural or exterior walls exposed to frost and lateral loads.
- Type O – Lower strength, often used for repointing softer historic masonry so the mortar—not the brick—takes the movement.
- Climate and exposure:
- Freeze-thaw regions demand durable units, proper air content in mortar, and aggressive water-shedding details.
- Coastal or industrial environments may need more sulfate-resistant cement and carefully detailed flashing.
- Compatibility with existing masonry (for repairs):
- Hard, modern mortars on soft, historic brick can cause spalling. Match hardness, color, and texture as closely as possible.
Practical tip: Get the material data sheets for both units and mortar. Check compressive strength, absorption, and recommended applications. If they’re not meant to work together in your conditions, change the spec before it becomes a problem in the field.
3. Control Moisture and Movement With Detailing, Not Just Sealers
Sealers are not a substitute for thoughtful detailing. Robust masonry assemblies manage water and movement with layers and pathways, not coatings alone.
Focus on these fundamentals:
- Water management:
- Install through-wall flashing above openings, at shelf angles, and at transitions to roofs or slabs. Lap flashing correctly and run it to the face with drip edges where required.
- Provide weep holes at the base of veneer and above flashing, typically spaced 24"–32" on center, and keep the cavity clear behind them.
- Maintain a drainage cavity (often 1" or more) behind brick veneers and clean out excess mortar droppings during installation.
- Movement accommodation:
- Use control joints in CMU and expansion joints in brick where standards recommend and where geometry suggests stress will accumulate.
- Install joint reinforcement in CMU walls (often every second or third course) to reduce cracking, especially over openings and long runs.
- Decouple dissimilar materials—brick to steel, brick to concrete—with proper jointing and backer rod/sealant systems.
- Details at openings:
- Set lintels with sufficient bearing each side (commonly 6"+, but check design) and protect them from corrosion with proper flashing.
- Tool joints around windows and doors to shed water, and use compatible sealants at perimeter gaps.
- Shed bulk water with slopes and overhangs.
- Drain anything that gets in via cavities and weeps.
- Let vapor escape through breathable systems rather than trapping moisture.
Aim to shed, drain, and dry:
Done right, your wall can stay durable with minimal reliance on surface sealers—those become a supplement, not a crutch.
4. Make Your Joints Do the Heavy Lifting in Durability and Appearance
Mortar joints are both structural and cosmetic. They influence strength, water performance, and how clean the wall looks from twenty feet away.
Key practices:
- Consistency in joint thickness:
- Target 3/8" bed and head joints unless your spec says otherwise. Variations telegraph through the whole wall and throw off coursing at openings.
- Use line blocks and a taut mason’s line to maintain straight, level joints between leads.
- Timing of tooling and cleaning:
- Tool joints when they’re “thumbprint hard”—firm enough not to smear, soft enough to compact. Too early and joints slump; too late and they won’t seal properly.
- Clean excess mortar from faces as you go with a brush or minimal water. Heavy acid washing later can stain and weaken mortar if overdone.
- Profile for weather resistance:
- Concave and V-joints generally offer the best water resistance and are standard on many exteriors.
- Raked or struck joints can be more vulnerable to water and should match design requirements, not just personal preference.
- Reinforcing appearance:
- Watch color consistency by lining up mix proportions, water content, and mixing time from batch to batch.
- In visible areas, mock up a small panel and get sign-off on joint profile, color, and tooling before running the full wall.
Quality control habit: Step back every few courses and sight along the wall. Look for “snaking” joints, inconsistent thickness, and any obvious dips. Catching issues at 3 courses is cheap. Fixing them at 30 is not.
5. Use Staging, Tools, and Workflow That Support Precision
Good masonry is as much about how you work as what you know. Efficient setup and correct tools keep quality high and rework low.
Practical setup:
- Scaffolding and access:
- Keep working height between waist and chest whenever possible; this reduces fatigue and keeps joints more consistent.
- Align scaffold bays so you can run continuous lines and keep sightlines across long stretches of wall.
- Tool selection and care:
- Use trowels matched to the units you’re laying (smaller for brick, larger for block) to control mortar placement and waste.
- Keep jointers, levels, and line pins in good condition. A bent level or worn jointer is a liability, not a tool.
- Batching and mixing mortar:
- Mix in consistent batches by volume or weight, not by “shovel count guesses” that vary from laborer to laborer.
- Only mix what can be used within its workable time window (often around 2 hours, depending on conditions). Re-tempering with too much water weakens mortar and changes color.
- Weather workflow:
- In hot, dry, or windy conditions, pre-dampen high-absorption units (not dripping wet) and protect fresh work from rapid drying.
- In cold weather, keep materials above minimum temperatures, protect walls from freezing until mortar gains strength, and follow cold-weather masonry guidelines.
- Communication on site:
- Establish a simple visual standard—mockup or reference wall—so everyone is working toward the same look and quality.
- For DIY work, set “checkpoints” (first course, first corner, first opening) to stop, measure, and adjust before you repeat a mistake hundreds of times.
Well-organized work isn’t just faster; it makes it easier to maintain plumb, level, and bond patterns when you’re tired, the weather changes, or the schedule tightens.
Conclusion
Masonry rewards builders who respect fundamentals: proper layout and support, matched materials, smart moisture and movement detailing, disciplined joint work, and a workflow that supports precision instead of fighting it.
None of these tips require exotic tools or overly complex procedures—but they do require consistency. Apply them across your next wall, veneer, or repair, and you’ll feel the difference as you build it, and see the difference years down the line when it’s still straight, tight, and doing its job.
Sources
- [The Masonry Society – TMS 402/602 Resources](https://masonrysociety.org/meeting-and-education/tms-402-602/) - Technical standards and guidance for structural masonry design and construction
- [Portland Cement Association – Mortar Types and Uses](https://www.cement.org/cement-concrete/paving/buildings-structures/masonry-walls/mortar-types-and-uses) - Overview of mortar classifications, properties, and recommended applications
- [NCMA (National Concrete Masonry Association) – TEK Resources](https://ncma.org/resources/) - Technical notes on CMU construction, control joints, reinforcement, and detailing
- [Canada Masonry Design Centre – Best Practices for Masonry Construction](https://www.canadamasonrydesigncentre.com/resources/) - Practical design and construction resources for durable masonry
- [U.S. General Services Administration – Historic Masonry Repair Guidelines](https://www.gsa.gov/technical-procedures/masonry) - Guidance on compatible materials and methods for masonry repair and repointing