This guide focuses on five expert practices you can apply on almost any job—sidewalks, slabs, footings, or small structural elements—to make your concrete behave more predictably and perform longer.
Start With the Right Mix for the Actual Job Conditions
Concrete performance starts long before the truck shows up. Even a well-finished slab will underperform if the mix doesn’t match the conditions and demands of the project.
Begin by clearly defining what the concrete must do: required strength, exposure to freeze–thaw, deicing salts, heavy traffic, or chemical exposure. Communicate these needs to the ready-mix supplier or, if you’re batching your own, select a mix design that specifically addresses them. For exterior flatwork in cold climates, prioritize an air-entrained mix designed for freeze–thaw durability and deicer exposure rather than simply “a 4,000 psi” mix.
Pay attention to water–cement ratio. High strength or long-term durability is far more sensitive to excess water than many realize. Resist the temptation to “loosen” the mix on site with water; instead, specify or request plasticizers or water-reducing admixtures when you need workability without compromising strength. When placing in hot or windy conditions, consider using a retarder or a mix designed for extended set times to allow safe finishing without rush.
Before placement day, review the mix submittal or ticket requirements and confirm slump, air content (if applicable), and admixtures that should be present. Having a concise, written set of expectations for your supplier—and checking each load on arrival—removes guesswork and prevents last-minute changes that can shorten service life.
Control Surface Moisture and Temperature, Not Just the Forms
Most crews check form dimensions and reinforcement, but surface conditions and concrete temperature often receive less attention—even though they heavily influence cracking, finish quality, and strength gain.
Check the temperature of the concrete at placement, especially in extreme weather. For hot weather, plan for early-morning pours, shade where possible, and windbreaks if needed. Hot, dry, or windy conditions accelerate evaporation, which can cause plastic shrinkage cracking before the surface has even set. In cold weather, confirm that mix temperature and ambient conditions meet minimum requirements, and prepare insulation or heated enclosures if needed to keep fresh concrete above critical temperatures during early curing.
Pre-wet absorbent subgrades and forms, but avoid standing water. A bone-dry base or plywood formwork will pull water out of fresh concrete, increasing the risk of weak surfaces and poor bond. Conversely, puddles beneath or inside forms can lead to segregation and inconsistent thickness. Aim for a uniform, damp (but not saturated) subgrade.
Monitor weather forecasts and have a written plan for protection. Evaporation reducers, curing blankets, temporary windbreaks, or even simple plastic sheeting are significantly more effective when anticipated, not improvised at the last minute. Treat moisture and temperature as controllable variables, not background conditions.
Place and Consolidate Concrete to Avoid Hidden Weaknesses
Concrete behaves best when it’s placed methodically and consolidated correctly. Poor placement practices don’t always show up on day one but often reveal themselves as cracking, honeycombing, or unexpected deflection later.
Place concrete as close to its final position as possible. Avoid dropping it from excessive heights or pushing large volumes across long distances with rakes, which can cause segregation (coarse aggregate separating from paste). Use chute extensions, pumps, or buggies to deliver concrete within reach of final placement.
Consolidation must match the element type. For slabs-on-grade, use appropriate screeds and bull floats; over-vibration isn’t usually the issue, but overworking the surface can be. For beams, columns, and walls, internal vibration is critical. Insert the vibrator vertically, in a regular pattern, and allow it to sink under its own weight; do not drag it horizontally. Overlap insertion zones and avoid keeping the vibrator in one place for too long, which can cause segregation.
Pay extra attention around congested reinforcement and embedded items. Honeycombing often occurs where rebar density is highest, and poor consolidation there can undercut design strength. Use smaller-diameter vibrators in tight areas and ensure concrete can flow completely around and beneath reinforcement.
Work in logical lifts. On tall walls or deep footings, place concrete in layers compatible with your ability to consolidate them thoroughly before initial set. Avoid cold joints by keeping a consistent pace of placement, planning access routes, and ensuring adequate manpower and vibration capacity is available before the pour starts.
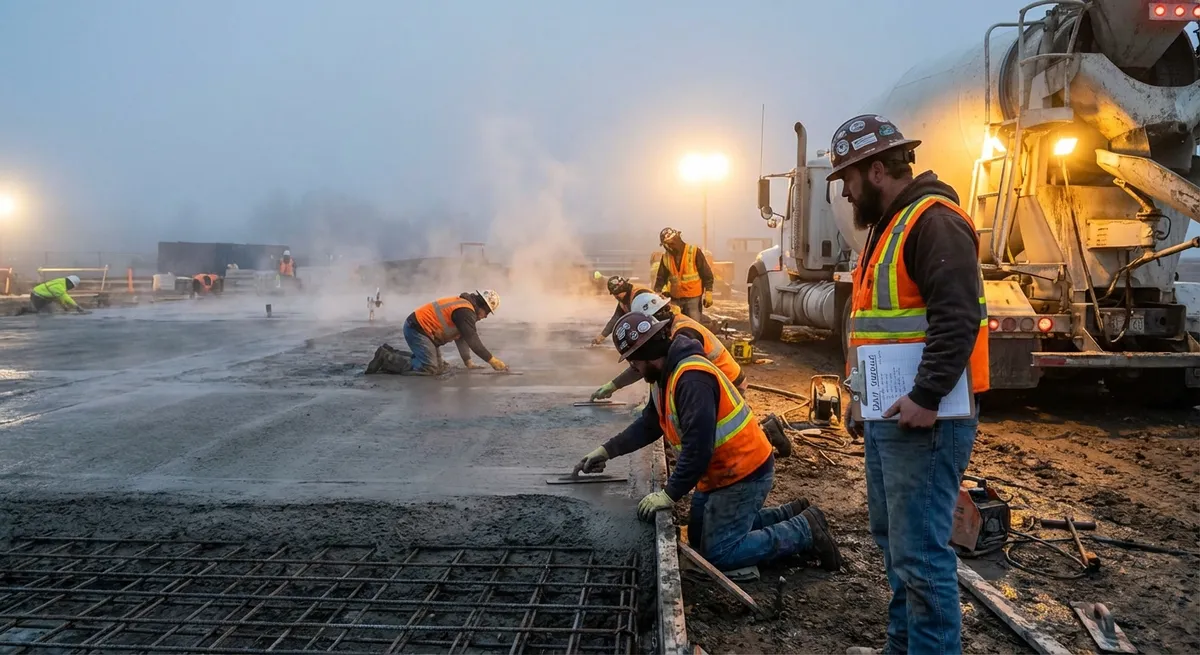
Finish With the Concrete, Not Against the Clock
Many defects are introduced not by bad finishing techniques but by finishing at the wrong time. Learning to read the concrete—and waiting for the right moment—often matters more than any specific tool.
After placement and screeding, allow bleed water to rise and evaporate naturally. Do not start steel troweling or close up the surface while bleed water is present; working this water back into the slab can weaken the surface layer, increase dusting, and promote scaling. On hot or windy days, use evaporation reducers or temporary covers to limit rapid moisture loss without forcing finishing too early.
Use the right tools for each stage. A bull float early on helps embed large aggregate and bring paste to the surface. Magnesium or wood floats are more forgiving when the surface still has some moisture, while steel trowels are best reserved for when the slab has stiffened and can support the pressure required for a dense finish. For exterior slabs, be cautious about overly smooth finishes; a lightly broomed surface usually offers better traction and weather resistance.
Watch the edges and transitions. Joint edges, drains, and interfaces with existing slabs often experience higher stress and traffic. Use edgers and joint tools to create defined, clean lines that reduce spalling at corners. Re-check these critical areas before curing to ensure they have not been inadvertently damaged or overworked.
Above all, let the concrete, not the clock or schedule, dictate the finishing pace. If conditions are accelerating set, slow your pour rate or increase staffing. If cool, damp weather is delaying set, resist the urge to “force” finishing; patience here frequently prevents callbacks later.
Treat Curing and Jointing as Structural Work, Not a Last Step
Curing and joint layout directly influence cracking, durability, and surface performance. Skipping or rushing either can undermine even the best placement and finishing.
Start curing as soon as the surface can safely accept it. For many flatwork applications, this means applying a curing compound, water curing, or covering with plastic sheeting shortly after final finishing. The goal is to maintain adequate moisture and temperature so cement can fully hydrate, especially in the first 7 days. Under-curing can leave concrete weaker, more porous, and more prone to shrinkage cracking and scaling.
Select a curing method that fits the project. Spray-applied curing compounds are efficient on most slabs; water curing (soaker hoses, wet burlap) is effective but labor-intensive and prone to drying out if not monitored. For colored or decorative concrete, verify that the curing compound is compatible with the intended appearance or sealer.
Plan contraction (control) joints before you pour. Joint spacing, depth, and layout should be based on slab thickness, geometry, and restraint conditions, not simply “where it looks good.” As a general guideline, joint depth should be at least one-quarter of the slab thickness, and panel dimensions should be as uniform and square as practical. Saw-cut joints should be made as soon as the concrete can support the saw without raveling but before uncontrolled cracking occurs—often within 4–12 hours, depending on conditions and mix.
Don’t neglect isolation joints and construction joints. Isolation joints separate slabs from columns, walls, or other rigid elements to allow movement without cracking. Construction joints need proper doweling or keying if they will transfer load. Before each pour, review joint locations and treatment so everyone on site understands what must be installed and protected during and after placement.
By elevating curing and jointing to the same level of importance as formwork and reinforcement, you significantly reduce risk of unsightly or structural cracking and improve long-term performance.
Conclusion
Concrete rewards deliberate preparation and disciplined execution. When the mix matches the conditions, placement is methodical, finishing is timed to the concrete rather than the clock, and curing and jointing are treated as structural priorities, slabs and structural elements behave more predictably and last longer.
Whether you’re managing a crew or tackling your own project, applying these five practices—mix selection based on exposure, control of moisture and temperature, proper consolidation, timing of finish work, and serious attention to curing and joints—will keep more projects on schedule and fewer coming back as repairs.
Sources
- [American Concrete Institute (ACI) – Guide for Concrete Floor and Slab Construction (ACI 302.1R)](https://www.concrete.org/store/productdetail.aspx?ItemID=3021) - Industry-standard guidance on concrete slab design, placement, finishing, and curing
- [Portland Cement Association – Concrete Basics](https://www.cement.org/learn/concrete-technology/concrete-construction/concrete-basics) - Practical overview of concrete materials, placing, finishing, and curing principles
- [U.S. Department of Transportation, FHWA – Concrete Pavement Field Reference](https://www.fhwa.dot.gov/pavement/concrete/pubs/hif18052.pdf) - Field-focused best practices on concrete mix, placement, consolidation, curing, and joints
- [National Ready Mixed Concrete Association (NRMCA) – Curing Concrete](https://www.nrmca.org/concrete-technology/curing-concrete/) - Detailed explanation of curing methods, timing, and their impact on performance
- [Cement Concrete & Aggregates Australia – Guide to Concrete Construction](https://www.ccaa.com.au/imis_prod/CCAA/Store/StoreLayouts/Store_Detail.aspx?productId=94) - Comprehensive handbook covering concrete planning, placing, finishing, and jointing for construction professionals and advanced DIYers