Know Your Mix Before the Truck Arrives
Concrete performance is largely decided before the chute ever swings over your forms. Treat the mix design as a tool, not a mystery.
Start by confirming the specified compressive strength (e.g., 3,000 psi vs. 4,000 psi) and exposure conditions (freeze-thaw cycles, deicing salts, marine environments). For exterior slabs in cold climates, insist on air-entrained concrete; those microscopic air bubbles give freeze-thaw expansion somewhere to go, significantly improving durability.
Clarify the maximum water–cement ratio on the ticket or spec sheet. Extra water on site may make concrete easier to place, but it also reduces strength, increases shrinkage, and invites surface dusting. If workability is an issue, talk with your ready-mix supplier about using water-reducing or superplasticizing admixtures instead of free water from the hose.
For DIY projects ordering bagged mixes, read the technical data sheet rather than just the front of the bag. Look for information on targeted strength, recommended slump range, and whether the mix includes air entrainment or fibers. Match the product to the job: high-early mixes for quick form removal, standard mixes for general flatwork, and specialty products for structural or high-abrasion areas.
Finally, document the mix on each pour (ticket photo, notes on admixtures and slump). When issues arise later, a clear record makes troubleshooting and warranty discussions much more productive.
Control Water and Slump Like a Professional
On-site water is one of the most abused variables in concrete work. Seasoned pros treat it with the same respect they give rebar layout or formwork.
Use a slump test (even a basic field cone) to check consistency rather than guessing by eye. If the specified slump is 4 inches, but what you see looks like soup sliding out of the chute, stop and verify before accepting the load. A mix that’s too wet will segregate (coarse aggregate sinking, paste rising), leading to weak, crack-prone surfaces.
If the crew is struggling to move the concrete, resist the urge to “loosen it up” with a lot of water. Instead:
- Ask the plant if water-reducer or superplasticizer was included.
- If not, and you know you’ll need more workability, discuss adding admixture at the plant for subsequent loads.
- For the current load, only add water within the limits allowed on the ticket, and record how much is added.
When mixing bagged concrete, measure water accurately by volume (bucket or graduated container). Add about 75–80% of the recommended water first, mix thoroughly, then add the rest gradually until you hit a workable yet cohesive consistency. The surface should shine without excessive bleed water, and the mix should hold its shape when heaped with a shovel.
Remember: every unnecessary gallon of water per cubic yard can dramatically reduce strength and increase shrinkage. A little discipline with water and slump is one of the easiest ways to extend service life and cut callbacks.
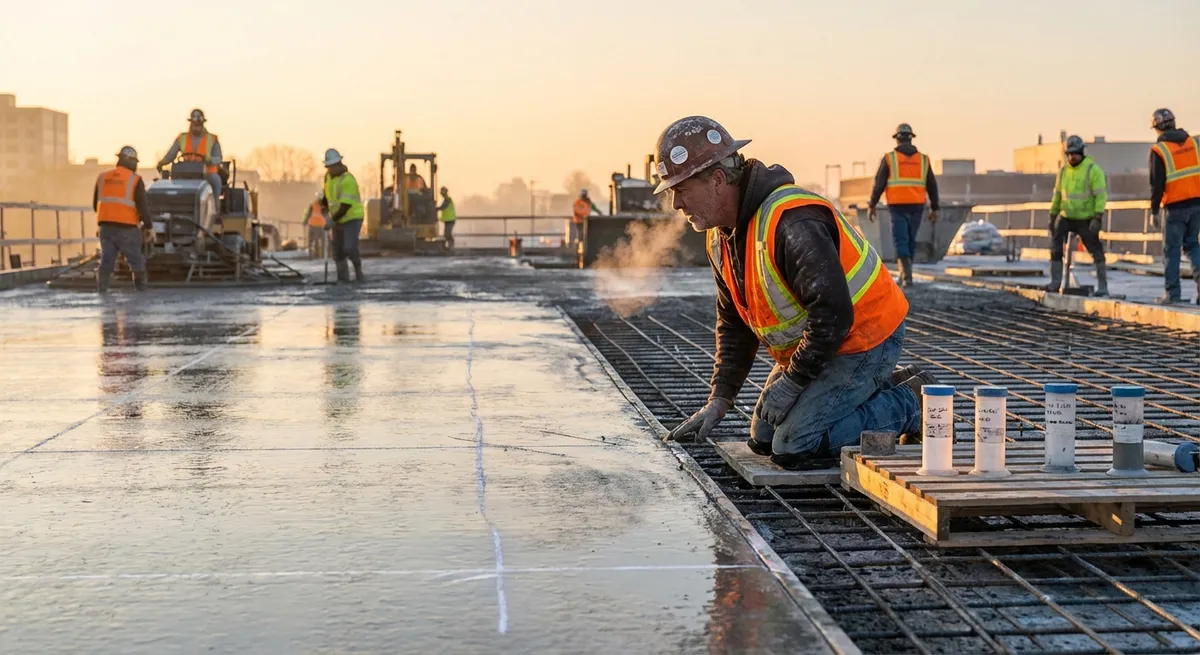
Reinforcement and Joints: Where Most Cracking Battles Are Won
Concrete wants to crack; your job is to control where and how it happens. That starts with reinforcement and joint layout that follow a rational plan, not guesswork.
Place rebar or welded wire reinforcement in the correct position—typically in the tension zone, not sitting on the subgrade. Use chairs or dobies to support the steel so it stays in the middle third (for slabs) or as specified for structural elements. Pulling mesh up with a rake during the pour is unreliable; it often ends up back on the bottom as workers move around.
Before placement, mark out joint locations on the forms and nearby structures. For slabs-on-grade, a common rule of thumb is to keep joint spacing in feet no more than 2–3 times the slab thickness in inches (for example, a 4-inch slab might have joints every 8–12 feet). Avoid long, narrow panels and irregular shapes; they are crack magnets. Try to maintain square or near-square panels wherever possible.
Plan for three joint types:
- Control (contraction) joints to manage shrinkage cracking by creating planes of weakness.
- Isolation joints where the slab meets columns, walls, or other fixed elements to allow differential movement.
- Construction joints where one day’s pour meets another; treat these like planned, reinforced seams rather than random cold joints.
For small DIY slabs, manufactured joint tools or hand-grooved joints can be adequate, but depth still matters—joints should be at least one-quarter of the slab thickness. Too shallow, and cracks will ignore the joint line and wander across the surface.
The combination of properly placed reinforcement and well-thought-out joints doesn’t eliminate cracks; it organizes them so they’re straighter, narrower, and far less likely to cause functional or aesthetic problems.
Finishing Without Ruining the Surface
Many concrete problems start with finishing that looked fine on day one but undermined the surface in subtle ways. The goal is to refine the slab—not to fight it.
First, respect bleed water. After screeding and bull floating, allow bleed water to come up and evaporate naturally. Do not trowel or broom finish while water is still sheening on the surface. Working bleed water back in traps excess moisture and raises the water–cement ratio at the top, leading to weak, dusty, or flaking surfaces.
Use the right tool at the right time:
- Bull float immediately after screeding to embed aggregate and bring paste to the surface.
- Hand or power troweling only when the slab can support a finisher’s weight with minimal imprint.
- Brooming for exterior slip resistance after troweling has closed the surface but before it becomes too hard.
Avoid over-troweling air-entrained exterior slabs. Aggressive, repeated steel troweling can crush the air-void system at the surface, making the slab more vulnerable to freeze-thaw scaling and deicing salts. For driveways, sidewalks, and patios in cold climates, a moderate steel trowel followed by a uniform broom finish is typically the safer option.
Be mindful of environmental conditions. On hot, windy days or in low humidity, consider using evaporation retarders and windbreaks, and shorten finishing passes so you stay slightly ahead of set. In cool, damp weather, expect slower set times; pushing the finish too soon can lead to tearing, blistering, or trapped moisture.
Lastly, keep your crew size aligned with the pour size. A small team on a large slab often leads to rushed finishing at the worst possible moment, just as the concrete is setting. Good finishing is less about heroics and more about having enough hands at the right time.
Curing as a Planned Phase, Not an Afterthought
Curing is where long-term strength and durability are either locked in or quietly sacrificed. Well-designed curing keeps moisture and temperature in the right range for cement hydration during those critical first days.
Plan your curing method before the pour:
- Curing compound (spray-applied membrane) is practical for many slabs where later coatings or toppings are not planned.
- Water curing (wet burlap, sprinklers, or soaker hoses) works well when constant moisture can be maintained and runoff controlled.
- Sheet curing (polyethylene sheeting or curing blankets) is effective for flatwork, especially in windy or hot conditions.
Start curing as soon as the surface can be walked on without marking and finishing is complete—often within hours, not the next day. For typical slabs, aim to maintain curing conditions for at least 7 days; for higher-performance or exposed structures, extending to 14 days or following engineer specifications pays dividends in strength and reduced cracking.
Watch ambient temperature. Concrete should be protected from rapid drying and from freezing during early curing. In cold weather, use insulated blankets or temporary heat to keep surface temperatures within the recommended range. In hot weather, cool mixing water, pour during cooler parts of the day, and use windbreaks and shade where practical.
If you plan to apply sealers, coatings, or adhesives, coordinate curing methods with the manufacturer’s instructions. Some curing compounds interfere with later bonding and must be removed; in those cases, sheet or water curing may be preferable.
Thoughtful curing doesn’t add much to your schedule, but it can be the difference between a slab that looks acceptable for a season and one that performs reliably for decades.
Conclusion
Consistently successful concrete work is less about secret tricks and more about disciplined control of fundamentals: mix design, water, reinforcement, finishing, and curing. Professionals and advanced DIYers who treat each pour as a controlled process—not a race against the clock—see fewer callbacks, fewer repairs, and far better long-term performance. Apply these five practices systematically on your next project, document what you do, and refine from there. Over time, your “standard” concrete jobs will start performing like premium ones.
Sources
- [Portland Cement Association – Concrete Basics](https://www.cement.org/learn/concrete-technology/concrete-construction/concrete-basics) - Overview of mix design, placement, finishing, and curing fundamentals
- [American Concrete Institute (ACI) – 302.1R Guide for Concrete Floor and Slab Construction](https://www.concrete.org/store/productdetail.aspx?ItemID=3021R21) - Industry-standard guidance on slab construction, joints, finishing, and curing practices
- [U.S. Federal Highway Administration – Concrete Pavement Guide](https://www.fhwa.dot.gov/pavement/concrete/) - Technical resources on concrete performance, joints, and durability in field conditions
- [NRMCA – CIP 11: Curing In-Place Concrete](https://www.nrmca.org/members/cip11-curing-in-place-concrete/) - Practical explanations of curing methods, timing, and impact on strength and durability
- [University of Illinois – Concrete Jointing and Crack Control](https://ict.illinois.edu/publications/report-files/FHWA-ICT-13-030.pdf) - Research-based discussion of joint spacing, design, and crack control strategies