This guide focuses on five practical, technically sound tips that apply to both professionals and serious DIY builders, with clear “how‑to” detail instead of vague rules of thumb.
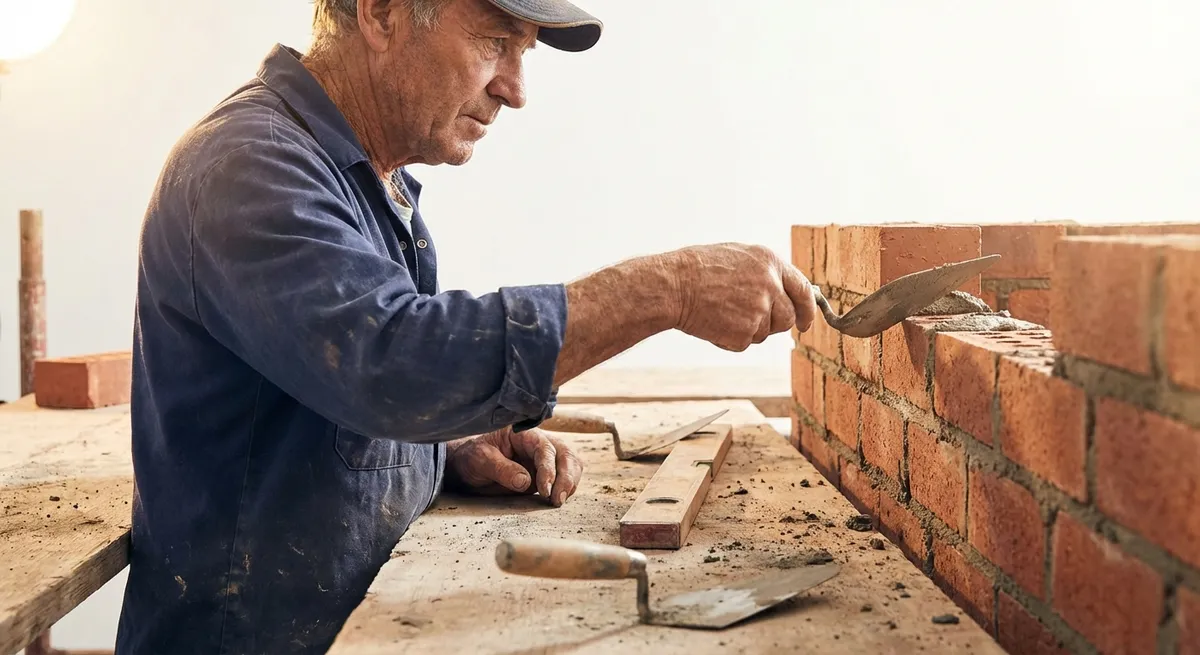
Tip 1: Control Your Mortar Consistency Instead of Chasing the Weather
Mortar that is too wet or too stiff causes more problems than most people realize: slumped joints, weak bond, or slow production as you fight the bed.
How to dial in workable mortar:
- Start with measured water. Don’t fill the mixer “until it looks right.” Use a clean bucket and record how much water you add per bag or per batch so you can repeat it.
- Aim for a plastic, not soupy, mix. A trowel should stand up in the mortar but still allow you to spread a smooth bed without tearing. If it shines like paint, it’s too wet.
- Adjust in small increments. If you need to tweak, add a small amount of water (or a small amount of dry mix) and let it blend for a minute before judging.
- Respect the initial set. Don’t “retemper” mortar that’s already begun to set by adding water over and over. That can weaken the bond and reduce strength.
- Match the job to the mortar. For exterior walls and structural work, use a mortar type specified by code or manufacturer (Type N, S, etc.). Don’t improvise mixes without understanding the strength and flexibility requirements.
A controlled, repeatable mortar mix lets you focus on line, plumb, and speed instead of constantly fighting your material.
Tip 2: Lay Out for Full Units First, Then Plan Your Cuts Intentionally
Walls look professional when the units “land right” at corners, openings, and transitions. Random slivers and awkward cuts are usually the result of skipping a thoughtful layout.
A practical approach to layout:
- Dry‑lay a course. On the slab or footing, set a line of units dry (no mortar) along the wall length to see how bond pattern and joint width will work out.
- Check against key points. Note where full units or half units will intersect window and door openings, corners, and control joints.
- Adjust the joint, not the unit. Within reason, slightly adjust mortar joint thickness (for example, between 3/8" and 1/2") along the run to avoid tiny “sliver” cuts at the ends.
- Plan cut locations. If you must cut, place cuts near less visible areas (behind downspouts, inside corners, under sills) rather than at eye‑level corners.
- Mark your layout. Snap chalk lines or use a construction pencil on the foundation or slab to mark key unit positions and course heights.
Investing 20–30 minutes in layout prevents hours of frustration later and produces cleaner, more intentional lines that stand out immediately to anyone in the trade.
Tip 3: Use String Lines and Story Poles to Keep Walls Straight and Level
Trusting your eye alone is the fastest path to wavy walls and uneven course heights. Simple tools—string lines and story poles—give you consistent reference points and dramatically increase quality.
Setting up straight, level work:
- Run a tight mason’s line. Hook line blocks or line pins at each end of the wall. Keep the line tight enough that it doesn’t sag when you bump it lightly with a trowel.
- Check level at the first course. If your base course is out, every course above will mirror that error. Take extra care to shim or adjust mortar to achieve a level, straight first course.
- Use a story pole for height control. Make a marked board (story pole) with the vertical positions of each course, including planned joint thickness. This keeps course heights consistent across long runs and around corners.
- Build leads, then infill. Construct “lead” corners or piers first, checking plumb and level, then run your line between them and infill the stretches between. This gives you a built‑in quality control framework.
- Verify plumb frequently. Use a 4' or longer level on corners and every few feet along the run, not just at the ends. Correcting a small deviation early is much easier than tearing out a crooked section later.
These techniques are inexpensive, quick, and make a visible difference in the straightness and professionalism of your finished work.
Tip 4: Manage Moisture with Proper Joint Profiles and Flashing
Masonry is not waterproof by itself. Its ability to shed water and dry out depends heavily on joint finishing and basic water management details.
Practical moisture‑smart practices:
- Choose the right joint profile. Concave and “V” joints compact mortar tightly and shed water well. Raked or struck joints can look sharp but may hold water and expose more of the mortar surface to weathering.
- Tool at the right time. Tool joints when the mortar is thumbprint hard—firm enough to hold shape but not so dry that it crumbles. This compacts the mortar and increases durability.
- Clear weep holes. On veneered brick walls and cavity walls, don’t plug or fill weep holes at the base or above openings. They allow trapped moisture to escape.
- Use proper flashing. Install corrosion‑resistant flashing (metal or compatible membrane) over openings, at shelf angles, and at the top of walls where specified. Lap it correctly and direct it toward weep holes.
- Keep grade away from masonry. Exterior soil or mulch should sit below brick or block courses, not buried against them. Raise grade too high and you invite capillary water into the wall.
If you think about how water lands, runs, and leaves the wall at every step, you’ll avoid most of the common long‑term masonry failures.
Tip 5: Cut, Grind, and Clean Without Damaging the Work
Finishing details—cutting units, grinding for fit, and cleaning mortar smears—can either sharpen your work or slowly destroy it if handled carelessly.
Field‑tested finishing practices:
- Use the right blade for the unit. Brick, CMU, and stone vary in hardness. Use a diamond blade rated for masonry and match your RPM and feed rate to the material to avoid chipping and overheating.
- Score before breaking. For simple cuts, a scored line with a masonry chisel can give a clean break with less dust. For visible edges, cut fully through with the saw and support the unit to prevent spalling.
- Control dust and safety. Use wet‑cutting where practical to reduce airborne dust, and always wear appropriate eye, hearing, and respiratory protection.
- Clean as you go. Remove fresh mortar smears with a stiff brush or a damp (not soaking) sponge before they harden. Don’t flood the wall, which can cause staining or wash out joints.
- Be cautious with acids. If acid cleaning is necessary, always follow the manufacturer’s dilution and pre‑wet the masonry to prevent “burning” the surface. Test in an inconspicuous area first.
Thoughtful cutting and cleaning preserve both the strength and appearance of the wall, turning competent work into clearly professional work.
Conclusion
Solid masonry isn’t just about stacking brick or block; it’s about small, repeatable habits that protect alignment, strength, and durability. Controlling mortar consistency, planning your layout, working off solid reference lines, managing moisture, and finishing carefully will raise the quality of every wall you build.
Whether you’re running a crew or building your first serious project at home, treating these practices as non‑negotiable standards—not optional extras—will show in every course you lay.
Sources
- [Portland Cement Association – Mortar Types and Uses](https://www.cement.org/cement-concrete/paving/buildings-structures/masonry/mortar-types-and-uses) - Overview of mortar types, properties, and appropriate applications
- [Brick Industry Association – Technical Notes on Brick Construction](https://www.gobrick.com/technical-notes) - Detailed guidance on brickwork design, moisture management, and construction practices
- [Masonry Standards Joint Committee (MSJC) / TMS 402/602 Summary – The Masonry Society](https://masonrysociety.org/design/masonry-standards-tms-402-602/) - Code-based requirements and best practices for structural and nonstructural masonry
- [U.S. National Park Service – Preservation Brief 1: Cleaning and Waterproof Coating for Historic Masonry Buildings](https://www.nps.gov/orgs/1739/preservation-briefs.htm) - Practical advice on appropriate cleaning methods and moisture considerations
- [University of Kentucky Cooperative Extension – Laying Brick](https://www.uky.edu/bae/laying-brick) - Step-by-step basic masonry techniques and tools overview