Tip 1: Stabilize the Structure Before You Touch the Damage
Most failed repairs start with the same mistake: fixing what you see without stabilizing what’s behind it. Before you chip, cut, or remove anything, make sure the surrounding structure can safely handle the disturbance.
First, identify load paths. For walls, note where loads are coming from (roof, upper floors, beams) and how they’re supported. For joists and beams, look at what they’re carrying and where they bear. If you’re altering anything near a load path, install temporary shoring or bracing before you start. This can be as simple as an adjustable steel jack post under a sagging joist, or as involved as a temporary stud wall under a compromised beam.
For cracked slabs or foundations, look for signs of active movement: fresh, sharp crack edges, misaligned doors and windows, or seasonal opening and closing of gaps. If movement is ongoing, address drainage, expansive soils, or structural support (piers, underpinning) before cosmetic repairs. Otherwise, your patch will fail as the structure keeps moving.
For vertical elements (columns, posts), never assume “it’s fine” because it’s been standing. Check for rot at base connections, rusted fasteners, and undersized bearing areas. If you’re replacing or repairing a post, pre-load the temporary support slightly (just enough to take the weight, not lift the structure significantly), then perform the repair. Only remove temporary supports after you’ve verified the new or repaired element is properly bearing and fastened.
The rule: stabilize first, then repair. If you’re guessing about load, consult span tables, manufacturer data, or a structural professional—especially on structural members in habitable spaces.
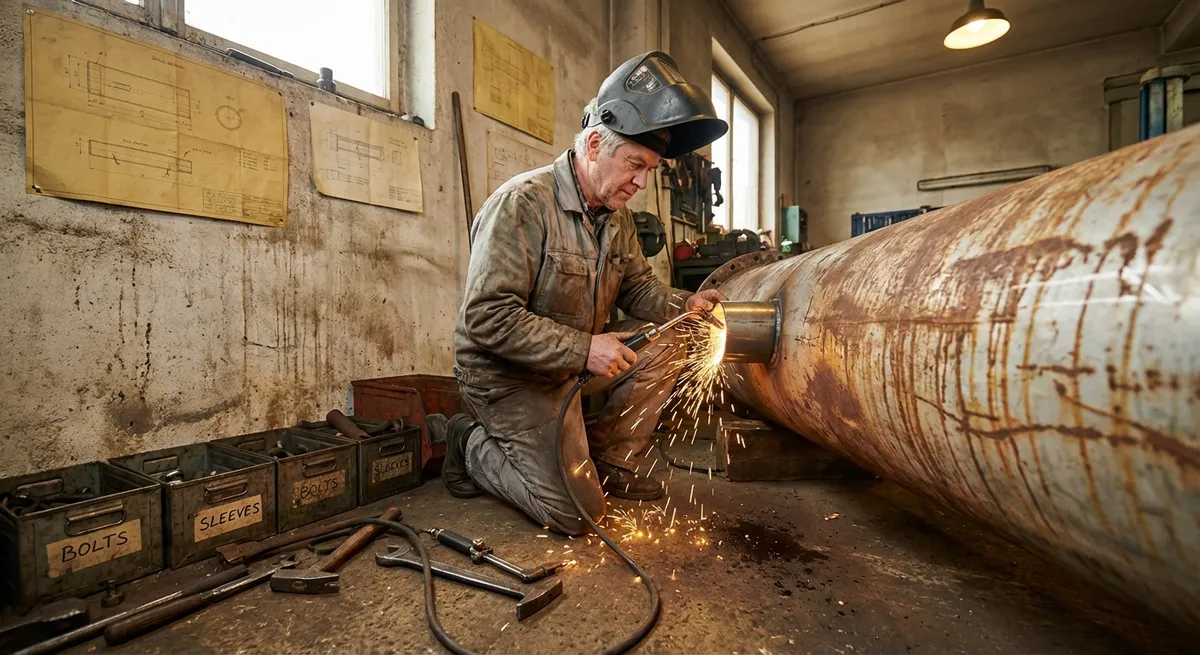
Tip 2: Treat Surface Prep as a Separate, Non-Negotiable Phase
Good products fail on dirty, weak, or incompatible surfaces. Instead of treating prep as a quick pre-step, treat it as its own phase with its own checklist.
Start by removing all loose material—not just what falls off with a light scrape. Use a stiff brush, cold chisel, or grinder to get down to sound substrate. For concrete repairs, you should see solid, un-cracked material with no hollow sound when tapped. For wood, remove all punky, fibrous, or darkened rot until you reach firm, clean fibers.
Next, deal with contamination. Paint, oil, sealers, curing compounds, efflorescence, mildew, and old adhesives can all interfere with adhesion. Mechanical removal (sanding, scraping, grinding) is usually more reliable than chemicals, but for oil- or grease-contaminated concrete, use a degreaser followed by thorough rinsing and drying. For mold or mildew, clean with a proper biocidal solution, not just soap and water, and let it dry completely.
Match moisture conditions to your repair material. Cement-based products usually want a clean, damp (not wet) surface to avoid premature drying; epoxies and some adhesives want a dry surface. Check the manufacturer’s surface requirements and test a small area before committing. If water beads up on concrete or masonry, you likely have a sealer or contaminant still present.
Finally, create a suitable profile. Many repair materials need a slightly rough surface (often described as “SSD” for concrete—saturated surface-dry, with a sandpaper-like profile). Smooth, tight-troweled concrete, glossy paint, or polished surfaces usually need mechanical roughening. Surface prep is successful when you’ve removed weak material, eliminated contaminants, matched moisture requirements, and created a compatible surface profile.
Tip 3: Use Compatible Materials and Systems, Not Just “Similar” Ones
Repairs often fail when a “good” product is incompatible with the existing material. Strength, flexibility, thermal movement, and chemical compatibility all matter more than buying the highest-spec product on the shelf.
For concrete and masonry, match or slightly under-match strength. An extremely hard, high-strength repair mortar on a lower-strength base concrete can lead to edge cracking where the two meet. Use repair mortars and grouts designed for the application (vertical, overhead, structural, non-structural) and check that they’re compatible with the substrate type and environment (freeze-thaw cycles, de-icing salts, moisture exposure).
For wood, use repair systems that move with the material. Epoxy consolidants and fillers can be excellent for structural wood repairs when used correctly, but they behave differently than wood under temperature and moisture changes. Follow system-based products (primer, consolidant, filler, topcoat) from a single manufacturer rather than mixing brands. For exterior repairs, avoid rigid interior-grade fillers that will crack out with seasonal movement.
For sealants and caulks, choose chemistry for the environment and joint movement: polyurethane, silyl-terminated polyether (STPE), or high-performance silicone for exterior high-movement joints; acrylic-latex for interior, paintable, low-movement joints. Always verify compatibility with adjacent materials—some sealants can stain stone or fail to adhere to certain plastics and coatings.
When tying new framing into old, stick to fasteners and connectors rated for the exposure and preservative treatment. Modern pressure-treated lumber can corrode unprotected steel fasteners; use hot-dip galvanized or stainless steel where required. When in doubt, check the lumber stamp and connector manufacturer’s tables.
The professional habit: treat every repair as a small system design. Verify material compatibility, not just general type, before you buy—and keep all data sheets for reference on future jobs.
Tip 4: Control Moisture and Movement Around the Repair Zone
Even perfectly executed repairs will fail if they’re installed in a wet, moving, or thermally stressed environment without mitigation. Before you commit to a repair, plan for how the area will shed water and handle movement over time.
For exterior walls and cladding, trace how bulk water is managed: roofing, flashing, housewrap or WRB, weep holes, and sealant joints. If you’re repairing damaged siding, brick, or stucco, make sure you reconstruct or improve the water-management layers behind it, not just the surface skin. Flashing laps should shed water (upper layers over lower), and penetrations (vents, fixtures, hose bibs) should be properly integrated with the WRB, not just caulked to the surface.
For slabs and foundations, inspect site grading and drainage. Soil should slope away from the structure, and downspouts should discharge well beyond the foundation zone. If you’re repairing interior moisture damage but ignoring exterior drainage, you’re setting yourself up for a repeat problem. In basements and crawlspaces, consider vapor barriers, perimeter drains, and dehumidification as part of the repair strategy.
Allow for movement with intentional joints. Long runs of concrete, masonry, or rigid trim need joints that accommodate temperature and moisture changes. If you’re repairing cracked concrete where no control joints exist, consider cutting or placing control joints at appropriate intervals to manage future cracking. Around windows and doors, use proper backer rod and sealant in joints sized according to manufacturer recommendations, rather than overfilling narrow gaps with rigid filler.
During curing and drying, protect your repair from rapid moisture changes and temperature extremes. Cement-based repairs should be cured in line with manufacturer guidance—often requiring misting, wet coverings, or curing compounds. Wood and coatings should be applied within the recommended temperature and humidity ranges, with adequate drying time before exposing them to heavy use or weather.
Moisture and movement control is not cosmetic—it’s what determines whether your repair remains bonded, intact, and functional over the long term.
Tip 5: Document, Test, and Inspect Before Calling the Job Complete
Professionals distinguish themselves by how they verify work, not just how they perform it. Before you clean up, confirm that your repair performs as intended, and leave behind enough information for future you—or another pro—to understand what was done.
Start with simple, practical tests. For structural repairs, check for deflection or movement under normal loads (within safe limits), not just at rest. For doors and windows, confirm operation through multiple open/close cycles and check clearances. For sealants and weatherproofing, use controlled water tests: light, directed spraying from low to high, while someone observes from inside, watching for leaks. For concrete and masonry, tap around the repair with a hammer or hard object and listen for hollow sounds that indicate poor bond.
Document what you used and how you used it. Note product names, batch numbers if available, installation dates, mixing ratios, and environmental conditions (temperature, humidity, substrate moisture if measured) at the time of installation. Take clear before, during, and after photos. This isn’t bureaucracy—it’s insurance. If a repair needs adjustment or fails prematurely, you immediately know what was done and can adjust materials or methods accordingly.
Perform a focused visual inspection 24–72 hours after the repair and again after the first major weather event or loading cycle. Look for hairline cracks, debonding at edges, staining, leaks, fastener back-out, or distortion. Small issues caught early can often be corrected quickly before they become major failures.
Lastly, communicate limitations. If you’re a contractor, explain to the owner what was repaired, what underlying risks remain, and what maintenance is required (e.g., re-caulking cycles, sealing schedules, drainage checks). If you’re a DIYer, keep a simple repair log for your home. Future projects—your own or a professional’s—will be better, faster, and safer with this context.
Treating verification and documentation as part of the repair itself—not an optional add-on—is what moves your work from “patched” to “professionally restored.”
Conclusion
Durable repairs come from disciplined process more than from special products. Stabilizing structures before you touch damaged areas, elevating surface prep, choosing genuinely compatible materials, controlling moisture and movement, and treating verification as part of the work will improve the lifespan of every fix you make. Whether you’re running crews or managing your own property, these habits turn each repair into a long-term improvement, instead of the start of the next problem.
Sources
- [U.S. General Services Administration – Concrete Repair](https://www.gsa.gov/technical-procedures/concrete-repair) - Federal guidance on proper assessment, preparation, and execution of concrete repairs
- [Portland Cement Association – Concrete Repair Basics](https://www.cement.org/learn/concrete-technology/durability/concrete-repair) - Technical overview of concrete repair materials, surface prep, and durability considerations
- [U.S. Department of Energy – Moisture Control Guidance](https://www.energy.gov/energysaver/moisture-control-home) - Practical strategies for managing moisture in and around buildings to prevent damage and repair failure
- [Simpson Strong-Tie – Corrosion and Pressure-Treated Wood](https://www.strongtie.com/resources/articles/corrosion) - Manufacturer guidance on fastener and connector compatibility with treated lumber and different environments
- [University of Minnesota Extension – Preventing Water in Basements](https://extension.umn.edu/problem-prevention-and-disaster-recovery/preventing-water-basement-and-crawl-space) - Research-based recommendations on grading, drainage, and moisture management around foundations