Below are five expert techniques that both construction professionals and serious DIYers can use to get more predictable, durable results from their concrete work.
Start with Subgrade That Doesn’t Move
Concrete performs only as well as the ground beneath it. A perfectly finished slab over a weak, poorly compacted base will almost always settle, crack, or heave.
Begin by stripping organic material—topsoil, roots, sod, and any loose debris—down to firm, undisturbed soil. Organic layers will decompose and shrink over time, causing voids and drop-offs under the slab. For most residential slabs and pads, plan on at least 4–6 inches of compactible base material (often a well-graded crushed stone or gravel) over this firm subgrade.
Place the base in thin lifts—typically 2–3 inches at a time—and compact each lift thoroughly with a plate compactor or rammer. Walking on gravel until it “feels firm” is not enough; proper compaction greatly reduces future settlement. Pay special attention to edges, trenches, and backfilled areas where utilities were installed; these zones tend to settle the most.
For exterior work in cold climates, check local frost-depth recommendations and consider whether the slab edge needs deeper support or thickened-edge design. Accounting for frost heave and soil movement before the pour is far more reliable than trying to repair a slab that has tilted later.
Build Smart Forms That Control Thickness and Shape
Forms do more than shape the concrete; they control slab thickness, edge strength, and how the load is transferred to the base. Flimsy, poorly braced forms allow the slab thickness to vary, which can create thin, weak spots that crack under loads.
Use straight, sound lumber or metal forms, and set them to the desired finished height using a builder’s level, laser level, or string lines checked with a line level. Confirm thickness in multiple locations by measuring from the top of the form down to the compacted base. Make adjustments now; it is nearly impossible to “fix” inconsistent thickness during the pour.
Brace forms from the outside with stakes driven firmly into the ground, spacing them closer where the form curves or where the concrete will be deeper. For wider slabs, consider temporary interior screed rails (for example, straight pipes or boards) set to height so finishers can maintain thickness through the middle, not just at the edges.
Before the pour, apply form release (commercial release agent or light motor oil for temporary wood forms where local rules allow it) to reduce sticking and edge damage when stripping forms. Tight, stable, well-braced forms help ensure the slab maintains its design thickness and edge integrity, which directly affects long-term performance.
Place and Reinforce Concrete to Fight Common Failure Points
Even with a solid base and strong forms, concrete will crack as it shrinks and responds to temperature changes. The goal is not to prevent all cracking—it’s to control where cracks form and how wide they get.
If using welded wire mesh or rebar, place it at the correct depth within the slab, typically in the upper third to middle of the slab thickness for many residential applications (check local codes and engineering requirements). Simply tossing mesh on the ground and pouring over it offers minimal benefit; use chairs, dobies, or supports to keep reinforcement in position. Pulling mesh up with hooks during the pour often leads to inconsistent placement.
For slabs that need additional crack control or where traditional reinforcement is difficult to place, consider fiber-reinforced concrete mixes. Micro-fibers help reduce plastic shrinkage cracking, and macro-fibers can add post-crack toughness. Discuss fiber options with your ready-mix supplier and confirm they align with structural or code requirements.
Plan control joints (saw cuts or tooled joints) before placing concrete. Typical joint spacing for residential slabs is often 2–3 times the slab thickness in feet (for a 4-inch slab, that’s about 8–12 feet), but always verify with design guidelines, climate conditions, and load requirements. Joints should be placed to create reasonably square panels and avoid long, narrow sections, which crack more easily.
Manage Water: In the Mix and Around the Slab
Too much water—both in the concrete mix and in the surrounding soil—is a leading cause of weak, unstable slabs. Water makes concrete easier to place but dramatically lowers its final strength and increases shrinkage and surface dusting.
When ordering concrete, specify the intended application and required strength (for example, a 3,500–4,000 psi mix for many residential slabs—confirm local norms). Avoid adding water at the site unless absolutely necessary and approved by the supplier; even small extra amounts can significantly reduce strength. If workability is the issue, talk with your supplier about plasticizers or water-reducing admixtures instead of simply increasing water.
Equally important is keeping surface and subsurface water from undermining your slab over time. Grade surrounding soil to slope away from the slab so that water does not pond along edges. For driveways, patios, and walkways, aim for a slight slope (often around 1–2% or roughly 1/8 to 1/4 inch per foot, depending on design and local standards) to encourage drainage.
Avoid placing slabs directly over saturated or muddy subgrades. Wet, pumping soils will not compact well and will settle as they dry. If the project schedule forces you to work in wet conditions, allow time for the subgrade to drain, or improve it with additional base material and compaction to achieve a stable, non-pumping surface.
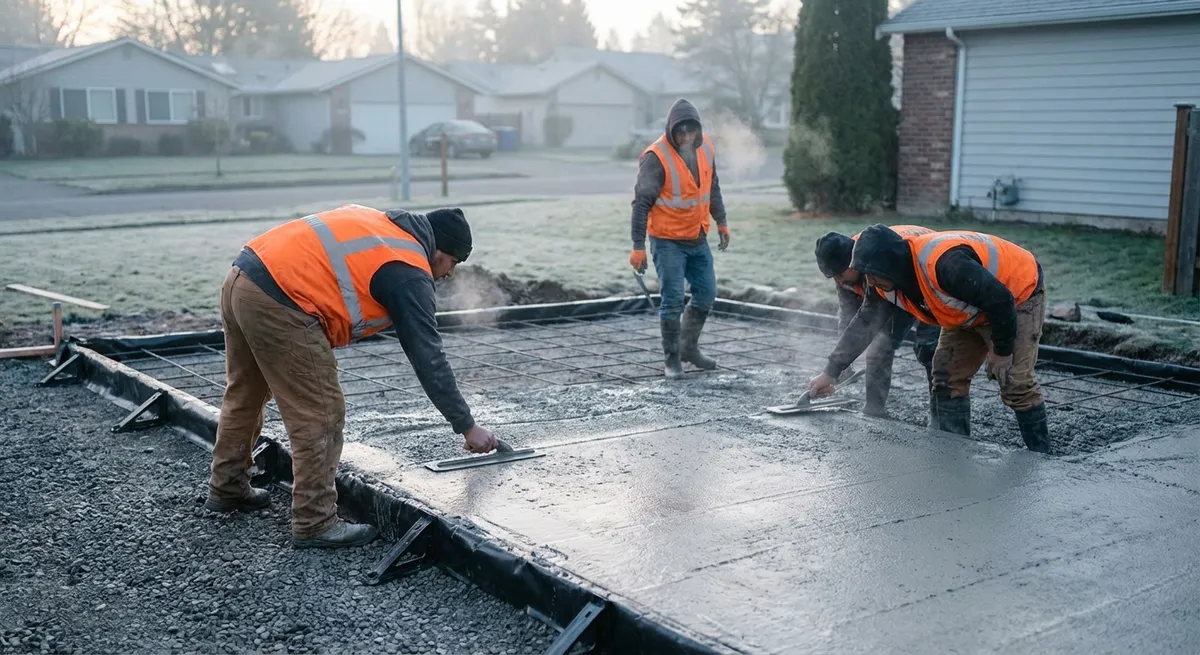
Finish and Cure with Durability in Mind, Not Just Appearance
The way concrete is finished and cured has a powerful effect on abrasion resistance, surface scaling, and long-term stability. Overworking the surface or trapping water can create a weak top layer that spalls and dusts under use.
After placement, strike off (screed) the concrete to the form height, then bull-float to embed large aggregate just below the surface. Avoid steel troweling or further finishing while bleed water is on the surface; working this water back into the concrete increases the water-cement ratio at the top and weakens the surface. Wait until the sheen from bleed water disappears before continuing finishing operations.
Exterior slabs—especially in freeze-thaw climates—often benefit from a broom finish for better traction and surface durability. Overly smooth finishes outside can become slippery and are more susceptible to scaling when exposed to deicing salts and freeze-thaw cycles.
Curing is not optional if you want concrete that keeps its strength and resists cracking. Immediately after final finishing, use a curing compound (following manufacturer instructions) or keep the slab continuously moist and covered (for example, with wet burlap, curing blankets, or plastic sheeting) for the recommended curing period, commonly at least 7 days for many mixes. Curing slows water loss, allowing the cement to hydrate more completely, which improves strength and durability.
Where joints are planned, saw-cut them as soon as the concrete is strong enough to avoid raveling but not so late that random cracking has already started. Proper timing varies by mix, climate, and slab thickness; experienced crews check the concrete’s hardness frequently during the first several hours after finishing.
Conclusion
Stable, long-lasting concrete slabs are built on more than just a strong mix design. They depend on disciplined site prep, precise formwork, correctly placed reinforcement, controlled water, and deliberate finishing and curing practices. Professionals and serious DIY builders who treat each of these steps as non-negotiable see fewer callbacks, less cracking, and far longer service life from their flatwork.
Whether you’re pouring a single equipment pad or upgrading a full driveway, applying these techniques will help your concrete stay where you placed it—and keep working reliably for years.
Sources
- [Portland Cement Association – Concrete Slab Construction](https://www.cement.org/learn/concrete-technology/concrete-construction/concrete-haus/concrete-floor-slabs) - Guidance on slab-on-ground design, subgrade prep, and construction practices
- [American Concrete Institute (ACI) – Guide for Concrete Floor and Slab Construction (ACI 302.1R)](https://www.concrete.org/store/productdetail.aspx?ItemID=3021) - Industry-standard recommendations for placing, finishing, and curing slabs
- [U.S. Department of Transportation – Concrete Pavement Basics](https://www.fhwa.dot.gov/pavement/concrete/howto.cfm) - Practical overview of concrete placement, joints, and long-term performance considerations
- [National Ready Mixed Concrete Association – Curing Concrete](https://www.nrmca.org/concrete-technology/curing-concrete/) - Detailed explanation of curing methods and their impact on strength and durability
- [The Constructor – Subgrade and Subbase for Concrete Slabs](https://theconstructor.org/practical-guide/subgrade-subbase-concrete-floor/19252/) - Discussion of subgrade/subbase roles, materials, and compaction for slab stability