This guide focuses on five field-tested tips that help concrete place, finish, and perform the way you planned—without leaning on expensive specialty products or gimmicks.
Understand Your Mix Before You Order
Before a truck ever shows up, you should know what you’re asking it to deliver. Treat the mix design as a tool, not an afterthought.
Start with the structural requirement and exposure. Are you pouring a garage slab that sees de-icing salts, a patio in a freeze–thaw climate, or interior footings on compacted fill? Each condition calls for different strength, air content, and sometimes different aggregate. Ask your ready-mix supplier for a design that matches both the specified compressive strength (e.g., 3,000 psi vs. 4,000 psi) and the exposure class (freeze–thaw, sulfate, etc.).
Discuss slump and workability in plain language. A 3"–4" slump is common for many slabs, but tight rebar, complex forms, and hot weather might justify a higher slump via water-reducing admixtures rather than on-site watering. Confirm if the mix will be air-entrained where freeze–thaw or de-icing salts are a concern—air content directly affects durability in these conditions.
Clarify maximum aggregate size in relation to your reinforcement spacing and element thickness. A rule of thumb: maximum aggregate size should be no more than about one-third of slab thickness and smaller than clear space between bars. If you’re using a pump, confirm the mix is pumpable and that your aggregate and slump meet your pump operator’s requirements.
For bagged concrete on small DIY jobs, read the technical data sheet, not just the front of the bag. Look for rated strength at 28 days, recommended water per bag, and any mention of air entrainment or special curing requirements. Pre-plan water measurement in buckets or containers so each batch matches the last.
Control Water Like It’s a Performance-Critical Additive
Excess water is the fastest way to ruin good concrete. It increases bleed water, shrinkage, permeability, and surface dusting, even if the job “looks fine” on pour day.
Start by verifying slump on arrival, either by formal slump test on larger jobs or by consistent observation on smaller pours. If the mix is outside acceptable limits, work with the supplier to adjust using admixtures rather than uncontrolled water whenever possible. Many ready-mix plants can dose water-reducing or superplasticizer admixtures to increase workability without weakening the mix.
If you must add water on site, do it deliberately: record how many gallons go in, and ensure you stay within the supplier’s recommended maximum water addition. Adding water by guessing with a hose is the quickest path to soft, flaky surfaces and random cracking.
Plan your pour sequence and crew size to reduce the perceived need for wetter concrete. When tools and people are ready, and forms and reinforcement are set, you’re less likely to demand slurry-like concrete just to buy time. For DIY projects, mix smaller batches you can place and strike off promptly instead of loading a mixer to full capacity and struggling to keep up.
Watch bleeding. If you see excessive bleed water, it’s often tied to high water content, warm weather, or a very wet subgrade. Avoid working bleed water back into the surface with your float or trowel; let it evaporate or be carefully removed. Finishing over bleed water traps moisture near the top, leading to weak, dusty, or flaking surfaces.
Prepare the Base and Forms So the Slab Can Actually Perform
Even a perfect mix fails on a bad base. Subgrade and formwork preparation are where many real-world problems start: uneven settlement, edge failures, curl, and random cracking.
Begin with the subgrade. Strip organic material, soft topsoil, and debris. Compact granular fill (gravel or crushed stone) in lifts using a plate compactor or jumping jack. Aim for uniform support across the entire area, not just the wheel paths of your equipment. If you’re pouring on existing soil, check moisture: too dry and it pulls water from the concrete; saturated and it pumps under load. Slightly damp, well-compacted base is ideal.
Decide whether to include a sub-base and vapor retarder. For exterior slabs like driveways or patios, a free-draining granular base is often more important than a plastic vapor barrier. For interior slabs over occupied space or where moisture-sensitive flooring will be installed, follow the spec and consider a vapor retarder directly under the concrete per industry guidelines.
Set forms rigidly and confirm alignment, elevation, and squareness before the truck arrives. Use stringlines or laser levels and measure diagonals on rectangles. Brace forms to resist lateral pressure; even minor blow-outs can destroy surface flatness and edge integrity. For DIY pours, overbuild the forms a bit—2x lumber, plenty of stakes, and diagonal braces prevent mid-pour adjustments.
Plan joints and reinforcement in advance. Mark control joint locations on forms and layouts so saw cuts or tooled joints land where intended. For structural elements, ensure rebar has proper cover from the edges and bottom (chairs or dobies, not crushed soda cans or rocks). In flatwork, welded wire reinforcement is only effective if positioned correctly—pull it up into the slab during the pour, or support it prior to placement so it’s not just sitting on the subgrade.
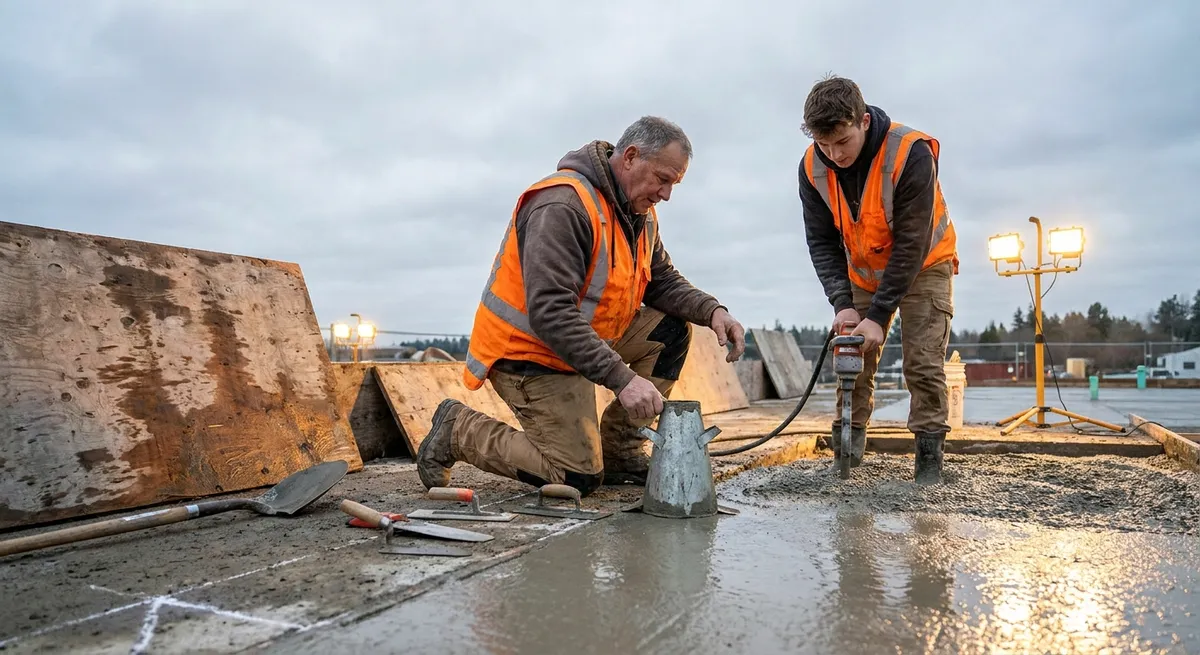
Time Your Finishing Steps to Match the Concrete, Not the Clock
Most surface problems—scaling, dusting, delamination, trowel burns—are the result of finishing at the wrong time or with the wrong sequence.
After placement, strike off (screed) the concrete to the correct level. Use a straight screed board or vibratory screed, working perpendicular to the direction of placement. Follow with bull floating to push down aggregate and bring up paste for finishing. Do not add water to the surface to “help” the bull float glide; instead, use an evaporation reducer in hot, windy conditions and keep tools clean.
Wait out the bleed. Do not start steel troweling, or even aggressive floating, while visible bleed water is still present. Early finishing traps water and air just below the surface, leading to blistering and scaling. In cool or damp conditions, bleeding can take longer—cover the slab lightly if wind is causing rapid evaporation on top while the interior still bleeds.
Choose your finish level based on use. A hard steel-troweled finish suits interior industrial floors but can be dangerously slick when wet if used outdoors. For exterior flatwork, a broom finish or light texture is typically safer and more durable. For DIY slabs, a simple bull float followed by a light broom perpendicular to foot traffic is often the most reliable method.
Coordinate edging and jointing. Run an edger along forms once the concrete supports it without tearing. Tool control joints to about one-quarter the slab thickness if you’re not relying on saw-cut joints. Later, if you plan saw cuts, schedule them as early as the concrete can support the saw without raveling—often within 6–24 hours, depending on mix and conditions.
Monitor weather and adjust process, not just tools. In hot weather, shorten your finishing window and deploy sunshades, windbreaks, or evaporation retarders. In cold weather, your challenge is slow set and prolonged bleeding; keep covers and insulation ready to protect fresh surfaces, and avoid overworking cold, plastic concrete that’s not gaining strength.
Treat Curing as Part of Construction, Not Cleanup
Curing is the part of concrete work most often rushed or skipped; it’s also where you protect the strength, durability, and crack resistance you just paid for.
Understand that curing is about maintaining moisture and temperature in the concrete long enough for proper hydration of the cement. The first 7 days are critical; the first 24–72 hours are especially important for minimizing early-age cracking and surface defects.
Choose a curing method appropriate to the project:
- Water curing (soaker hoses, wet burlap, or ponding) keeps surfaces continuously wet and is very effective if you can maintain it.
- Curing compounds (spray-on membranes) are often best for large slabs where continuous wet curing isn’t practical; use a product compatible with any planned coatings or floor coverings.
- Covering with plastic sheeting or curing blankets reduces moisture loss and can help maintain temperature in cool conditions.
Start curing as soon as the surface can tolerate it without marking. For curing compounds, that’s often immediately after final finishing sheen dissipates. For wet curing or plastic covers, wait until the surface is firm enough not to be marred by contact, but don’t delay for hours if the weather is hot and dry.
Protect against temperature extremes. In cold weather, keep concrete above the minimum recommended temperature during early curing—use insulated blankets, heated enclosures, or temporary heat if necessary. In hot weather, prevent rapid surface drying with windbreaks, fogging (not directly onto the slab), or white curing compounds to reduce heat absorption.
Enforce protection from loads and traffic. Concrete reaches only a fraction of its design strength after a couple of days. Keep vehicles, heavy equipment, and point loads off slabs until they’ve reached the age and strength specified. For DIY work, that might mean no cars on a driveway for at least a week, and no heavy trailers for longer, depending on mix and weather.
Conclusion
Concrete work delivers its best results when you manage fundamentals: mix selection, water control, base preparation, finishing timing, and curing discipline. None of these steps requires advanced equipment or exotic admixtures—just planning, coordination with your supplier, and respect for how concrete actually behaves in the field.
Whether you’re pouring a small slab behind a house or managing a series of commercial placements, treating these five areas as non-negotiable drastically reduces callbacks, surface failures, and premature repairs. Concrete performance is built in from the start; once it hardens, you’re no longer finishing a slab—you’re fixing mistakes.
Sources
- [Portland Cement Association – Design and Control of Concrete Mixtures](https://www.cement.org/learn/concrete-technology/durability/design-and-control-of-concrete-mixtures) - Technical guidance on concrete materials, mix design, and field practices
- [American Concrete Institute (ACI) – Concrete International & Guides](https://www.concrete.org/tools/freetopics.aspx) - Free topic papers and excerpts from ACI documents on placement, finishing, and curing
- [U.S. Department of Transportation FHWA – Concrete Pavement Field Reference](https://www.fhwa.dot.gov/pavement/concrete/pubs/07027/) - Practical field information on concrete handling, finishing, and curing for pavements
- [National Ready Mixed Concrete Association – CIP Concrete In Practice Sheets](https://www.nrmca.org/association-resources/cips-concrete-in-practice-2/) - Short, practical bulletins on common concrete issues like curing, cracking, and finishing
- [Cement & Concrete Institute (University of Kansas – Concrete Technology](https://iti.ku.edu/concrete-technology) - Educational resources covering fundamentals of concrete behavior and construction practices