This guide walks through five expert-level tips that go beyond the basics printed on a bag. Each one is designed to help you get more predictable, high-quality results on slabs, pads, steps, and small structural elements.
Tip 1: Treat Subgrade Prep as Structural Work, Not Housekeeping
Concrete only performs as well as what’s beneath it. A perfectly mixed, perfectly finished slab will still crack and settle if the subgrade is inconsistent.
Start by stripping all organic material—topsoil, roots, soft fill—down to firm, undisturbed soil or well-compacted structural fill. Organic layers shrink and decompose, which leads to voids and settlement. If you must build over previously disturbed ground (old trenches, utility lines, backfilled areas), compact in thin lifts, usually 4–8 inches at a time, using a plate compactor or jumping jack, depending on soil type.
Aim for a consistent, uniform subgrade that resists footprinting. For exterior flatwork like driveways, walkways, and patios, place a compacted granular base (gravel or crushed stone) that drains well and resists frost heave. Typically, 4 inches is a minimum, with more in cold climates or under heavier loads. Slope the finished subgrade away from structures at about 1/8–1/4 inch per foot to assist drainage, and match that slope in the slab itself.
Before forms go in, check elevations with a laser level, builder’s level, or at least a string line and line level. Look for dips that could collect water, and correct them now—concrete will mirror these irregularities. Think of subgrade prep as structural work; once concrete is down, you’re simply locking in any mistakes.
Tip 2: Control Water and Workability Instead of Chasing Slump
Adding extra water on site is one of the quickest ways to weaken concrete, even though it makes the mix easier to place. The water-to-cement (w/c) ratio is central to strength and durability: more water means more space between cement particles, more shrinkage, more cracking, and lower compressive strength.
If you’re ordering ready-mix, specify slump and air content when you place the order, based on the application and local climate. For typical slabs, a target slump of about 4 inches is common unless otherwise engineered. If the truck arrives too stiff, consult your supplier first; they may authorize a specific amount of water or, better, a chemical admixture like a water reducer or plasticizer that improves workability without significantly changing the w/c ratio.
For bagged mixes, follow the water recommendations carefully by measuring—not guessing. Add about 75–80% of the required water, mix thoroughly, then add water in small increments until the mix is workable but still cohesive. A proper mix should hold its shape when mounded and slump slowly, not run like soup. Overly wet mixes segregate (rock and mortar separate), bleed excessively, and are more prone to dusting and scaling.
On hot, dry, or windy days, plan ahead. Use sunshades, windbreaks, and pre-damped subgrades and forms to slow moisture loss. Consider setting agents or retarding admixtures (per your supplier’s recommendation) if placement or finishing will be slow. Controlling workability through planning and admixtures instead of water is a habit that consistently delivers stronger concrete.
Tip 3: Reinforce with the End in Mind, Not Just the Minimum
Steel reinforcement and fiber additives are not interchangeable, and they aren’t magic. Their performance depends heavily on placement, coverage, and the loads your concrete will see over its life.
For slabs on grade, welded wire mesh or rebar helps control crack width more than preventing cracks entirely. For the steel to work, it must stay in the top third to middle of the slab thickness. Placing mesh directly on the ground and then “hooking” it up with rakes during the pour is unreliable; mesh almost always ends up on the bottom where it’s largely ineffective. Instead, use proper chairs or supports that keep reinforcement off the subgrade at the designed height.
Rebar in structural elements (footings, retaining walls, stairs, load-bearing pads) should follow engineered spacing and bar size, with attention to cover: the distance from bar to concrete surface. Too little cover increases risk of corrosion; too much reduces structural efficiency. For exterior work exposed to deicing salts or marine environments, adequate cover and proper air-entrained concrete are essential for long service life.
Synthetic or steel fibers dispersed in the mix can help with plastic shrinkage cracking and surface toughness, especially in slabs or overlays. They don’t replace structural reinforcement, but they can significantly improve impact resistance and reduce cracking from early-stage shrinkage. When ordering fiber-reinforced concrete, make sure your crew adjusts their expectations; finishing can feel different, and some fibers may require specific troweling techniques for a clean surface.
Think through how the concrete will be used—vehicle loads, soil pressure, freeze-thaw cycles—and reinforce accordingly. “Just enough” steel is rarely worth the risk on work you want to last.
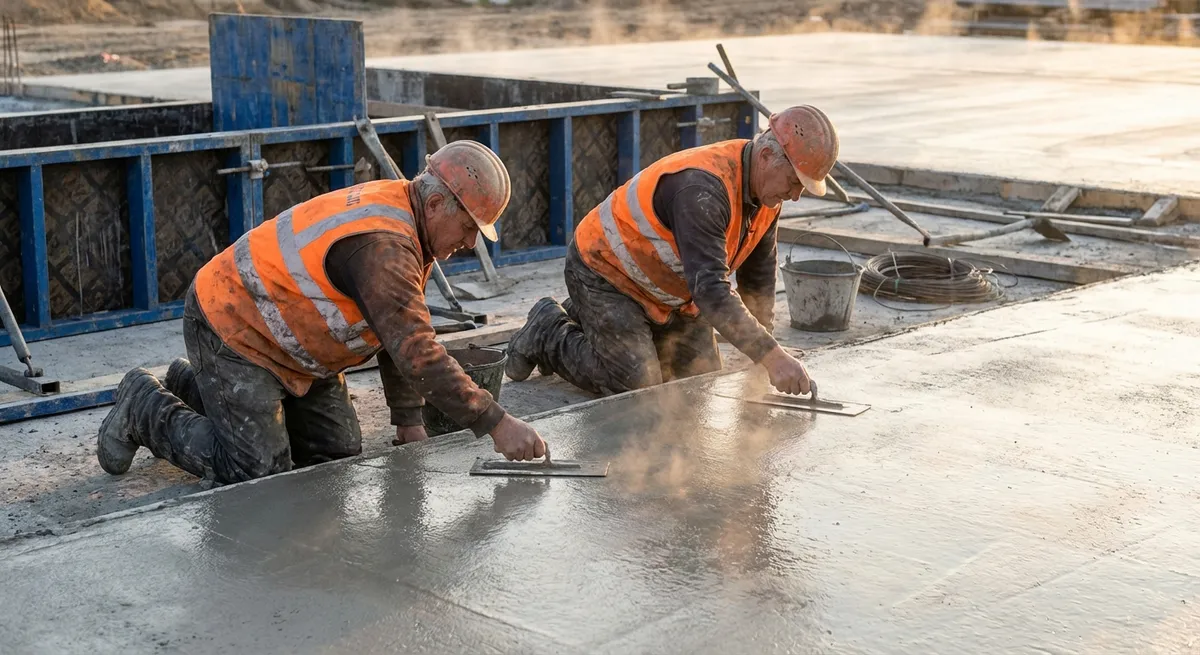
Tip 4: Time the Finishing Window Instead of Chasing a Smooth Surface
Over-finishing or finishing at the wrong time is a major cause of weak, dusty, or crazed surfaces. The finishing process should follow the concrete’s setting curve, not force it.
After placement, strike off (screed) the surface level with your forms, then immediately bull float to embed aggregate and bring up a thin paste of cement and fine sand. This initial pass should be light; you’re smoothing ridges and filling hollows, not polishing. Then step back.
Allow bleed water to rise and evaporate entirely before troweling or brooming. Working bleed water back into the surface dilutes the top layer, increasing the water-to-cement ratio where strength is most critical. This can lead to dusting, scaling, and poor abrasion resistance. In cool or humid conditions, bleed water may linger; in hot or windy conditions, it may evaporate quickly, so you must stay alert, not locked to a clock.
Test set by pressing your fingerprint into the surface. For machine troweling, the concrete should resist a light touch but still yield slightly. For exterior slabs, especially in freeze-thaw climates, avoid steel trowel finishes that create very dense, slick surfaces; these can become dangerously slippery and more prone to scaling under deicing salts. A broom finish applied after the surface has tightened but before it is fully hard offers good traction and a durable face.
Night or cold-weather pours demand extra attention. Finishing late into the curing period can damage surface integrity, while finishing too early damages the matrix. Train your team to read the concrete—bleed water, touch, resistance—instead of just working to a schedule.
Tip 5: Prioritize Curing as Seriously as Placement
Curing is where concrete earns its long-term strength, durability, and resistance to cracking. Once the surface looks hard, it’s tempting to move on, but the first 7 days after placement have outsized impact on performance.
Concrete gains strength as cement hydrates—a chemical reaction that depends on moisture and temperature. If the surface dries too quickly, hydration slows or stops near the top, leaving a weak, brittle skin that’s vulnerable to wear, scaling, and shrinkage cracking. A common rule of thumb is to keep concrete moist and above freezing for at least 7 days, and longer for high-performance or critical structural elements.
On small projects, simple wet curing works well: cover with wet burlap, towels, or curing blankets and keep them damp, or gently mist the surface periodically. For larger slabs, curing compounds (sprays that form a membrane to limit moisture loss) are practical, especially where ongoing access for wet curing is difficult. Follow manufacturer instructions regarding timing and application rate, and be aware that some curing compounds can interfere with future coatings, sealers, or overlays.
Temperature matters as much as moisture. In hot weather, surface temperatures can spike, driving rapid evaporation and thermal cracking. Use sunshades, evaporation retardants (as recommended by your supplier), and start pours earlier or later in the day to avoid peak heat. In cold weather, insulate new concrete against freezing; ice crystal formation in fresh concrete can permanently reduce strength.
Plan the entire cure before you pour: materials, coverage, access, and any restrictions on traffic or loading. Protecting young concrete is one of the least glamorous tasks on site, but it directly determines whether your work performs like a commodity slab or a long-lasting asset.
Conclusion
High-performing concrete isn’t about secret products—it’s about disciplined control over fundamentals from the subgrade up. When you treat substrate prep as structural work, manage water and workability intentionally, design reinforcement for real-world loads, respect the timing of finishing, and take curing seriously, you dramatically reduce the chances of early failures, callbacks, and costly repairs.
Whether you’re pouring a small equipment pad or coordinating multiple truckloads on a commercial job, these expert habits help concrete behave predictably and last longer. The materials haven’t changed much in decades; what separates dependable work from problem slabs is execution.
Sources
- [Portland Cement Association – Concrete Floors and Slabs Construction](https://www.cement.org/learn/concrete-technology/concrete-construction/concrete-floors-and-slabs-construction) - Technical guidance on subgrade prep, placement, finishing, and curing for slabs
- [American Concrete Institute (ACI) – Guide for Concrete Slabs that Receive Moisture-Sensitive Flooring (ACI 302.2R)](https://www.concrete.org/store/productdetail.aspx?ItemID=3022R14) - Industry-standard recommendations on mix, finishing, and curing practices
- [U.S. Department of Transportation – Concrete Pavement Field Reference](https://www.fhwa.dot.gov/pavement/concrete/pubs/00027/) - Practical field guidance on placement, finishing, curing, and quality control
- [National Ready Mixed Concrete Association – CIP 11: Curing In-Place Concrete](https://www.nrmca.org/wp-content/uploads/2024/04/CIP11.pdf) - Clear explanation of why curing matters and how to do it effectively
- [The Constructor – Effect of Water-Cement Ratio on Concrete Properties](https://theconstructor.org/concrete/effect-water-cement-ratio-concrete/33132/) - Overview of how water content influences strength, durability, and cracking