This guide focuses on practical, field-tested techniques that professionals rely on and advanced DIY builders can adopt. The variables are always mix, moisture, temperature, restraint, and timing—but the difference between “average” and “excellent” work is in how you manage each of those, consistently, from prep to cure.
1. Treat Subgrade Prep Like Structural Work, Not “Dirt Work”
Most long-term slab failures start below the concrete, not in it. The subgrade is part of the structure, and it needs to be uniform, compacted, and drained. Start by stripping organic material completely—no turf, roots, or topsoil should remain under a slab. Organic layers decompose and settle, telegraphing cracks and low spots to the finished surface.
Aim for a consistent, well-compacted base using a granular material like crushed stone or gravel, typically 4–6 inches thick for light residential slabs, more for driveways or heavier loads. Use a plate compactor in multiple passes, moistening the base slightly if it’s dusty; you’re looking for firm, non-pumping support that doesn’t deform when you walk on it or twist your foot. Check grade with a laser level or string lines, ensuring positive drainage away from structures—standing water under a slab is a long-term enemy. Where frost is a concern, verify that your base depth and material align with local frost line and code requirements. Finally, introduce a capillary break (e.g., compacted gravel) and, if needed, a vapor barrier under interior or conditioned slabs to limit moisture migration that can damage finishes and adhesives.
2. Control Water, Don’t Let Water Control the Mix
Overwatering is the fastest way to ruin otherwise good concrete. Extra water makes the mix easier to place in the moment but dramatically weakens the final product and increases shrinkage cracking. Instead of reaching for the hose, plan for workability. Start by specifying or ordering the correct slump for the task—often 4–5 inches for flatwork, higher only when specifically required and supported by admixtures. If you’re mixing on-site from bagged concrete, measure water accurately by volume, not by “feel” or how it looks in the wheelbarrow.
Use chemical admixtures, not water, to adjust workability on larger or critical pours. Plasticizers and water-reducing admixtures maintain or improve flow while protecting strength. On hot or windy days, lower initial water content slightly and protect the fresh concrete from rapid evaporation. Train your crew (or remind yourself) that “just a splash more water” added at the truck or in the mixer has structural consequences. When placing the mix, avoid excessive re-tempering and keep re-queuing or remixing within the manufacturer’s recommended time limits; old, repeatedly re-tempered concrete rarely performs well. Document mix details and on-site water additions for repeatable quality on future projects.
3. Design and Place Reinforcement With Crack Control in Mind
Reinforcement is not just about adding steel; it’s about managing where the concrete will inevitably crack. For slabs-on-grade, welded wire reinforcement (WWR), deformed bars, and even fiber reinforcement each have a place, but only when they’re correctly positioned. WWR and rebar need to be in the upper third of the slab thickness to be effective in controlling crack width; reinforcement sitting on the subgrade is doing almost nothing. Use proper bar chairs or supports, and tie reinforcement securely so it doesn’t sink during placement or finishing.
Plan reinforcing layout based on expected loads and geometry, not just habit. For driveways, garage slabs, or areas carrying point loads (posts, equipment, vehicles), add reinforcement or thicken the slab where needed, and ensure adequate overlap and development length at splices and corners. Consider combining steel reinforcement with synthetic fibers to improve resistance to plastic shrinkage cracking in the early hours. Avoid sharp re-entrant corners in your slab layout—inside corners tend to crack; if unavoidable, reinforce those areas and place control joints that lead cracks to safer locations. Remember that reinforcement is about controlling crack size and distribution, not eliminating cracks entirely. A slab with many fine, controlled cracks is far better than one with a few wide, uncontrolled failures.
4. Use Control Joints and Curing as Active Tools, Not Afterthoughts
Good control joint planning and disciplined curing separate professional-grade work from weekend mistakes. Control joints create intentional weak planes where the concrete can relieve internal stresses. For typical slabs, joints are often spaced no more than 2–3 times the slab thickness in feet (e.g., 4-inch slab: joints roughly 8–12 feet apart) and ideally form panels as close to square as practical. Lay out joints carefully before the pour, using chalk lines or marking paint, and avoid “odd” panel shapes or long, narrow strips that encourage random cracking.
Cut joints at the right time and depth. For saw-cut joints, that usually means cutting as soon as the concrete is hard enough to walk on without damage, but before random cracks appear—often within 6–18 hours depending on conditions and mix. Joints should typically be at least one-quarter of the slab thickness in depth. If tooling joints in fresh concrete instead, use a proper groover and maintain consistent alignment and depth. Immediately after finishing, begin curing. Moist curing, curing compounds, or wet coverings help maintain adequate moisture for hydration, especially in the first 7 days. Avoid rapid drying from sun, wind, or low humidity, which increases shrinkage and surface cracking. On decorative or exposed slabs, choose curing methods that are compatible with future sealers or coatings, and always follow the manufacturer’s recommendations.
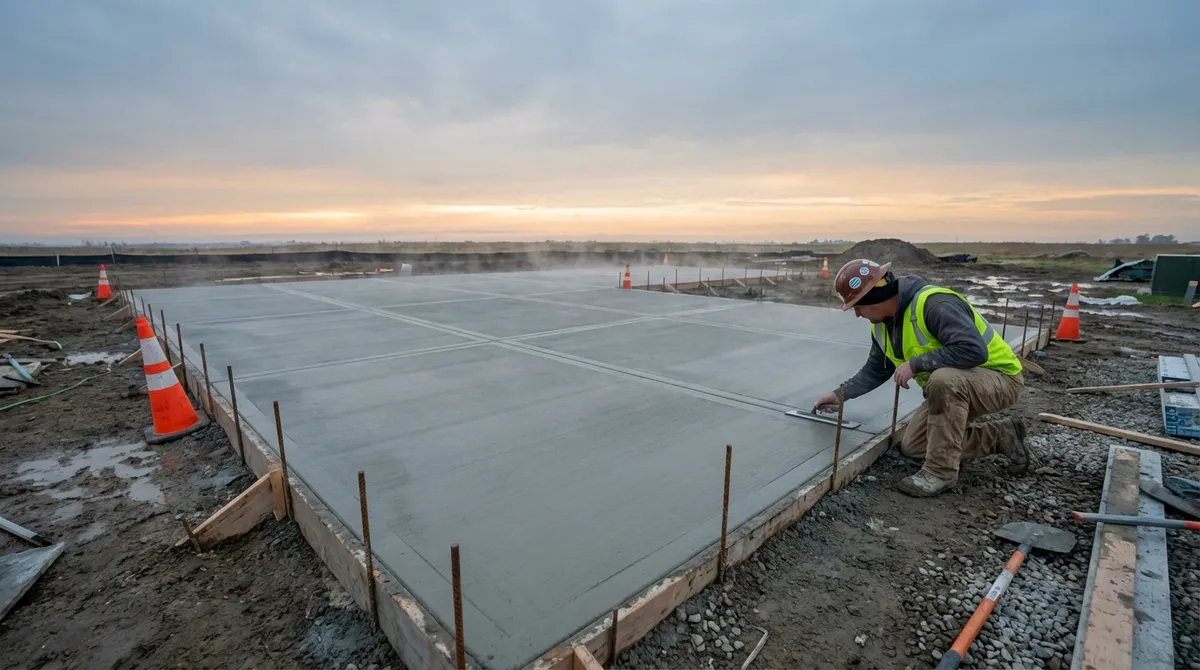
5. Match Your Finishing Technique to the Environment and Mix
Finishing is where many concrete mistakes are locked in permanently. The right finish depends on the concrete’s setting behavior and the site conditions at the time of the pour. Start by resisting the urge to trowel too early. Wait until bleed water has fully evaporated from the surface; working bleed water back into the slab weakens the top layer, increases dusting, and encourages scaling and flaking. On hot, windy, or sunny days, protect the slab from excessive evaporation with windbreaks, shade, or evaporation retarders so you can still finish without overworking the surface.
Choose a finish that suits the use and climate. For exterior flatwork in freeze-thaw regions, a broomed or lightly textured finish often provides better traction and weather durability than a slick, steel-troweled surface. On indoor slabs or shop floors where a smooth finish is desired, time your floating and troweling passes carefully; too much late steel troweling can seal the surface excessively and trap moisture. Watch the edges, where drying and curing differ from the slab interior; use edge tools consistently to prevent scaling and spalling along forms. Finally, understand the interaction between air-entrained concrete and finish techniques—over-troweling air-entrained mixes or finishing with excess water can ruin the air void system that protects against freeze-thaw damage.
Conclusion
Durable concrete isn’t the result of one “trick”; it’s the cumulative effect of disciplined decisions at each step. Stable subgrades, controlled water content, correctly placed reinforcement, planned joints with proper curing, and context-aware finishing all work together to produce slabs and structures that perform for decades instead of just a few seasons.
For professionals, tightening up these fundamentals reduces callbacks and protects your reputation. For serious DIY builders, adopting these same practices moves your work closer to trade-quality results. Concrete will always crack and weather—but with the right methods, you decide how, where, and how much.