This guide walks through five expert-level, practical tips that keep concrete work predictable, durable, and easier to execute, from prep to protection.
Build a Stable Base: Subgrade and Forms That Don’t Move
Concrete only performs as well as what’s underneath it. A slab poured over soft, poorly compacted soil will crack and settle no matter how good the mix is.
Start by stripping off organic material—topsoil, roots, and loose debris. These materials compress and decompose, making your slab sink. For driveways, garages, or heavy-use pads, bring in a granular base (crushed stone or gravel) and compact in thin layers (usually 3–4 inches per lift) using a plate compactor or jumping jack. Aim for a firm, even surface that doesn’t deform under foot traffic.
Check moisture conditions: extremely dry subgrades can pull water from fresh concrete, increasing the risk of shrinkage cracking. Lightly dampening the base (but not soaking it) before placement helps keep water in the mix for proper hydration.
Formwork must be straight, rigid, and well-braced. Use stakes and kickers to resist the outward pressure of fresh concrete, especially on deeper sections or slopes. Confirm elevations and slopes with a string line or laser level; it’s far faster to adjust forms than to grind or patch a hardened slab. For freeze-thaw climates, maintain a minimum thickness (commonly 4 inches for light-duty slabs, more for heavy loads) and plan for positive drainage away from structures.
Control Water and Mix Consistency Instead of “Fixing It Later”
One of the quickest ways to weaken concrete in the field is to add water until it “looks right.” Extra water improves workability in the moment but reduces strength, increases shrinkage, and makes surface scaling more likely.
Whenever possible, order concrete with a specified slump (workability) that matches your placement method and crew size. If you’re mixing bagged concrete, measure water accurately—don’t guess. Follow the manufacturer’s recommended water range and adjust with plasticizers (water-reducing admixtures) rather than more water when better flow is needed.
Monitor the consistency as the truck discharges. If the first and last wheelbarrows look noticeably different, stop and resolve it with the driver—don’t just work faster and hope it blends out. Keep discharge time within the recommended limits (typically 60–90 minutes from batching, depending on specs and conditions) to prevent early set, inconsistent finishing, and poor long-term performance.
Temperature matters. In hot weather, use cool mix water, shade, or schedule early/late placements to slow the set time and reduce plastic shrinkage cracking. In cold weather, warm (not hot) mix water and appropriate cold-weather admixtures can keep curing on track while avoiding freezing in the first critical hours.
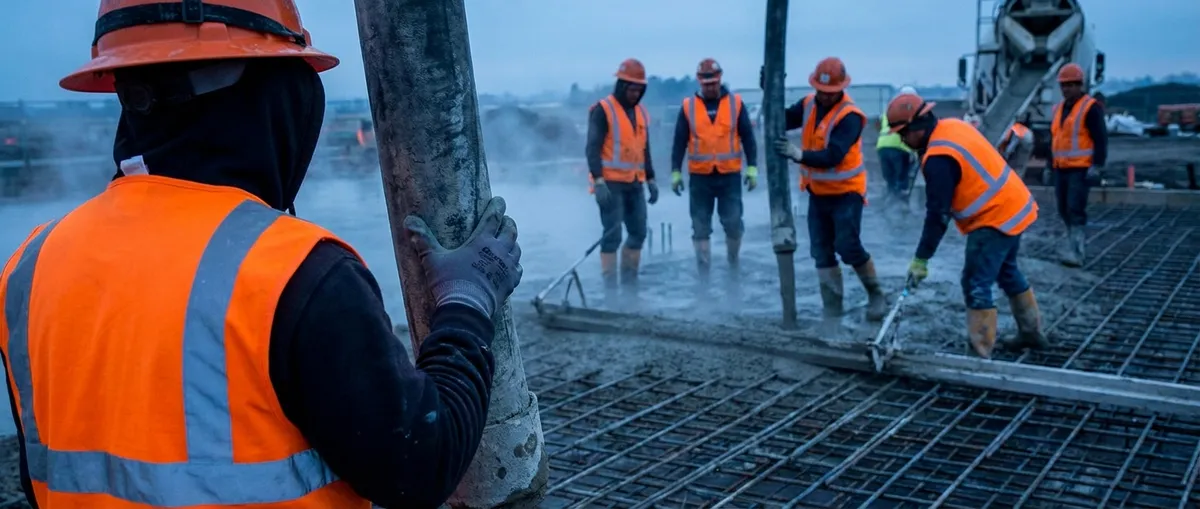
Place, Consolidate, and Strike Off Like You Planned It
Placement isn’t just about getting concrete into the forms; it’s about putting it there in a way that avoids segregation, honeycombing, and weak spots.
Avoid dropping concrete from excessive heights, especially near corners or forms. This can separate coarse aggregate from paste and create zones that finish poorly or don’t bond well. For deeper forms or walls, use chutes or tremie pipes to reduce free-fall distance.
Consolidation is essential to eliminate air pockets and ensure good paste-aggregate contact. For slabs, proper rodding, tamping, or using a screed with vibratory action is often enough. For thicker sections and walls, use an internal vibrator: insert it vertically, allow it to work briefly, then withdraw slowly. Don’t over-vibrate, as this can cause segregation and bring too much paste to the surface.
Strike off (screed) immediately after placement to establish final grade. Use a straight 2x4, magnesium screed, or laser screed and move it with a sawing motion across the forms, pulling excess forward and filling low spots as you go. Have one person ahead of the screed to shovel or rake concrete where needed; this avoids dragging too much mix over long distances, which can lead to uneven aggregate distribution.
Plan your pour sequence before you start. Work systematically from one end to the other, avoiding random patches that are hard to blend. Overlaps in time between adjacent areas should be minimized so the surface cures uniformly.
Finish With Timing, Not Just Tools
Finishing is where even experienced crews can get into trouble if they chase appearance instead of timing. The concrete must be ready to finish—not too wet, not too stiff.
After screeding, use a bull float to level ridges and fill voids, running it perpendicular to the screed direction. This embeds larger aggregate slightly and pulls a bit of paste to the surface, aiding subsequent finishing. Avoid overworking the surface at this stage, especially in bleed water.
Bleed water is the thin film of water rising to the top as heavier particles settle. Never start steel troweling or hard floating while bleed water is present. Working bleed water back into the surface weakens the top layer and promotes dusting, scaling, and delamination. Wait until surface sheen disappears and the slab supports weight with only light indentation from foot pressure.
Choose the right level of finish for the use case. A broom finish provides traction and is preferred for exterior slabs, driveways, and walkways. A smooth steel-troweled finish suits interior floors that will receive finishes or coatings, but it is usually a bad idea outdoors in freezing climates due to slip and scaling risk.
If decorative joints or edge details are planned, coordinate them with finishing stages. Cutting grooves or edging too late can cause raveling; doing it too early can slump or close up. For larger projects, mock up a small test section to dial in timing before committing across the entire slab.
Protect and Cure the Concrete Like It’s Part of the Job, Not an Afterthought
Curing is often treated as optional, but it’s one of the highest-return actions you can take. Proper curing promotes strength gain, reduces cracking, and improves surface durability—especially in exposed or high-traffic areas.
Concrete needs moisture and controlled temperature to hydrate properly. For slabs, common curing methods include curing compounds (liquid membrane-forming products), wet coverings (burlap, mats), and continuous light water spray (fogging or soaker hoses). For most general-purpose work, a quality curing compound applied as soon as finishing is complete and surface sheen is gone provides a practical balance between performance and simplicity.
In hot, dry, or windy conditions, evaporation can exceed bleed water rates, causing plastic shrinkage cracks within hours of placement. Windbreaks, sunshades, and applying evaporation retarders before final finishing can significantly reduce this risk. In cold weather, use insulated blankets or heated enclosures to keep the slab from freezing and to maintain curing temperatures, particularly in the first 24–48 hours.
Don’t load or open the slab to traffic too early. Light foot traffic is often acceptable after 24 hours, but wheeled loads or vehicles should generally wait longer, commonly 7 days or more depending on strength requirements and mix design. For structural or critical elements, rely on measured compressive strength tests rather than arbitrary time alone.
Finally, protect the concrete from aggressive chemicals and deicing salts during its first winter, especially for exterior flatwork in freeze-thaw climates. Using sealers where appropriate and following local best practices can substantially extend service life.
Conclusion
Concrete rewards planning, consistency, and discipline more than it rewards heroics. A solid subbase, controlled mix water, deliberate placement, well-timed finishing, and committed curing practice work together—not separately—to produce slabs and structures that last.
Whether you’re managing a crew or tackling a single pad beside your garage, treating these five steps as non-negotiable standards will reduce callbacks, rework, and premature repairs. The concrete doesn’t care if you’re a pro or a DIYer; it will respond to the same fundamentals every time.
Sources
- [Portland Cement Association – Concrete Basics](https://www.cement.org/cement-concrete/concrete-materials/concrete-basics) - Overview of concrete materials, placement, and curing fundamentals
- [American Concrete Institute (ACI) – Concrete Craftsman Series](https://www.concrete.org/store/productdetail.aspx?ItemID=CCS1(16)) - Professional guidance on field practices for placing and finishing concrete
- [National Ready Mixed Concrete Association – CIP 11: Curing In-Place Concrete](https://www.nrmca.org/wp-content/uploads/2021/01/CIP11.pdf) - Best practices and technical recommendations for curing concrete
- [NRMCA – CIP 20: Delamination of Troweled Concrete Surfaces](https://www.nrmca.org/wp-content/uploads/2021/01/CIP20.pdf) - Explains causes and prevention of delamination related to finishing timing
- [U.S. DOT FHWA – Concrete Pavement Field Reference](https://www.fhwa.dot.gov/pavement/concrete/pubs/07027/) - Practical field guidance on concrete placement, consolidation, and curing for pavements