This guide focuses on practical curing methods and field-proven habits that matter to both professionals and serious DIY builders. The mix design and placement might be engineered on paper—but curing is where you control what the concrete becomes.
Why Curing Matters More Than Most Specs Acknowledge
Concrete doesn’t “dry,” it hydrates. Cement particles react chemically with water to form the hardened paste that locks aggregate together. If the mix loses moisture too quickly or swings through temperature extremes, that hydration slows, stops, or happens unevenly. The result: weaker, more brittle concrete with more shrinkage cracking.
Good curing targets three things:
Moisture retention – keeping enough water in the concrete for hydration
Temperature control – maintaining a reasonable, stable range for the reaction
Time – giving the slab or element a realistic window to develop strength before stress
Most code guidance and manufacturer data assume proper curing. In the field, shortcuts during the first 3–7 days often explain low break strengths, surface dusting, and random cracking months later. Thoughtful curing is one of the most cost-effective quality upgrades you can make on any project.
Expert Tip 1: Plan Curing Before You Order the Concrete
Good curing is nearly impossible to improvise after the truck is washing out. It needs to be baked into your plan, sequence, and materials list.
Before placement day, answer these questions:
- What’s the exposure?
Direct sun, steady wind, low humidity, and hot forms will pull moisture out fast. A shaded, enclosed pour behaves very differently from a driveway in full summer sun.
- What curing method fits the job?
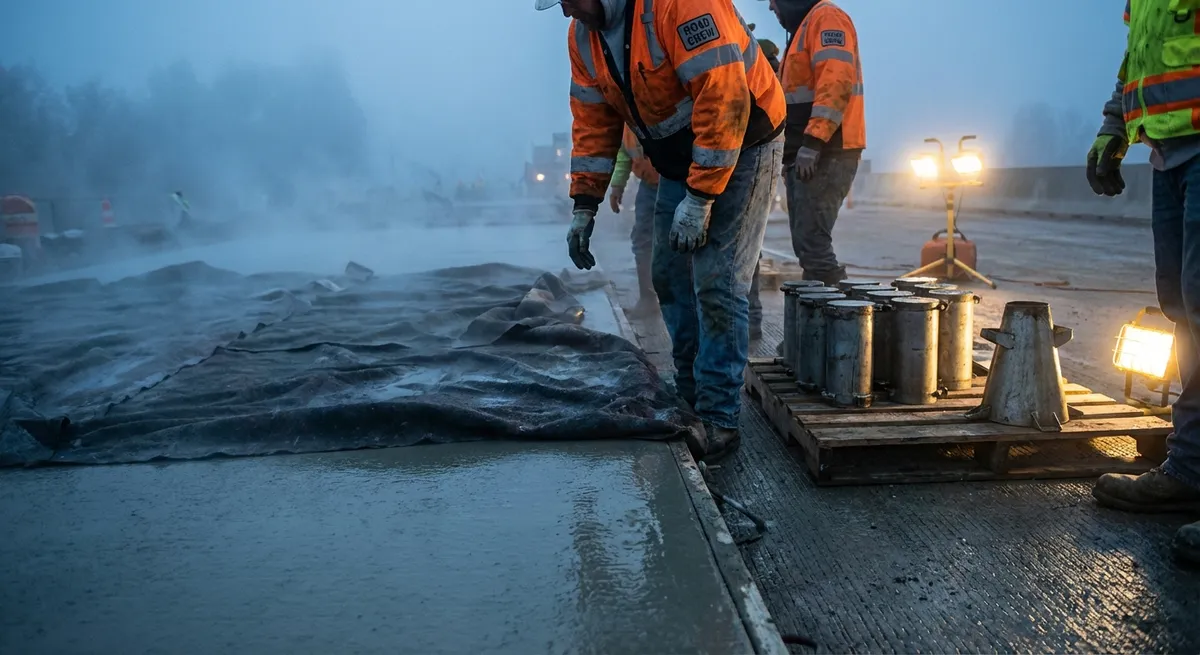
- Water curing (sprinkling, ponding, or wet coverings)
- Sheet curing (polyethylene or specialty curing blankets)
- Membrane-forming curing compounds (spray-applied)
- Combination approaches (e.g., water cure for 3 days, then curing compound)
- How will follow-on trades interact with the slab or wall?
Common options include:
If you need to walk, cart, or scaffold on the fresh concrete early, choose curing methods that allow access, like curing compounds plus edge protection, instead of standing water or fragile coverings.
- Where will you store curing materials on site?
Poly sheeting, wet burlap, foam blankets, and sprayers should be on-site, staged, and ready—before the first wheelbarrow moves.
For DIY projects, this planning might mean buying a garden sprayer and poly sheets a week ahead. For contractors, it often means having a standard curing kit on every job: rolls of 6-mil poly, curing compound, nozzles dedicated to curing only, and blankets for cold weather work.
Expert Tip 2: Match Curing Strategy to Temperature and Season
Temperature is as important as moisture. The hydration reaction slows dramatically when the concrete gets cold, and can be damaged if it freezes early. In high heat, the surface can dry out before deeper layers hydrate properly.
In hot weather (generally above ~80–85°F / 27–29°C):
- Cool what you can before placement
Shade the subgrade, dampen (not saturate) base and forms, and avoid afternoon peak heat if possible.
- Control evaporation during finishing
Use evaporation reducer sprays when wind and low humidity combine with high temps. These create a temporary film that slows moisture loss between bull floating and troweling.
- Cover early and seal moisture in
As soon as finishing is complete and the surface can take it, cover with light-colored poly sheeting or apply a membrane curing compound. On slabs, ensure the poly is in full contact with the surface to avoid uneven curing patterns.
In cold weather (generally below ~50°F / 10°C):
- Protect from freezing at all costs
Early-age concrete that freezes can lose a large share of its ultimate strength. Use insulated blankets, heated enclosures, or ground heat as needed.
- Use insulated curing blankets
After finishing, cover slabs and exposed surfaces with thermal blankets that both retain moisture and limit heat loss. Keep edges sealed; corners and slab edges are the first to cool and are common weak points.
- Extend the curing window
Strength gain is slower in cold conditions. Don’t assume “24 hours and strip forms” is safe. Base stripping, loading, and sawcut timing on temperature-adjusted strength gain, not calendar days alone.
By aligning your curing approach with the season and site conditions, you significantly improve both strength and durability without changing the mix itself.
Expert Tip 3: Use Water Intelligently, Not Randomly
“Keep it wet” can be helpful—and also destructive when done poorly. Smart water curing maintains consistent moisture without shock-cooling or washing the surface.
For slabs and flatwork
- Avoid full-pressure hose streams on young concrete
High-velocity water can etch the surface paste, expose aggregate, and cause micro-cracking.
- Use gentle, frequent wetting or continuous low flow
Soaker hoses, gentle sprinklers, or periodic misting keep the surface damp without mechanical damage.
- Consider wet coverings instead of open water
Wet burlap, cotton mats, or specialized curing fabrics, kept continuously damp, provide even moisture with less water usage and less risk of erosion. Always use clean materials to avoid staining.
For walls, columns, and formed work
- Keep the forms on longer when possible
Forms naturally help retain moisture and moderate temperature swings. Leaving them in place a bit longer (as allowed by design and schedule) often improves curing with no extra materials.
- Wet the exterior sensibly
Light misting or damp burlap wraps can help, especially on hot or windy days. Avoid over-saturating backfill areas or allowing water to pool where it can create hydrostatic pressure.
Whatever the structure, the priority is consistent moisture exposure—avoiding cycles of “bone dry in the sun” followed by “overly soaked” in the evening.
Expert Tip 4: Time Your Early-Use Activities Around Real Strength, Not Habit
A lot of field damage happens when concrete is technically hard—but not strong enough for the loads or actions imposed on it. Sawcutting, form stripping, and early loading all interact with curing.
Sawcutting joints
- Cut too early and the saw can ravels the still‑weak paste and leave messy edges.
- Cut too late and shrinkage cracks may form randomly before joints can control them.
General guidance is often to cut when the concrete is strong enough to resist ravelling but early enough to intercept shrinkage—commonly in the 4–24 hour window, depending on mix, temperature, and slab thickness. On hot days with fast set mixes, the window is shorter.
Align curing and sawcutting like this:
- Keep surface moisture controlled (not flooded) during the sawcut window.
- After cuts are made and slurry cleaned, resume curing immediately—especially along joint edges, which are prone to drying and cracking.
Stripping forms and loading
- Formwork: Don’t base stripping solely on a standard schedule; consider actual conditions. In cold weather or with slower mixes, forms may need to stay longer to protect immature concrete and support curing.
- Early loads and traffic: Even if a slab can handle foot traffic after 24–48 hours, heavy carts, point loads, or equipment can introduce micro-cracking or permanent deformation. When practical:
- Use plywood paths to spread loads.
- Delay heavy equipment as long as the project allows.
- Keep curing in place on unused areas while work proceeds elsewhere.
When in doubt, lean toward more conservative timing. Early overstress is rarely visible immediately—but it can show up later as curling, cracking, or poor surface performance.
Expert Tip 5: Document Curing as Carefully as You Document Mixes
On professional projects, mix designs come with submittals, break results, and batch tickets. Curing, by comparison, is often just “understood.” Bringing more discipline to curing pays off in reduced disputes, stronger QA records, and fewer callbacks.
Practical documentation habits:
- Record conditions during the first 7 days
Note daily high/low temperatures, unusual weather events (high winds, heat waves, cold snaps), and any protective measures in place.
- Log curing method and duration
- When curing began (relative to final finish)
- Type of curing used (poly, blankets, curing compound brand and type, water curing)
- How long each method was maintained
- Coordinate with testing schedules
Specify:
If you’re taking cylinders or cores, align curing records with break dates and strengths. If early breaks are low, curing data can help explain and correct issues before a pattern develops.
- For DIY work, use a simplified log
- Pour time and date
- Starting conditions (sun, shade, wind)
- When you started curing and what you used
- Any unusual events (unexpected freeze, heavy rain, missed watering period)
A notebook or smartphone note capturing:
Clear curing records turn “we did the usual” into measurable practice. For contractors, they also build a track record that can support bids, defend against claims, and justify quality-focused methods to clients.
Conclusion
Curing is where concrete becomes what you actually live with—strong or fragile, durable or short‑lived. The mix design, the reinforcing, and the formwork matter, but curing turns the potential strength on paper into performance in the field.
By planning curing before the pour, matching methods to temperature, using water intelligently, timing early activities around real strength, and documenting your approach, you dramatically reduce the risk of avoidable cracking and underperforming concrete. These habits cost little compared to the total work, yet they deliver some of the highest returns in concrete quality.
Treat curing as a core construction task, not an afterthought. The projects that look good years later are almost always the ones that were cured on purpose, not by accident.
Sources
- [Portland Cement Association – Curing Concrete](https://www.cement.org/learn/concrete-technology/concrete-construction/curing-in-construction) - Technical overview of curing mechanisms, methods, and field recommendations
- [American Concrete Institute (ACI) – Guide to Curing Concrete (ACI 308R) Summary](https://www.concrete.org/store/productdetail.aspx?ItemID=308R16) - Industry-standard guidance on curing practices, temperature considerations, and performance impacts
- [U.S. Department of Transportation – FHWA Concrete Pavement Field Reference: Pre-Paving, Paving, Curing](https://www.fhwa.dot.gov/pavement/concrete/pubs/07027/07027.pdf) - Practical field reference for curing concrete pavements under varied weather conditions
- [National Ready Mixed Concrete Association – CIP 11: Curing In-Place Concrete](https://www.nrmca.org/wp-content/uploads/2020/05/cip11.pdf) - Concise best-practice bulletin on curing methods, timing, and common problems
- [Cement Concrete & Aggregates Australia – Curing of Concrete](https://www.ccaa.com.au/imis_prod/documents/Library%20Documents/CCAA%20Datasheets/DS_CuringConcrete.pdf) - Detailed guide with diagrams on curing techniques and their impact on strength and durability