Why Curing Matters More Than “Perfect” Finishing
Most people obsess over the pour and finishing tools, then treat curing as an afterthought. That’s backwards. Concrete gains strength and durability by keeping enough moisture and a suitable temperature for cement hydration to continue. When it dries out too quickly, you get:
- Reduced compressive strength
- Increased surface dusting and scaling
- More shrinkage cracks and curled slabs
- Poor bond with toppings, coatings, or overlays
For professionals, this means premature failures, customer complaints, and extra labor on repairs. For DIY builders, it can mean a driveway that spalls after one winter or a garage slab that dusts under vehicle traffic.
Plan curing before you schedule the pour: identify your curing method, materials (curing compound, plastic, wet coverings), and who is responsible for monitoring moisture and temperature. Treat curing as a line item in your project, not a footnote.
Expert Tip 1: Choose the Right Mix for the Job, Not Just What’s Available
No curing method can fully compensate for the wrong mix design. Before you order concrete, match the mix to the exposure, schedule, and placement conditions.
Key considerations:
- Strength vs. workability: Higher strength often means lower water-cement ratios and can be stiffer to place. Coordinate with your ready-mix supplier about plasticizers or water reducers if you need workability without weakening the concrete.
- Exposure conditions: For exterior slabs exposed to freeze-thaw, de-icing salts, or heavy traffic, specify air-entrained concrete and verify the air content on site.
- Set time vs. climate: In hot weather, ask about retarding admixtures to slow the set and give you more finishing time. In cold weather, consider accelerating admixtures or slightly higher cement content—but pair that with solid curing and temperature control.
- Slab thickness and reinforcement: Thin slabs and lightly reinforced sections are more susceptible to curling and shrinkage cracking. Low-shrinkage mixes and proper joint layout become more critical here.
Have a short, clear conversation with your ready-mix provider before each project: describe use, thickness, expected loads, and weather. A five-minute call often prevents hours of problems.
Expert Tip 2: Control Water—From Truck to Final Finish
Extra water is the fastest way to weaken concrete. The water-to-cement ratio (w/c) largely determines strength and durability. Every bucket of water added at the job site to “loosen it up” costs you compressive strength, surface durability, and increases shrinkage cracking.
Practical water-control habits:
- Pre-plan placement equipment: Use wheelbarrows, buggies, or a pump rather than relying on wet, highly flowable mixes just to move material easily.
- Train your crew on water discipline: Only a designated person should be allowed to authorize water added to the truck, and it should be measured and documented.
- Finish with as little bleed water as possible: Do not trowel bleed water back into the surface. Wait for bleed water to evaporate before floating or troweling.
- Be cautious with retempering: If the truck is delayed, retempering (adding water and remixing) can sometimes be done within strict limits and time frames—always follow your supplier’s guidance and local codes.
Better control of water during placement pays off directly in reduced cracking, stronger surfaces, and improved bond for coatings and sealers later.
Expert Tip 3: Treat Curing as a System—Time, Moisture, and Temperature
Effective curing is about managing three variables simultaneously: how long the concrete stays moist, how long it stays warm enough for hydration, and how fast each surface dries relative to the rest of the slab.
Core curing practices:
- Start curing as soon as finishing allows: For slabs, this often means immediately after final troweling or once the surface can be covered without damage. Don’t leave a fresh slab exposed during a long lunch break.
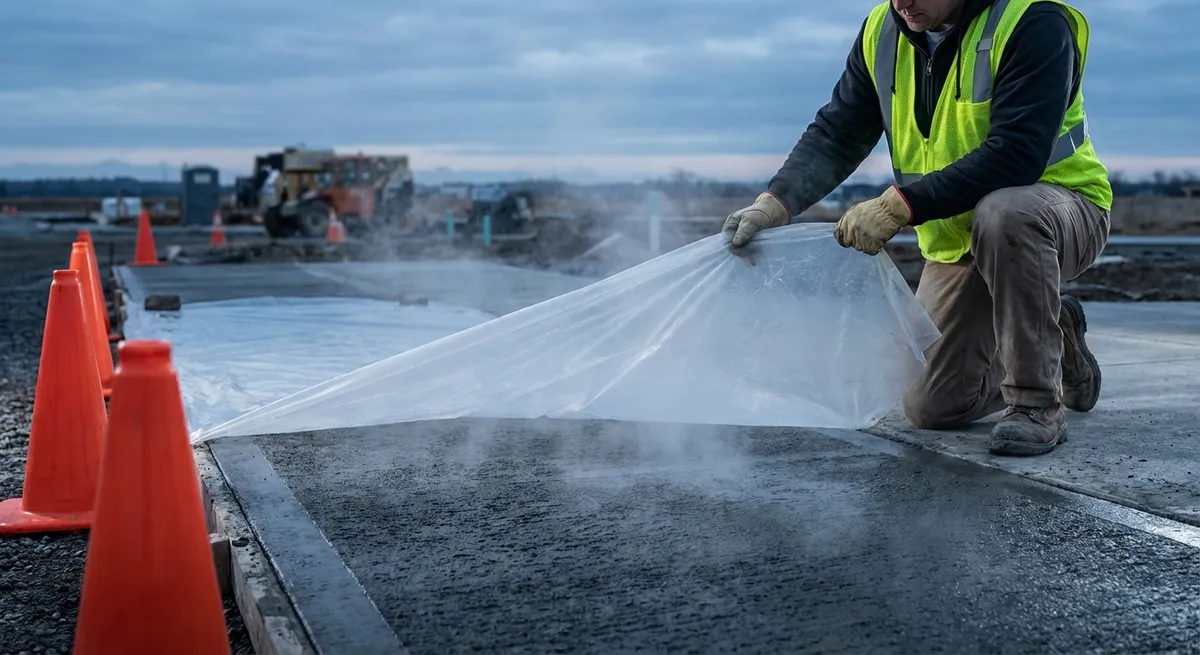
- Keep it moist: Options include water curing (wet burlap, soaker hoses, sprinklers), curing compounds (spray-on membrane-forming sealers), or impermeable coverings (polyethylene sheets). Choose based on access, climate, and whether you’ll apply later coatings.
- Monitor temperature: In cold weather, use insulated blankets or temporary enclosures with safe heaters to maintain adequate temperature. In hot conditions, avoid rapid surface drying with windbreaks, sunshades, or light fogging before curing materials are applied.
- Respect the curing window: Many codes and standards recommend a minimum of 7 days of curing for ordinary Portland cement concrete, longer for high-strength or large sections. Even if full protection isn’t practical for a full week, every additional day of proper curing significantly improves performance.
Don’t guess—use simple tools: inexpensive surface thermometers, hygrometers, and even basic data loggers can help confirm that your curing plan is actually working.
Expert Tip 4: Cut Joints Strategically, Not Randomly
Joints are not just lines in the slab; they are a controlled crack. Done correctly, they direct inevitable movement and shrinkage where you want it, instead of allowing random cracking.
Guidelines for effective jointing:
- Timing is critical: Saw-cut contraction joints as soon as the concrete is strong enough to prevent raveling but before random cracking begins. This may be within 4–12 hours of finishing, depending on temperature and mix. For some applications, early-entry saws can be used even sooner.
- Joint spacing: As a rule of thumb for slabs-on-grade, keep joint spacing in feet less than or equal to 2–3 times the slab thickness in inches. For example, a 4-inch slab should have joints no more than about 8–12 feet apart in both directions, adjusted for layout.
- Depth matters: Typical saw-cut joints should be at least one-quarter of slab thickness. Too shallow and they won’t effectively control cracking.
- Coordinate with rebar and load paths: Avoid placing joints directly over concentrated point loads (like column pads) or in locations that work against structural reinforcement. For structural concrete, follow engineering drawings and code requirements.
- Isolation and construction joints: Properly detail and install isolation joints around columns, footings, and walls to allow differential movement. For multi-day placements, use keyed construction joints or dowels where load transfer is needed.
Thoughtful joint design and execution reduce unsightly cracks, trip hazards, and long-term maintenance issues.
Expert Tip 5: Protect the Surface from Early Abuse and Long-Term Degradation
Even well-cured concrete can be ruined in the first few days by premature traffic or poor protection. For high-performance slabs (garages, workshops, patios, driveways), think beyond day one.
Surface protection practices:
- Limit early traffic: Keep vehicles and heavy equipment off the slab until it has reached adequate strength—often a minimum of several days for light traffic and 7+ days for heavier loads. Always confirm with your supplier and project specifications.
- Cover against staining and impact: During subsequent trades’ work, protect slabs with appropriate coverings (non-staining mats, plywood walkways) to prevent gouges, oil stains, or embedded debris that can interfere with sealers or coatings.
- Plan for sealing—when appropriate: Breathable sealers can improve resistance to water and de-icing salts, but timing and product selection matter. Many sealers should only be applied after the concrete has sufficiently cured and dried. Follow manufacturer and industry guidance, especially on moisture levels and surface prep.
- Manage de-icing salts: For exterior flatwork in cold climates, avoid de-icing salts on new concrete during the first winter if possible. Use sand for traction and ensure good drainage to minimize standing water that leads to freeze-thaw damage.
- Inspect and maintain: Schedule an early inspection (within the first 30–60 days) to identify shrinkage cracks, curling, or surface problems. Addressing minor issues early—like routing and sealing cracks—can prevent larger failures later.
Treat a new slab like a system that continues to change for weeks. Careful protection and early maintenance translate directly into longer life and fewer complaints.
Conclusion
Concrete work doesn’t end when the surface looks smooth. The real performance of your slab, footing, or wall is decided by the mix you choose, how you control water, when and how you cure it, and how you protect it in those critical early days. Professionals and serious DIY builders who plan curing like any other trade task consistently deliver stronger, more durable, and more predictable results.
If you approach each pour with a curing plan, disciplined water control, smart jointing, and early protection, your concrete will look better on day one—and still perform years down the line.
Sources
- [American Concrete Institute (ACI) – Guide to Curing Concrete (ACI 308.1R)](https://www.concrete.org/store/productdetail.aspx?ItemID=3081R14) - Industry-standard guidance on curing methods, timing, and best practices
- [Portland Cement Association – Concrete Slab Surface Defects: Causes, Prevention, Repair](https://www.cement.org/learn/materials-applications/concrete-materials/concrete-slab-surface-defects-causes-prevention-repair) - Detailed discussion of common slab issues related to curing, finishing, and mix design
- [U.S. Federal Highway Administration – Concrete Pavement Field Reference: Pre-Paving](https://www.fhwa.dot.gov/pavement/concrete/pubs/07027/07027.pdf) - Practical field recommendations on mix selection, placement, jointing, and curing for durable concrete pavements
- [National Ready Mixed Concrete Association – Curing In-Place Concrete](https://www.nrmca.org/concrete-technologies/concrete-in-practice-11-curing-in-place-concrete/) - Clear overview of curing options, why they matter, and common jobsite considerations
- [Concrete Construction Magazine – Jointing Practices for Slabs-on-Ground](https://www.concreteconstruction.net/how-to/repair/jointing-practices-for-slabs-on-ground_o) - Practical insights into timing, spacing, and detailing of control and construction joints