Understand What Your Mix Is Really Designed to Do
Every good concrete job starts with a mix that matches the work, not just whatever the yard has on the schedule that day.
For structural work, you’re typically targeting a specified compressive strength (for example, 3,000 or 4,000 psi at 28 days), but field performance also depends on aggregate size, slump, admixtures, and exposure conditions. For exterior slabs in freeze–thaw climates, air-entrained concrete is often nonnegotiable: it helps relieve internal pressure from ice formation and extends service life. Interior slabs may prioritize lower shrinkage and a tighter surface over freeze resistance.
If you’re ordering ready-mix, have your requirements written out: strength, air content, maximum water–cement ratio if specified, and slump range. On site, avoid “watering up” the load to make it easier to place—every unnecessary gallon of water increases the water–cement ratio, reducing strength and increasing shrinkage and dusting. Use plasticizers (water-reducing admixtures) instead of water when you need more workability, and clear any changes with the supplier or engineer of record.
For DIY bag mixes, read the technical data on the bag, not just the front label. Confirm whether the mix is intended for structural use, whether it’s compatible with reinforcing steel, and whether you need any special curing steps. Measuring water accurately with a marked bucket, and mixing consistently from batch to batch, will do more for performance than any tool upgrade.
Control Subgrade and Formwork Like They’re Part of the Structure
Concrete is only as good as what it rests on. Subgrade and forms don’t just “hold the shape”—they fundamentally influence cracking, settlement, and finish quality.
Start with a subgrade that’s stable, uniform, and well-compacted. Remove topsoil and organic material, then compact in thin lifts with a plate compactor or roller, especially for driveways, patios, and slabs that will see wheel loads. Soft spots, poorly compacted trenches, or mixed fill will translate directly into differential settlement and random cracks. Where specified, install a granular base layer (such as crushed stone) and compact it to the required density and thickness.
Formwork should be stiff enough not to bow, and anchored so it won’t shift under the pressure of fresh concrete or workers. Check form elevations with a laser or string line, and confirm fall for drainage—often 1/8" to 1/4" per foot away from structures, depending on local codes and intended use. Any mistake in slope will be locked in once the concrete cures.
Include isolation joints where slabs meet walls, columns, or other fixed structures, and plan contraction (control) joints before you place concrete—don’t rely on saw cuts as an afterthought. Thoughtful layout helps guide where the slab will crack, instead of letting it decide for you. Proper base prep and formwork feel “invisible” when done well—but they’re usually the reason jobs go smoothly.
Place and Consolidate Concrete to Minimize Hidden Weak Points
How the concrete moves from truck or mixer into the forms has a major impact on strength, voids, and long-term durability.
Avoid excessive handling. Pushing concrete long distances with shovels or rakes can cause segregation, where coarse aggregate separates from paste. Use chutes, buggies, or pumps to place closer to final position, and use come-alongs and rakes designed for concrete (not garden rakes) to move and roughly level the material.
Consolidation is where many jobs quietly fail. For structural elements like footings, walls, and heavily reinforced slabs, internal vibration helps eliminate entrapped air and honeycombing. Use a vibrator with an appropriate head size for the element and rebar spacing. Insert vertically and withdraw slowly, overlapping insertion points; over-vibration can cause segregation, so follow manufacturer guidance for duration and spacing.
For thinner slabs or DIY projects without vibrators, work systematically with a screed board and tamping where appropriate to help settle the concrete and remove large voids. Tapping forms with a hammer can help bring entrapped air to the surface along edges. The goal is consistent density—especially around rebar, corners, and penetrations—so the concrete performs uniformly under load and environmental stress.
Time Your Finishing with the Surface, Not the Clock
Professional finishers don’t finish on a schedule; they finish when the concrete is ready. Getting this timing wrong can lock in problems you’ll be stuck with for years.
Once placed and screeded, let bleed water rise and evaporate naturally. Do not trowel, broom, or apply curing compound while bleed water is still present; finishing into bleed water seals excess water under the surface, weakening the top layer and increasing the risk of scaling, dusting, and surface delamination. Wind, temperature, and humidity all affect how fast bleed water disappears, so watch the surface, not your watch.
Early finishing typically begins with bull floating to embed larger aggregate just below the surface and smooth out ridges. After bleed water is gone and the surface can support foot pressure with only slight indentation, use hand or power trowels if a steel-troweled finish is appropriate. For exterior, freeze–thaw exposed slabs, avoid an overly tight, glossy trowel finish; a moderately steel-troweled surface followed by a broom texture is often preferred for slip resistance and durability.
If conditions are hot, dry, or windy, evaporation may outpace bleed water. In those cases, use windbreaks, evaporation retarders, or light fogging to prevent plastic shrinkage cracking, but still wait for visible bleed water to dissipate before final finishing. The discipline to finish on the concrete’s schedule, instead of rushing to wrap up, is one of the clearest differences between average and long-lasting work.
Treat Curing and Protection as Your Final Structural Step
Curing is where concrete quietly gains most of its performance—and where many projects quietly give it away. Proper curing controls moisture loss and temperature so cement can fully hydrate and develop strength and durability.
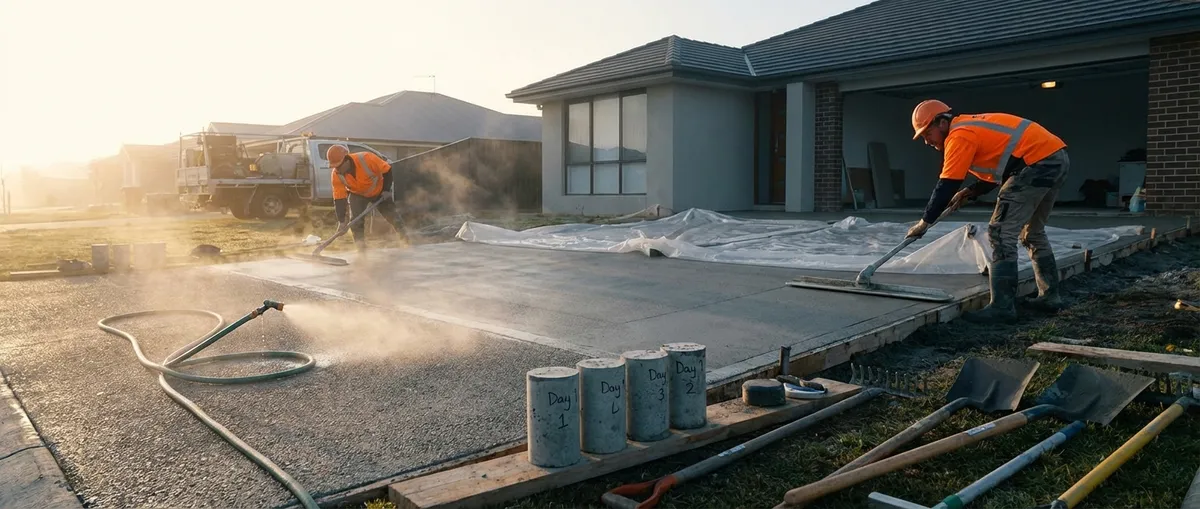
A common rule of thumb is to maintain adequate moisture and temperature for at least the first seven days for most standard mixes, and longer for high-strength or specialty concretes unless a shorter period is specifically designed and approved. Methods include continuous wet curing (soaker hoses, wet burlap, or ponding), curing compounds sprayed on the surface, or impervious coverings like plastic sheeting sealed at the edges. Each method has trade-offs in labor, appearance, and compatibility with future coatings.
Avoid exposing fresh concrete to early freeze, rapid drying, or heavy loads. In cold conditions, use insulating blankets or heated enclosures as required by local codes and specifications, keeping concrete above the minimum curing temperature to prevent early-age damage. In hot weather, consider sunshades, windbreaks, and scheduling pours for cooler times of day.
For slabs, delay saw-cutting control joints just long enough for the concrete to support the saw without raveling, but not so long that uncontrolled cracking starts. Many professionals use early-entry saws for tighter timing control. Treat curing and early protection as part of your structural work, not the cleanup phase—because that’s exactly what they are.
Conclusion
Concrete doesn’t succeed by accident. It performs when the mix matches the job, the base and forms are treated as structural components, placement and consolidation eliminate weak spots, finishing is timed to the material—not the clock—and curing is approached as a critical final step. Professionals and serious DIY builders who consistently apply these practices see fewer callbacks, fewer random cracks, and structures that actually meet their intended service life. For every pour—large or small—these five habits are a practical checklist that keeps concrete working the way it was designed.
Sources
- [Portland Cement Association – Concrete Basics](https://www.cement.org/cement-concrete/concrete-materials) - Overview of concrete materials, mix design fundamentals, and performance considerations
- [American Concrete Institute – ACI 302.1R Guide for Concrete Floor and Slab Construction](https://www.concrete.org/store/productdetail.aspx?ItemID=3021R21) - Industry guidance on slab prep, placement, finishing, and curing practices
- [U.S. Department of Transportation – Concrete Placement and Consolidation](https://www.fhwa.dot.gov/pavement/concrete/pubs/hif12010.pdf) - Technical discussion of placement, vibration, and consolidation techniques and their impact on quality
- [National Ready Mixed Concrete Association – Curing Concrete](https://www.nrmca.org/association-resources/cips-11-curing-in-place-concrete/) - Practical recommendations for curing methods, durations, and field conditions
- [Concrete Construction Magazine – Bleed Water and Finishing Timing](https://www.concreteconstruction.net/how-to/bleed-water-in-concrete_o) - Explanation of bleed water behavior and how it should guide finishing operations