Know Your Window: Working With Concrete, Not Against It
Finishing concrete is about timing more than tools. Right after placement, concrete is too wet to support a good finish—working it at this stage just brings excess water and paste to the top, leading to dusting, weak surfaces, and scaling. You want to wait until the bleed water (the shiny layer of water rising to the surface) has fully evaporated before starting serious finishing.
A simple field check: step lightly onto the slab—if your shoe sinks and fills with water, it’s too early; if it leaves a shallow imprint that doesn’t immediately fill with water, you’re close. Temperature, wind, mix design, and sun exposure all change this window, so don’t rely strictly on the clock. On hot, windy days, your window to edge, bull float, and trowel might compress into minutes. On cool, overcast days, it might stretch into an hour or more.
Plan labor and tools around this timing. Have screeds, bull floats, edgers, and backup trowels ready before the truck shows up. Assign someone to watch the surface, not just the delivery. Once the concrete reaches that “plastic, but firm” stage, you need to move with purpose and sequence: bull float, edge, joint, then final finish. Missing that window is a common reason even experienced crews end up with rough, uneven, or flaky surfaces.
Control Joints With Intention, Not Guesswork
Concrete will crack—your job is to choose where and how. Proper control joints don’t eliminate cracking, but they dramatically reduce random cracks that telegraph through coatings, trip people, or invite water into the slab. Many DIY slabs skip this step or guess at joint layout, which almost guarantees unpredictable cracking within the first year.
Before the pour, lay out your joints on paper and on the subgrade with spray paint or chalk. A practical rule of thumb for slabs-on-ground: keep joint spacing at about 24–36 times the slab thickness in inches (for a 4-inch slab, that’s roughly 8–12 feet), and aim for a roughly square layout where possible. Long, narrow panels are more prone to cracking in uncontrolled patterns.
You have two main options: tooled joints (made while the concrete is plastic) and saw-cut joints (cut after the surface has gained enough strength). Tooled joints are ideal for smaller pours and decorative edges; they’re formed using a grooving tool shortly after bull floating and edging. Saw-cut joints require you to come back with a saw as soon as the slab can support a saw and operator without ravelling—often within 4–12 hours, depending on conditions and mix.
Depth matters as much as spacing. A joint that’s too shallow won’t work; target at least one-quarter of the slab thickness. For a 4-inch slab, that means a minimum 1-inch saw cut. Mark joints on walls, control their alignment with door thresholds, and keep them straight; clean, intentional joint layouts make finished slabs look deliberate rather than patched together.
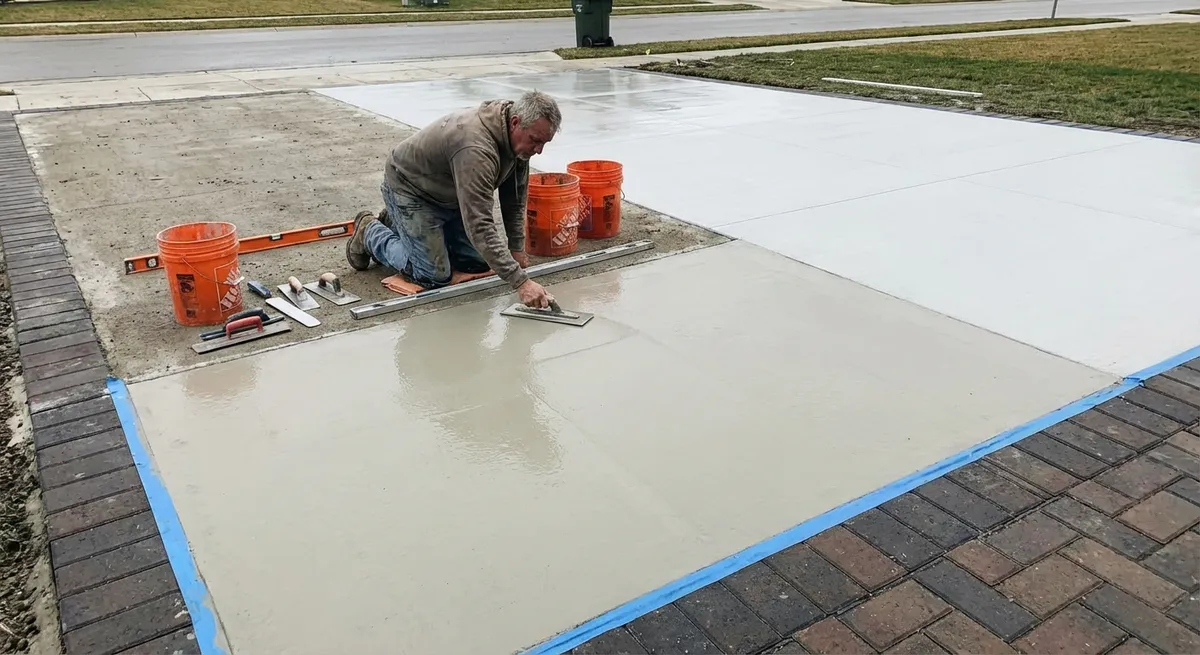
Finish With the Right Tool for the Surface’s Job
Not every slab should be mirror-smooth. The right finish depends on how the concrete will be used, cleaned, and walked on. Over-finishing is a common mistake, especially on exterior slabs, where slick surfaces can be dangerous when wet or icy. Match your finishing tools and techniques to the slab’s purpose from the start rather than deciding on the fly.
For garage floors, shop slabs, and interior surfaces that may receive coatings, a steel trowel finish is common. After bull floating and edging, allow the surface to firm up, then trowel in multiple passes, each at a slightly steeper angle than the last. Avoid troweling when the surface is still bleeding water; that traps moisture and weakens the top layer. On hot days, work in smaller sections and consider light misting nearby—not directly on the slab—to keep edges from setting too fast.
For exterior walks, patios, and driveways, a broom finish usually provides a safer, more durable surface. Once the slab has been bull floated, edged, and jointed, and the surface has set enough to hold a light texture without tearing, pull a broom across the slab in one direction—typically perpendicular to the direction of travel—to create consistent, fine ridges. Use a soft-bristle broom for a subtle texture or a stiffer broom for high-traction areas like ramps.
Decorative options, such as exposed aggregate or light stamped textures, demand even more attention to timing. Exposed aggregate requires washing or surface retarder at just the right set to avoid either washing too much paste and stone away or leaving the aggregate barely visible. Regardless of the finish type, consistency across the slab is key—change broom direction, trowel pattern, or texture only where it aligns with joints or defined transitions to avoid a patchy look.
Protect the Surface From Early Damage and Contamination
The first 24–72 hours after a pour are when most preventable damage happens. Footprints, tool marks, pet tracks, and early staining from leaves, mud, or spills all become long-term scars that are difficult to remove without grinding or resurfacing. Treat fresh concrete as a delicate surface, even after it can bear weight.
Limit access by roping off the area and posting simple, visible signs. Don’t rely on “everyone just knowing” to stay off; on a shared jobsite or in a neighborhood, curiosity and shortcuts are almost guaranteed. If vehicles must cross nearby, create temporary barriers or alternate routes before the pour. Keep wheelbarrows, ladders, and heavy tools off the slab until you’re certain it has the strength to support them.
Avoid placing plastic, plywood, or other flat objects directly on fresh concrete for extended periods. They can trap moisture and cause discoloration, soft spots, or uneven curing. If you must protect the surface from falling debris or overspray, use breathable coverings designed for concrete, and remove them as soon as practical.
Contamination from de-icing salts, fertilizers, and organic matter is another common issue, especially for driveways and entry slabs. The first winter is the most critical period: avoid using de-icing salts on new exterior concrete during that season, and keep vehicles treated with road salts from parking on new slabs whenever possible. Sweep leaves, soil, and mulch off concrete promptly to prevent tannin and organic staining that may require chemical cleaning later.
Cure Smart: Moisture Management for Long-Term Strength
Finishing is what you see; curing is what keeps it that way. Proper curing slows moisture loss so the concrete can gain strength and reduce surface defects like shrinkage cracks, scaling, and curling. Many slabs that look fine on day one deteriorate quickly simply because they were allowed to dry out too fast.
As soon as the surface is hard enough to walk on without leaving marks, start your curing plan. For small DIY projects, continuous water curing—keeping the surface damp with a soaker hose, light mist, or wet burlap—is highly effective, though more labor-intensive. Maintain uniform moisture for at least 7 days for typical mixes. Avoid aggressive spraying that erodes or pits the fresh surface; gentleness and consistency matter more than volume.
On larger or professional jobs, curing compounds are often used for practicality. These are sprayed uniformly on the finished surface to form a membrane that slows water loss. Follow the manufacturer’s coverage rate and ensure overlapping passes for even coverage; missed spots often show up later as lighter, weaker patches. Be aware that some curing compounds can interfere with later coatings, sealers, or overlays, so confirm compatibility in advance if you plan future treatments.
For exterior slabs in hot, dry, or windy conditions, consider a combination approach: initial water curing to control early moisture loss, followed by curing compound where appropriate. Protect curing concrete from sudden temperature swings, frost, or direct heat sources. The first week of curing has an outsized impact on the slab’s ultimate performance—treat it as part of the job, not an optional extra.
Conclusion
Clean, durable concrete isn’t just about mixing and pouring; it’s about deliberate control over timing, joints, finish, protection, and curing. By watching your work window instead of the clock, laying out joints with intention, matching finish tools to the slab’s use, guarding the surface from early damage, and managing moisture as the concrete gains strength, you stack the odds heavily in your favor. These habits don’t require exotic tools or oversized budgets—just planning, attention, and consistency that pay off in fewer callbacks, less maintenance, and concrete surfaces that actually perform the way they should.
Sources
- [Portland Cement Association – Concrete Finishing Techniques](https://www.cement.org/learn/concrete-technology/concrete-construction/concrete-finishing) - Overview of standard finishing tools, timing, and methods
- [American Concrete Institute (ACI) – Guide for Concrete Floor and Slab Construction (ACI 302.1R) Summary](https://www.concrete.org/store/productdetail.aspx?ItemID=3021R14) - Industry guidance on slab joints, finishing practices, and curing considerations
- [U.S. Department of Transportation – Concrete Pavement Joints](https://www.fhwa.dot.gov/pavement/concrete/pubs/hif12013/hif12013.pdf) - Detailed information on joint design, spacing, and performance in concrete slabs
- [Concrete Network – Concrete Curing Methods](https://www.concretenetwork.com/curing-concrete/) - Practical discussion of water curing, curing compounds, and environmental factors
- [NRMCA (National Ready Mixed Concrete Association) – Hot Weather Concreting](https://www.nrmca.org/concrete-technologies/hot-weather-concreting/) - Explains how temperature and weather affect setting, finishing windows, and curing practices