This guide focuses on five expert habits that professionals rely on every day and shows you exactly how to apply them in your own DIY projects.
Start with a Scope, Not Just an Idea
Professionals don’t start with tools in hand; they start with scope. A clear scope defines what you’re doing, what you’re not doing, and what “done” actually looks like.
Begin by writing a one-page project brief:
- Describe the project in one sentence. For example: “Build a 10' x 12' paver patio with a compacted gravel base and proper drainage away from the house.”
- List constraints. Budget, space limits, HOA rules, local codes, and time window (e.g., “must be done in two weekends”).
- Define performance targets. Not just appearance—things like “no pooling water,” “supports a full grill station,” or “rated for 40 psf snow load.”
- Break into phases. Example phases: demo, layout, foundation, structure, finishes, cleanup.
Then translate that scope into a basic material and task list:
- Materials list with quantities, specs, and acceptable substitutes.
- Task list in order, with dependencies (e.g., “inspection before closing walls,” “concrete fully cured before heavy loads”).
This small amount of “paper work” gives you a reference when you’re tired, frustrated, or tempted to cut corners midway through the job. It’s how pros stay aligned with the original intent even when the work gets messy.
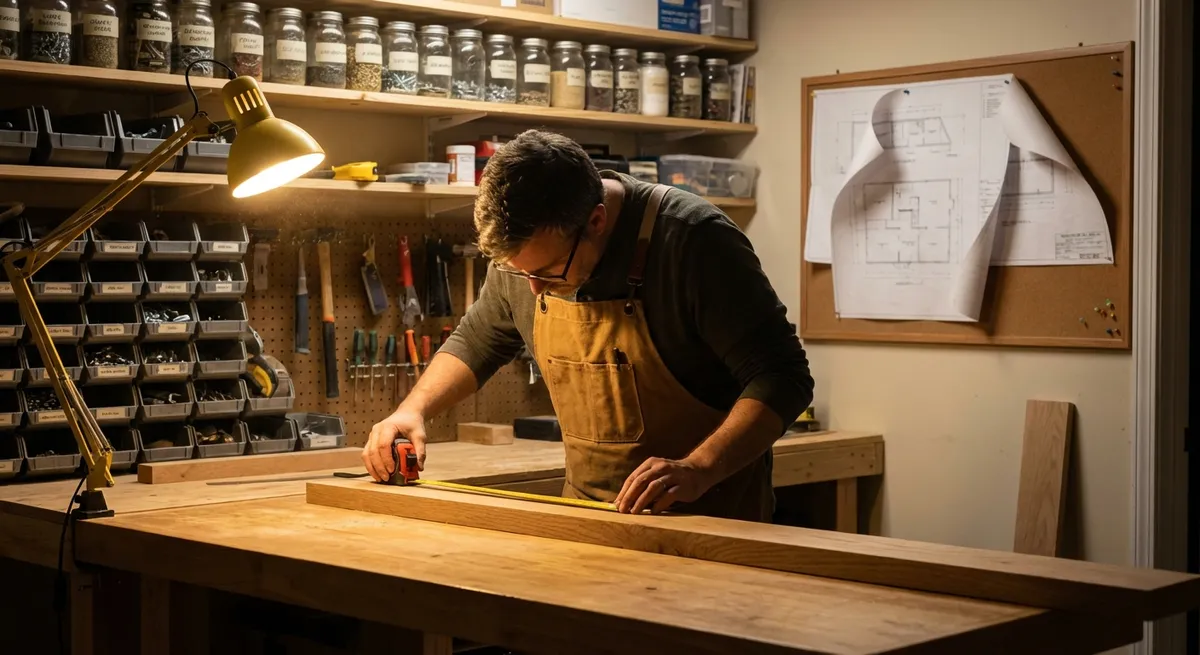
Measure and Mark Like the Jobsite Depends on It
Professionals obsess over layout because it’s where accuracy is cheapest. Fixing layout mistakes after concrete is poured or walls are closed is where budgets explode.
Adopt jobsite-grade layout habits:
- Use consistent reference lines. Establish a “control line” (often along a straight exterior wall or property line). Measure everything from that line, not from random points.
- Snap chalk lines instead of “eyeballing.” For decks, walls, tile, and pavers, snap primary lines and confirm them with diagonals to verify square. If the two diagonal measurements match, your rectangle is square.
- Cross-check units. Use both feet/inches and decimal feet or millimeters where helpful. Mark your tape with painter’s tape notes on key dimensions if repeating cuts.
- Mock up critical locations. Before drilling anchors or cutting openings, tape or temporarily tack materials in place and stand back. Check door swings, clearance around appliances, step heights, and overhangs.
When marking cuts:
- Use a sharp pencil or fine-tip marker and a square—fat, sloppy lines add up.
- Mark the waste side of the cut with an “X” and cut along the line so the finished piece stays at full dimension.
- For repetitive cuts, make a stop block instead of re-measuring every board; pros rely on jigs and stops to keep accuracy and speed.
These habits cost minutes at the start but often save hours correcting misaligned work later.
Treat Structure and Substrate as Non-Negotiable
Pros know that what you can’t see after the finish goes in is what usually fails first. In residential projects, that means framing, substrates, and sub-bases. As a DIYer, you should treat these layers as “no-compromise” zones.
Apply pro-level discipline to what’s under the surface:
- For concrete and pavers:
- Excavate to the proper depth for base, sand, and finished height.
- Compact in thin lifts (2–4 inches at a time) with a plate compactor or hand tamper, not just foot-stomping.
- Maintain slope (typically 1/4" per foot away from structures) using string lines and a level.
- For framing and carpentry:
- Check lumber for crown (the natural curve) and install with crowns consistently oriented (typically up on joists).
- Confirm plumb, level, and square on every critical member (king studs, headers, posts, beams).
- Use connection hardware (hangers, straps, structural screws) that matches or exceeds code requirements for the load.
- For tile, flooring, and finishes:
- Verify substrate flatness against manufacturer tolerances, not just your eyeball.
- Use underlayments (cement board, uncoupling membranes, or self-leveling compounds) where specified by the product’s installation guide.
- Isolate dissimilar materials (e.g., tile meeting wood) with appropriate transitions and movement joints.
If you only have the time, money, or energy to do one thing “perfect,” let it be the substrate or structure. Finishes are far more forgiving than the layers that support them.
Use Materials the Way They Were Engineered
Professionals don’t rely on guesswork with modern materials. They lean heavily on manufacturer instructions and data sheets—because those documents are essentially the “recipe” for performance and warranty coverage.
Bring that same discipline into your DIY work:
- Always read the technical data sheet (TDS) and installation guide, not just the label. Look for:
- Mix ratios and working time
- Temperature and humidity limits
- Compatible primers, adhesives, or fasteners
- Cure times before loading, tiling, painting, or backfilling
- Match products to their environment:
- Exterior vs. interior ratings
- Freeze-thaw resistance for concrete or mortars in cold climates
- Corrosion-resistant hardware for coastal or treated-lumber applications
- Moisture-resistant materials in bathrooms, basements, and slabs-on-grade
- Avoid “franken-spec” combinations. Don’t mix brands or systems unless the manufacturers state they’re compatible (e.g., waterproofing membranes, tile mortars, and grouts). In building science, small chemistry mismatches can cause big adhesion or moisture problems.
When in doubt, use the manufacturer’s tech support line or email. Pros do this constantly. You’ll often get practical clarifications that never make it onto the front of the packaging.
Build in Inspection Points and Simple Quality Checks
On professional jobs, work is inspected multiple times: by crew leads, superintendents, and often building inspectors. That layered checking is a big part of why permanent work holds up. As a DIYer, deliberately create your own inspection checkpoints.
Before starting, define when you’ll stop and verify:
- Pre-cover inspections
- Before pouring concrete: recheck form dimensions, slopes, reinforcement placement, and clearances from soil or forms.
- Before closing walls: photograph and label wiring, plumbing, blocking, and insulation. Confirm fastener patterns and vapor barrier continuity.
- Benchmark checks
- After the first few boards of decking or rows of tile/pavers, stop and check spacing, alignment, and pattern. Adjust now, not 30 rows later.
- After framing a wall, check diagonals corner-to-corner and adjust for square before sheathing.
- Functional tests
- Doors and windows: open/close, latch smoothly, and verify even gaps.
- Drains: do a controlled water test to check for pooling.
- Stairs: confirm consistent riser and tread dimensions meet local code guidance.
Finally, walk the project as if you didn’t build it:
- Look for proud fasteners, sharp edges, trip hazards, and areas that might collect water.
- Think through maintenance: can you access shutoff valves, cleanouts, or junction boxes?
- Ask, “If I were buying this house, would this detail make me question what’s behind it?”
That final round of self-critique emulates the way seasoned pros and inspectors scrutinize finished work—and it’s where good projects become great ones.
Conclusion
Professional builders don’t have a secret stash of tricks reserved for big jobs; they rely on disciplined habits that anyone can adopt:
- Start with a clear, written scope.
- Lay out and measure with repeatable accuracy.
- Treat structure and substrate as sacred.
- Use materials exactly as engineered.
- Build in inspection and quality checkpoints.
When these habits guide your next DIY project, you’ll find that fewer things “go wrong,” timelines feel more predictable, and the finished work looks and performs closer to professional standards. The tools in your hand matter—but the habits behind them matter more.
Sources
- [U.S. Department of Housing and Urban Development – Residential Rehabilitation Inspection Guide](https://www.hud.gov/program_offices/comm_planning/affordablehousing/training/web/content/rrr) - Practical inspection and quality checkpoints for common residential work
- [International Code Council – International Residential Code (IRC) Overview](https://www.iccsafe.org/codes-tech-support/codes/2021-i-codes/irc/) - Defines structural, safety, and performance requirements that inform pro practice
- [Portland Cement Association – Concrete Basics](https://www.cement.org/learn/concrete-technology/concrete-construction/concrete-basics) - Covers subgrade preparation, mix handling, and curing fundamentals
- [Schluter Systems – Installation Handbooks](https://www.schluter.com/schluter-us/en_US/technical-center/installation-handbooks) - Real-world examples of how modern building products depend on following manufacturer instructions
- [OSHA – Construction Industry Safety & Health Topics](https://www.osha.gov/construction) - Authoritative guidance on safe practices and jobsite habits relevant to DIY and professional projects alike