This guide breaks down five expert-level planning habits that construction professionals rely on and shows exactly how to apply them to your own DIY projects.
Start With the End in Mind: Define Performance, Not Just Appearance
Before you buy a single 2x4 or bag of mix, define what “success” looks like in terms of performance, not looks.
Ask and write down:
- What loads will this support? (People, storage, vehicles, wind, snow, moisture, temperature changes.)
- How long does this need to last before major maintenance? (5, 10, 20+ years.)
- What environment will it live in? (Interior/dry, exterior/wet, freeze-thaw, coastal, high UV.)
- What’s the failure you absolutely cannot accept? (Water leaks, wobble, sag, rot, cracking, rust.)
Turn those answers into specific requirements. For example:
- A deck stair: “No noticeable bounce, safe under 300 lb concentrated load, slip-resistant when wet, tolerates de-icing salts.”
- A shop workbench: “Supports 400 lb in the center without visible sag, top replaceable without rebuilding frame, resistant to spilled oils and solvents.”
Then match materials and methods to those requirements:
- For moisture or ground contact, choose pressure-treated or rot-resistant species and corrosion-resistant fasteners rated for contact with treated lumber.
- For high loads, check basic span tables or manufacturer data for lumber, engineered wood, or concrete thickness/ reinforcement rather than guessing.
- For outdoor assemblies, plan for drainage paths, gaps for expansion, and UV-resistant finishes rather than relying on interior-grade paints or sealers.
By defining the job your project actually has to do, you avoid underbuilding, overbuilding, or choosing materials that fail early even if they look good at first.
Break the Project Into Systems, Not Steps
Professionals don’t just see a “shed” or “patio”—they see a collection of systems that each need to work correctly:
- Structure (load path, connections, bracing)
- Weather/ moisture control (drainage, flashing, vapor control)
- Thermal performance (insulation, air sealing, thermal breaks)
- Durability (rot, corrosion, UV resistance, wear surfaces)
- Serviceability (access to wiring, plumbing, fasteners, replacement parts)
Use this “systems” view to plan even small DIY builds:
- Structure first.
- Draw a simple load path: where does weight start, and where does it end up (studs → plate → joists → beam → posts → footing → soil)?
- Eliminate unsupported spans and weak connections in that path. Strength comes from continuity.
- Moisture management next.
- Decide how bulk water is kept out (slope, flashing, overhangs) and how incidental water gets out (drainage gaps, weep paths, breathable assemblies).
- Never trap water: if you add a membrane, flashing, or sealant, ask “Where does water go if this fails?”
- Then comfort and performance.
- For interior or conditioned spaces, decide how you’ll insulate, where your air barrier is, and how penetrations (outlets, pipes, fixtures) will be sealed.
- Finally, finishes and access.
- Plan removable panels or access points for anything you might need to service: shutoff valves, junction boxes, fastener locations, anchor points.
On paper, draw a simple side-view section and label each system. This 15–20 minutes of planning will expose most of the problems (missing blocking, no drainage slope, uninsulated cavities) before you spend money or time on the wrong approach.
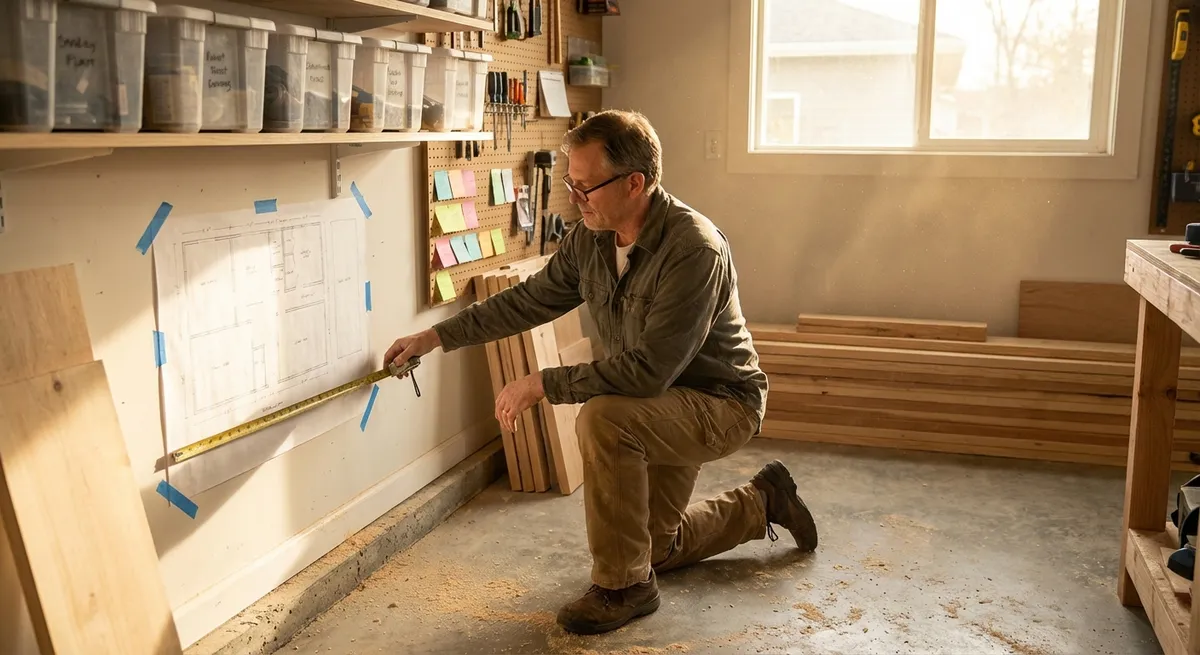
Use Pro-Grade Measurement and Layout Habits
Most rework comes from preventable layout errors. Professionals rely on a small set of disciplined routines—adopt them, and your accuracy jumps immediately.
Work from a single baseline
- Establish one reference line (chalk line or snapped line on the floor/ slab) and one reference elevation (a benchmark mark on a wall or stake).
- Measure all other distances, centers, and heights from these references, not from random edges which may be out of square or out of level.
Guarantee square, don’t eyeball it
- Use the 3-4-5 method or larger multiples (6-8-10, 9-12-15) to set true 90° corners:
- Measure 3' on one line, 4' on the other, adjust until the diagonal is exactly 5'.
- On longer runs, cross-check diagonals: if both diagonals of a rectangle match, it’s square.
Account for material realities
- Include real-world dimensions in your layout, not nominal ones:
- 2x4 is usually 1½" × 3½", not 2" × 4".
- ¾" plywood is often ~23/32".
- Pre-draw stud layouts, joist spacing, and panel breaks so that:
- Sheet edges land on framing centers, not in mid-air.
- Layout lines (e.g., 16" on center) are transferred before framing, not guessed later.
Mark clearly and consistently
- Use distinct marks for cut lines vs. center lines. For example:
- “X” on the waste side of the cut.
- A small “C” for centers, “B” for blocking.
- Keep a written legend in your notebook for complex layouts to avoid confusion later.
Treat layout as a separate work phase, not a casual step while cutting. The more decisions you “lock in” on paper and on your work surface, the faster and cleaner the actual build will go.
Choose Fasteners and Connectors as Carefully as Lumber
Many otherwise solid projects fail at the connections. Pros treat fasteners, anchors, and connectors as structural components, not an afterthought.
Match fasteners to environment and material
- Moist or exterior environments:
- Use hot-dip galvanized or stainless fasteners and connectors, especially with pressure-treated lumber.
- Check that screws or nails are rated for ACQ/CA-treated wood to avoid corrosion.
- Masonry or concrete:
- Use anchors explicitly listed for your base material (solid concrete vs. hollow block vs. brick).
- Follow specified embedment depths and hole diameters; “almost there” is not good enough structurally.
Use structural-rated where it matters
- For load-bearing connections (deck ledger, stair stringer hangers, beams, rail posts):
- Use tested structural screws or bolts, not generic wood screws or drywall fasteners.
- Follow manufacturer spacing and edge distance guidelines—over-tight clustering of fasteners can weaken members.
Pre-plan your fastening pattern
- Sketch joint details before building:
- How many fasteners per joint?
- What edge distances and offsets from ends to avoid splitting?
- Where can you add concealed blocking to move fasteners away from weak edges?
- Consider disassembly:
- In areas you may need to open for maintenance, prefer screws over nails and leave a logical screw pattern so future you can find and remove them without destroying finishes.
By treating fasteners and connectors with the same respect you give your framing material, you greatly reduce the risk of wobbly structures, pull-outs, and early component failure.
Schedule the Build Like a Small Jobsite
One of the biggest differences between a professional and a frustrated DIYer is sequencing. Pros think in terms of tasks that depend on each other, dry times, and inspections. You can do the same—even for small projects.
Write a task sequence, not just a to-do list
For any project, divide into:
Prep and protection
- Clear the area, protect adjacent surfaces (poly sheeting, drop cloths, cardboard). - Set up lighting, power access, and a safe path for materials.
Structural and hidden work
- Demolition or removal. - Framing, rough mechanicals (if any), blocking, backing. - Layout checks, squareness, and fastening of concealed elements.
Weather/ moisture/ enclosure layers
- Underlayments, membranes, flashing, wraps, sealants. - Closure of cavities that won’t be accessible later.
Finishes and hardware
- Trims, claddings, coatings, sealants that remain visible. - Adjustable components (hinges, latches, leveling feet).
Punch list and cleanup
- Tighten fasteners, fix small defects, clean edges, label any hidden panels or access points.
Plan for cure and dry times
- Note products that require curing: concrete, mortar, adhesives, caulks, paints, sealers.
- Sequence work so you can move to another task while something cures instead of rushing it:
- Pour footings on Friday evening → form/ strip and start framing on Saturday afternoon or Sunday, per strength gain guidance.
- Apply first coat of finish early, then hardware install while it dries.
Build in QC checkpoints
At 2–3 key stages, stop and inspect against your own written criteria:
- After framing and before sheathing:
- Check level, plumb, square, and all critical dimensions.
- After moisture/ weather layers:
- Confirm all laps, slopes, and transitions direct water out, not in.
- Before finishes:
- Confirm solid backing where needed, fastener heads set properly, sharp edges removed, and gaps sized for caulk or trim.
Treat scheduling as deliberate risk management. The goal isn’t to work faster at any cost; it’s to put each task in the best possible order so your project comes together predictably and doesn’t need to be torn apart later.
Conclusion
Durable, professional-quality DIY work is less about owning the most expensive tools and more about thinking like a builder before you cut the first board. Define performance up front so you’re building to a clear standard. Break your project into systems so structure, moisture, and durability are each addressed deliberately. Use disciplined layout habits to avoid hidden mistakes. Select fasteners and connectors as carefully as your framing. Finally, run your project like a small jobsite, with smart sequencing and built-in checkpoints.
Adopt these planning tactics, and you’ll notice two changes right away: your projects will feel more solid and last longer—and you’ll spend far less time fixing what shouldn’t have failed in the first place.
Sources
- [U.S. Department of Energy – Building Science & Moisture Control](https://www.energy.gov/energysaver/weatherize/air-sealing-your-home) - Guidance on air sealing and moisture-related durability considerations that apply to many DIY building projects
- [American Wood Council – Span Tables and Design Resources](https://awc.org/codes-standards/publications/ span-tables) - Technical references for sizing and loading of common wood framing members
- [Simpson Strong-Tie – Fastening Systems & Connectors](https://www.strongtie.com/resources) - Manufacturer guidance on structural fasteners, connectors, and proper installation for wood and concrete
- [Portland Cement Association – Concrete Basics](https://www.cement.org/cement-concrete/applications/concrete-basics) - Practical information on concrete behavior, curing, and performance relevant to DIY slabs and footings
- [International Code Council (ICC) – Building Safety Resources](https://www.iccsafe.org/building-safety-journal) - Articles and resources on structural safety, load paths, and code-related best practices for residential construction